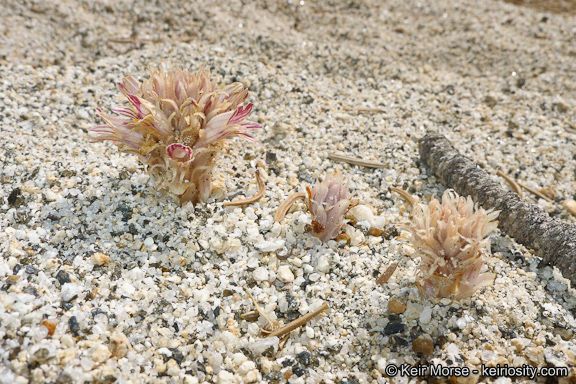
Oh, friends, gathering around the garden table for a chat about plant babies always brings a smile to my face! Today, we’re diving into the somewhat unique world of Orobanche parishii, also known as Parish’s broomrape. While not as common a houseplant as your typical succulent or pothos, there’s a certain allure to this fascinating plant. Its delicate, often vibrant, flower spikes can bring a splash of unexpected color to arid landscapes or even a specialized rock garden. Propagating it is a bit of a journey, I’ll admit, and perhaps not the easiest plant for a complete beginner, but the reward of seeing a new one take hold is truly special.
The Best Time to Start
Timing is everything in gardening, as you know! For Orobanche parishii, the sweet spot for propagation is generally late spring to early summer. This is when the parent plant is actively growing and has the most energy to invest in new shoots. You’re looking for new growth that’s firm but not yet woody.
Supplies You’ll Need
Gathering your tools beforehand makes the process so much smoother. Here’s what I’ve found helpful:
- Sharp, sterile pruning shears or a clean knife: For making clean cuts.
- Potting mix: A well-draining mix is crucial. I often use a blend of 50% perlite and 50% peat moss, or a commercial cactus and succulent mix.
- Small pots or seedling trays: With drainage holes, of course!
- Bottom heat mat (optional but recommended): This keeps the soil temperature consistently warm, which is a big help.
- Rooting hormone powder (optional): This can give your cuttings a little boost.
- Plastic bag or humidity dome: To create a mini-greenhouse effect.
- Watering can with a fine rose: For gentle watering.
Propagation Methods
Now for the hands-on part! While Orobanche parishii is technically a parasitic plant (which adds another layer of complexity we won’t get into here for propagation), we’re going to focus on propagating from its own tissue. The most reliable method I’ve found is through stem cuttings.
- Take Your Cuttings: Using your sharp, sterile shears, carefully select a healthy stem from the parent plant that is about 3-5 inches long. Look for a piece that has a few sets of leaves or nodes. Make a clean cut just below a leaf node.
- Prepare the Cuttings: Gently remove any lower leaves that would be below the soil line. This helps prevent rot. If you’re using rooting hormone, dip the cut end into the powder, tapping off any excess.
- Plant Your Cuttings: Fill your small pots with the well-draining potting mix. Make a little hole in the center with your finger or a pencil. Insert the cut end of your stem cutting into the hole, ensuring that at least one leaf node is buried under the soil. Gently firm the soil around the cutting.
- Provide Humidity: Water the soil lightly. Then, cover the pot with a plastic bag, securing it with a rubber band, or place it under a humidity dome. This is vital for keeping the cuttings from drying out before they can root.
- Place in a Bright Spot: Position the pots in a location that receives bright, indirect light. Avoid direct sunlight, which can scorch the delicate cuttings. If you’re using a bottom heat mat, set it to a gentle warmth, around 70-75°F (21-24°C).
The “Secret Sauce” (Pro Tips)
Over the years, I’ve learned a few little tricks that can make a big difference.
- Don’t Overwater! This is probably the most common mistake. The soil should be kept consistently moist, not soggy. Root rot is the enemy of new cuttings, and an overly wet environment is its best friend.
- Air it Out: Even though you want humidity, it’s a good idea to remove the plastic bag or dome for about 15-30 minutes each day. This allows for air circulation and helps prevent fungal diseases.
- Patience is a Virtue: Orobanche parishii can be a bit slow to root. Don’t be discouraged if you don’t see significant growth for several weeks. Keep an eye out for resistance when you gently tug on the cutting – that’s a good sign new roots are forming.
Aftercare & Troubleshooting
Once you see signs of new growth – perhaps a tiny new leaf unfurling – that’s your cue that rooting has been successful! At this point, you can gradually reduce the humidity by slowly introducing more air to the environment. Continue to keep the soil moist and in bright, indirect light.
The biggest challenge you might face is rot. If your cutting turns mushy and black at the base, it’s likely succumbed to rot. This usually means it was too wet or didn’t have enough air circulation. Unfortunately, there’s not much you can do once this happens, so learning from it and trying again with better conditions is the best approach. Another sign of trouble is wilting that doesn’t perk up after watering, which can also indicate rot or a cutting that simply didn’t take.
A Encouraging Closing
Propagating any plant is a little act of faith, isn’t it? Seeing a new piece of life emerge from a cutting is such a rewarding experience. With a bit of care and these tips, I’m confident you can have success with Orobanche parishii. Be patient, observe your cuttings closely, and most importantly, enjoy the journey of growing! Happy gardening!
Resource:
https://identify.plantnet.org/k-world-flora/species/Orobanche%20parishii%20(Jeps.)%20Heckard/data