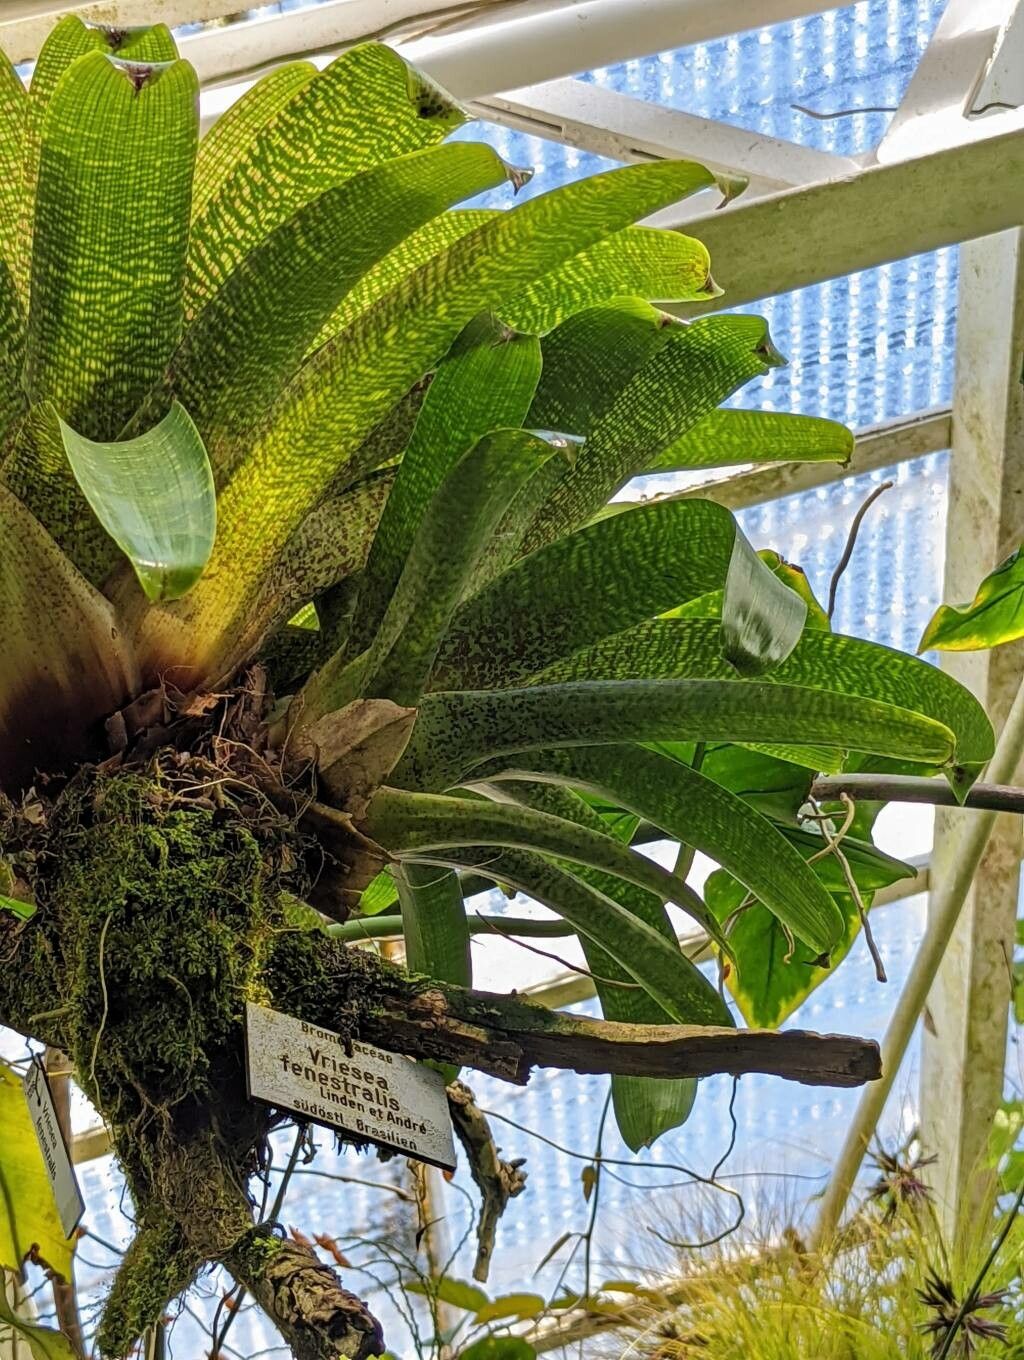
Ah, the Vriesea fenestralis! This bromeliad is a real stunner with its striking, patterned leaves. It’s the kind of plant that draws your eye in any room, and honestly, it’s a joy to have around. If you’ve fallen in love with yours and are thinking of adding more to your collection, or even sharing a piece with a fellow plant enthusiast, propagating it is a fantastic idea. It’s a wonderfully rewarding process, watching a tiny bit of your existing beauty grow into a new life.
Now, before we dive in, let’s talk about how challenging this is. For Vriesea fenestralis, I’d say it’s a moderately easy plant to propagate. You’ll need a little patience and attention to detail, but with these steps, you’ll be well on your way.
The Best Time to Start
The absolute best time to propagate your Vriesea fenestralis is when it’s actively growing, which is typically during the spring and summer months. You’ll often see new pups (baby plants) emerging from the base of the mother plant during this warmer, brighter period. That’s your cue! Trying to propagate outside of this active growth phase is much less likely to be successful.
Supplies You’ll Need
Gathering your supplies ahead of time makes the whole process smoother. Here’s what you’ll want:
- Sharp, clean pruning shears or a sharp knife: Sterilize them with rubbing alcohol to prevent disease.
- A good quality potting mix: I find a blend that’s well-draining is key. A mix of peat moss, perlite, and a bit of orchid bark works wonders. You can also find specific bromeliad mixes.
- Small pots or containers: Whatever you use, make sure they have drainage holes.
- Rooting hormone (optional but recommended): This can give your cutting a good head start.
- A spray bottle: For misting.
- Small, clear plastic bag or a propagator (optional): To create a humid environment for your new cuttings.
- Gloves (if you prefer): Bromeliads can have slightly prickly edges.
Propagation Methods
For Vriesea fenestralis, the most reliable method is division of pups.
Here’s how to do it:
- Inspect your mother plant: Look for healthy, established pups growing from the base. A pup is usually considered ready for division when it’s about one-third the size of the mother plant and has its own developed root system. You’ll usually see them peeking out from under the leaves.
- Gently remove the pup: If the pup is relatively small and still attached snugly, you might need to gently wiggle it. For larger pups, you will likely need to carefully cut the pup away from the mother plant using your sterilized shears or knife. Try to get a bit of the mother plant’s base and any existing roots with the pup.
- Allow the cut to callus: This is a crucial step! Before planting, let the cut end of the pup sit in a dry, well-ventilated spot for 24-48 hours. This allows the cut to dry out and form a protective scab, which helps prevent rot when it’s planted.
- Potting the pup: Fill your small pot with your prepared, well-draining potting mix. Make a small hole in the center and gently place the callused end of the pup into the soil. Firm the soil gently around the base, ensuring the pup is stable. Don’t bury it too deep; the base of the leaves should be right at the soil line.
- Watering and initial care: Water the soil lightly. You don’t want it soggy, just moist. You can then place the pot in a plastic bag or a propagator to maintain high humidity, which is essential for new root development.
The “Secret Sauce” (Pro Tips)
Here are a couple of things I’ve learned over the years that can really boost your success with Vrieseas:
- Don’t let those tiny leaves ‘drink’ from the water: When you’re propagating other types of plants in water, encouraging roots to grow into the water is common. However, for bromeliads like Vriesea fenestralis, it’s best to let them develop roots in slightly moist soil. If you do choose to water propagate (which I generally don’t recommend for fenestralis pups), make sure the water level is only touching the very base of the stem, not the leaves. Standing water can easily lead to rot in the leaf axils.
- Bottom heat is your friend: If you can, place your potted pups on a heat mat designed for plants, or in a warm spot that consistently stays around 70-75°F (21-24°C). This gentle warmth encourages root formation much more effectively than just ambient room temperature.
Aftercare & Troubleshooting
Once your pup is potted and settled, keep it in bright, indirect light. Avoid direct sun, which can scorch its delicate leaves. Continue to mist the air around the plant occasionally, but be careful not to waterlog the soil. You’ll know your pup is taking root when you start to see new leaf growth emerging from the center after a few weeks to a couple of months.
Now, what if things go wrong? The most common issue you’ll encounter is rot. If the pup starts to turn mushy or develop dark, soft spots, it’s likely due to too much moisture and not enough aeration. If you catch it early, you might be able to trim away the rotted parts with a clean knife and repot in fresh, dry soil in a warmer spot. If the entire pup has gone soft, it’s unfortunately a sign it didn’t make it. Don’t get discouraged; many gardeners have had failures!
A Encouraging Closing
Propagating plants is an act of faith and patience. You’re giving life to something new, and it’s a beautiful journey. Be patient with your Vriesea fenestralis pups; some take their sweet time. Enjoy the process, learn from each attempt, and before you know it, you’ll have a little forest of your beloved fenestralis. Happy propagating!
Resource:
https://identify.plantnet.org/k-world-flora/species/Vriesea%20fenestralis%20Linden%20&%20André/data