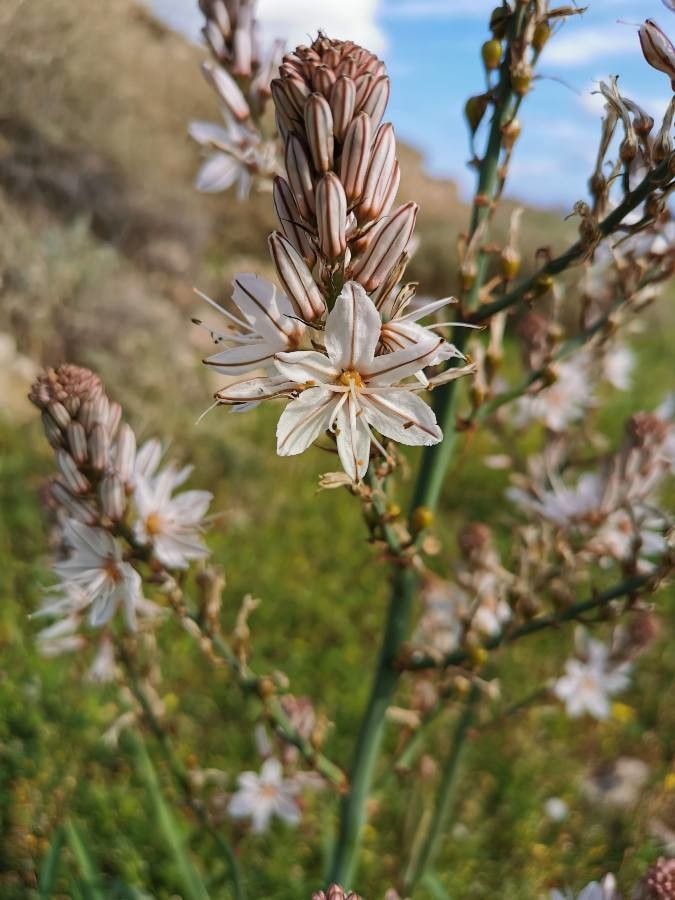
Hey there, fellow plant lovers! It’s so lovely to have you join me today. We’re going to dive into the world of Asphodelus ramosus, also known as the branched asphodel. If you’ve ever seen this striking beauty gracing a garden, you know what I mean. Its architectural spikes of starry white flowers are simply breathtaking, especially against a Mediterranean-inspired landscape or even just adding a touch of wild elegance to a more manicured space.
Now, you might be wondering if this plant is a good candidate for us to try and multiply. I’m happy to report that Asphodelus ramosus is, for the most part, a rewarding plant to propagate. While it might not be the absolute easiest for a complete beginner’s first go, with a little care and attention, you’ll absolutely be successful. It feels so special to nurture a new life from an existing plant, doesn’t it?
The Best Time to Start
The absolute sweet spot for propagating Asphodelus ramosus is late spring to early summer. This is when the plant is in its active growth phase, and the young shoots are firm enough to handle but still have plenty of energy to expend on rooting. You’ll want to look for flowering stems or new, non-flowering basal shoots. Trying to do this when the plant is dormant, or in the middle of a heatwave, will make things much tougher.
Supplies You’ll Need
Gathering your tools beforehand makes the whole process much smoother. Here’s what I usually have on hand:
- Sharp, clean pruning shears or a sharp knife: For making clean cuts.
- Rooting hormone powder (optional but helpful): Especially for stem cuttings.
- Well-draining potting mix: A good blend of perlite, coarse sand, and peat moss is ideal. You can also use a commercial cactus or succulent mix.
- Small pots or seed trays: With drainage holes, of course!
- Watering can or spray bottle: For gentle watering.
- Labels and a marker: To keep track of what you’ve propagated.
- A trowel or small shovel: For division.
Propagation Methods
Now for the exciting part – getting our hands dirty (metaphorically, for now!). There are a couple of ways we can coax new plants from our Asphodelus ramosus.
1. Stem Cuttings
This is a fantastic method to try, especially with those flower stalks.
- Select a healthy stem: Look for a stem that has finished flowering or is about to. It should be firm and not woody.
- Make the cut: Using your clean shears, make a cut just below a leaf node (where a leaf attaches to the stem). Aim for cuttings that are about 4-6 inches long.
- Prepare the cutting: Gently remove any lower leaves. You want a clean stem to work with.
- Apply rooting hormone (optional): Dip the cut end into rooting hormone powder, tapping off any excess.
- Plant the cutting: Insert the cut end about 1-2 inches deep into your prepared well-draining potting mix. You can plant several cuttings in one pot, giving them a little space.
- Water gently: Water the soil lightly. You want it moist, not soggy.
- Provide warmth and light: Place the pot in a warm spot with bright, indirect light.
2. Division
Asphodelus ramosus forms clumps over time, and dividing these is probably the easiest and most successful method.
- Choose your timing: The best time is either early spring as new growth emerges or early autumn after the main flowering season has passed.
- Gently unearth the plant: Carefully dig around the base of the plant with your trowel or shovel, loosening the soil. Lift the entire clump out of the ground.
- Separate the divisions: You’ll see clumps of thick roots and crowns. Gently pull them apart with your hands. If they’re stubborn, you might need to use a clean knife to cut through the root ball. Ensure each division has at least one healthy root and a viable crown (where new shoots emerge).
- Replant immediately: Prepare new planting holes in your garden or in pots with fresh, well-draining soil. Replant the divisions at the same depth they were growing.
- Water well: Give the newly planted divisions a good watering.
The “Secret Sauce” (Pro Tips)
Here are a couple of little tricks I’ve picked up over the years that can really tip the scales in your favor:
- Don’t be afraid to let cuttings “cure”: After you’ve taken a stem cutting, let it sit in a dry, shady spot for a day or two before planting. This allows the cut end to callous over, which can help prevent rot and encourage rooting.
- Bottom heat is your friend (for stem cuttings): If you’re propagating stem cuttings indoors, placing the pot on a gentle heating mat can significantly speed up root development. It mimics the warmth of summer soil, giving those baby roots a real boost.
Aftercare & Troubleshooting
Once your cuttings have taken or your divisions are settled, they are still babies and need a little extra TLC. Keep the soil consistently moist but never waterlogged. For stem cuttings, you’ll likely see new growth within a few weeks, which is a good sign that roots are forming. You can gently tug on a cutting to feel for resistance – that’s a sign of roots!
What if things go wrong? Rot is the most common culprit. If your cuttings look mushy, smell foul, or have turned black, they’ve probably succumbed to rot. This is usually due to overwatering or poor drainage. Don’t despair! Just discard the rotted material, clean your pot, and try again. If your divisions don’t seem to be taking, ensure they have good soil contact and continue with consistent, but not excessive, watering. Pests can sometimes be an issue, so keep an eye out for any unwelcome visitors.
A Encouraging Closing
Propagating Asphodelus ramosus is a journey, and like any good journey, it’s about the experience and the learning. Be patient, observe your plant, and don’t be discouraged if your first attempt isn’t a runaway success. With each try, you’ll get a better feel for what your plants need. Enjoy the process, the anticipation, and the immense satisfaction of nurturing new life in your own garden! Happy propagating!
Resource:
https://identify.plantnet.org/k-world-flora/species/Asphodelus%20ramosus%20L./data