Oh, hello there! Come on in, pull up a chair. I’ve got a fresh pot of coffee brewing, and I can’t wait to chat with you about a truly special plant: Polyosma brachystachys.
Welcome to the Wonderful World of Polyosma brachystachys
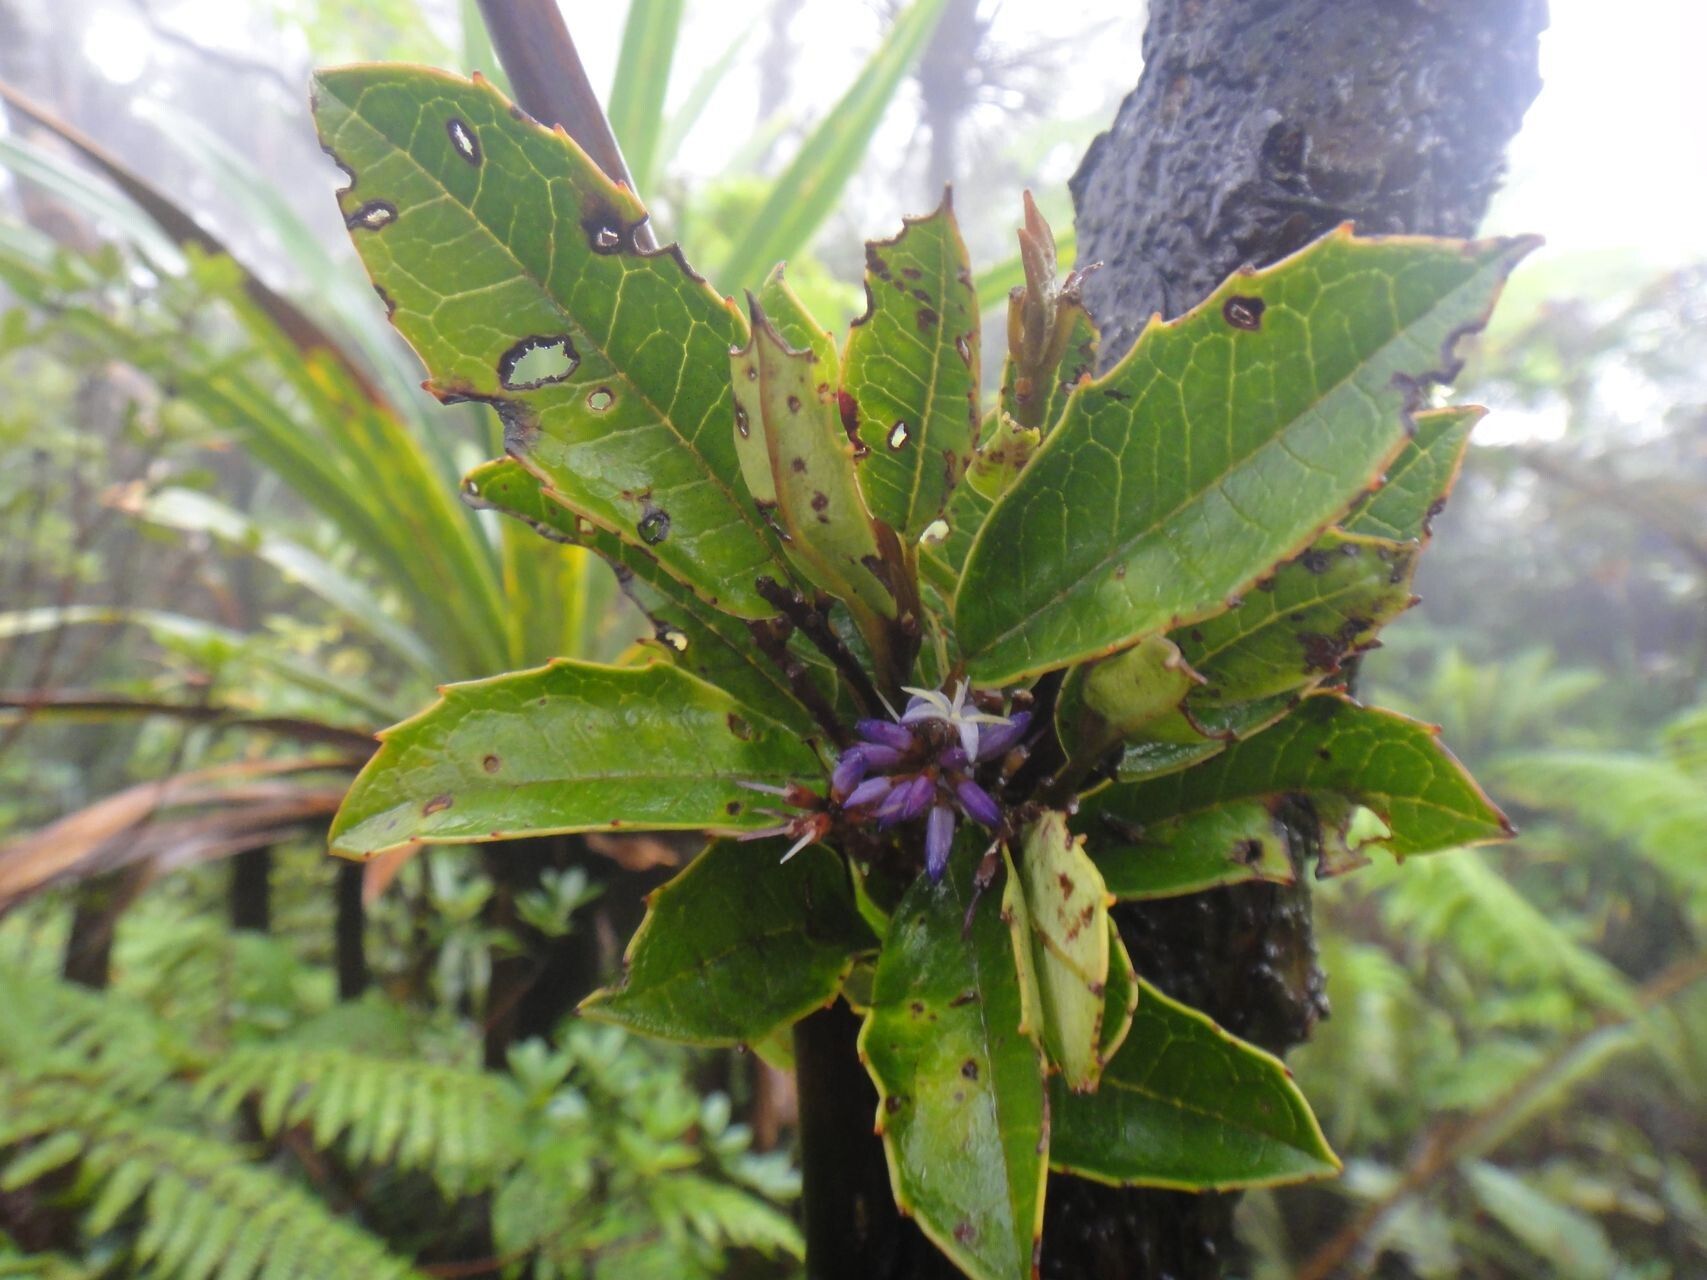
This beauty, with its elegant foliage and often fragrant, intriguing blooms, is a real showstopper. I’ve spent years admiring it in my own garden and in others, and honestly, there’s a special kind of joy in nurturing a brand new plant from a little piece of the original. It’s a bit like cheering on your favorite underdog, isn’t it? Now, is it a walk in the park for absolute beginners? I’d say it’s a tad more involved than, say, a spider plant, but with a little care and attention, you’ll be well on your way. Don’t let that deter you, though! It’s an incredibly rewarding experience.
The Best Time to Start Your Propagation Adventure
For Polyosma brachystachys, I find spring and early summer are your golden ticket. Think of it like this: when the plant is really waking up after its winter rest, it has a lot of energy to put into growing new roots. You want to take cuttings from stems that are actively growing, but not brand new, super soft shoots. Look for stems that are a little firm – what we in the trade call “semi-hardwood.”
Your Propagation Toolkit
Gathering your supplies beforehand makes the whole process so much smoother. Here’s what I like to have on hand:
- Clean, sharp pruning shears or a sharp knife: Essential for making clean cuts that heal better.
- Small pots or trays: For your cuttings to root in. Make sure they have drainage holes!
- A well-draining potting mix: I often use a blend of equal parts perlite and peat moss or coco coir. Some growers swear by a seed-starting mix, which is also fine. The key is good aeration.
- Rooting hormone (optional but recommended): A little boost can significantly improve your success rate, especially for trickier plants. I prefer the powder form for stem cuttings.
- Plastic bags or a clear plastic dome: To create a humid environment for your cuttings.
- A spray bottle: For misting.
- Labels: Don’t skip this! You’ll thank yourself later when you’ve got a few different things rooting.
Bringing Your Polyosma to Life: Propagation Methods
The most reliable way I’ve found to propagate Polyosma brachystachys is through stem cuttings.
- Taking the Cuttings: First, select a healthy stem from your parent plant. Using your clean pruning shears, make a cut just below a leaf node (where a leaf attaches to the stem). You’re aiming for cuttings that are about 4-6 inches long.
- Preparing the Cuttings: Gently remove the lower leaves from your cutting, leaving only the top 2-3 leaves. If the remaining leaves are quite large, you can carefully cut them in half horizontally. This reduces water loss through transpiration.
- Dipping in Rooting Hormone (if using): Moisten the cut end of the stem slightly, then dip it into your rooting hormone powder. Tap off any excess.
- Planting: Fill your small pots with your prepared potting mix. Make a hole in the center with your finger or a pencil. Insert the cut end of the stem into the hole, ensuring it’s firm. Gently firm the soil around the base of the cutting.
- Creating Humidity: Water the soil lightly. Then, cover the pot loosely with a plastic bag or place a clear plastic dome over it. This creates a mini-greenhouse effect, keeping the humidity high, which is crucial for cuttings to root. Make sure the leaves don’t touch the plastic if possible.
Another method, though I find it less consistently successful for Polyosma, is water propagation.
- Prepare the Cutting: Follow steps 1 and 2 above for taking and preparing your cuttings.
- Place in Water: Plunge the cut end of the stem into a glass or jar filled with clean water. Make sure no leaves are submerged in the water; they will rot.
- Location: Place the jar in a bright spot, but out of direct sunlight.
- Water Changes: Change the water every few days to keep it fresh. You’ll start to see tiny white roots forming after a few weeks.
- Transplanting: Once the roots are about an inch long, you can carefully transplant them into your potting mix.
The “Secret Sauce”: My Top Tips
Okay, lean in, because here are a few little tricks I’ve learned over the years:
- Think “Clean Sweep” for Your Tools: Sterilize your pruning shears or knife with rubbing alcohol before and after each cutting session. This prevents the spread of any potential diseases.
- Bottom Heat is Your Friend: If you happen to have a heated propagator mat or can place your pots on top of a router (just kidding… mostly!), a little gentle warmth from below can significantly speed up root formation. It mimics the feeling of spring soil warming up.
- Don’t Rush the Transplant: Before you move your rooted cuttings into larger pots, give them a gentle tug. If you feel resistance, that’s a good sign roots have developed firmly.
Aftercare and When Things Go Wrong
Once you start seeing new growth on your cuttings, it’s a great sign that roots are forming! You can slowly acclimatize them to normal humidity by gradually opening the plastic bag or dome over a few days. Keep the soil consistently moist but not soggy.
Now, troubleshooting. The most common culprit for failure is rot. If your cutting turns mushy and dark, or if you see mold on the soil, it’s usually a sign of too much moisture and poor air circulation. Sometimes, it’s just a matter of the cutting not having enough energy, or the conditions weren’t quite right. Don’t get discouraged! Propagation is a numbers game, and sometimes you just have to try again. If your cuttings are wilting and browning, it could be underwatering or too much direct sun.
Keep Planting, Keep Growing!
So there you have it! Propagating Polyosma brachystachys might take a little patience, but witnessing that first tiny leaf emerge on a new plant is incredibly rewarding. Trust your instincts, enjoy the process, and don’t be afraid to get your hands a little dirty. Happy propagating!
Resource:
https://identify.plantnet.org/k-world-flora/species/Polyosma%20brachystachys%20Schltr./data