Well hello there! It’s so wonderful to have you join me in the garden today. I’ve been nurturing plants for a good two decades now, and if there’s one thing I’ve learned, it’s that sharing them, whether through gifting a new plant baby or simply expanding your own collection, brings a special kind of joy.
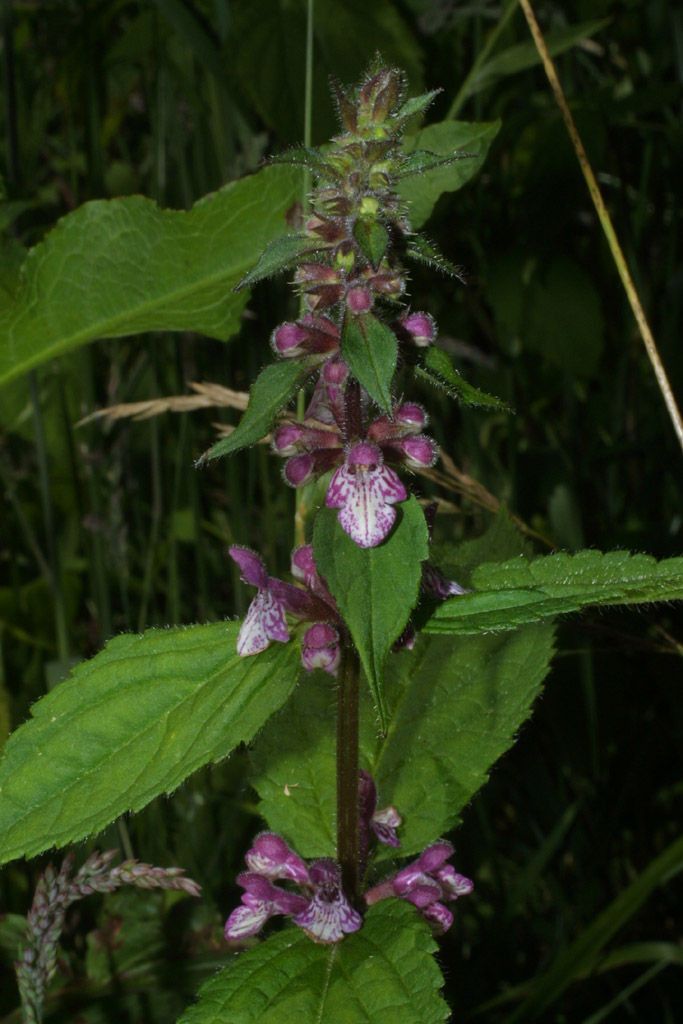
Today, we’re diving into the delightful world of Stachys clingmanii, or as some of us affectionately call it, the charming Betony. This beauty, with its soft, fuzzy leaves and lovely spires of bloom, is a real charmer in any garden. Growing new Stachys clingmanii from an existing one is incredibly rewarding, and I promise, it’s not some arcane magic reserved for the pros. In fact, I’d say it’s quite beginner-friendly, which is always a plus in my book!
The Best Time to Start
When it comes to getting your new Stachys clingmanii started, timing is key. The absolute best time is late spring to early summer. This is when the plant is actively growing and full of energy. You’ll be able to gather healthy, pliable stems that are more likely to root successfully. Waiting until after the main flush of growth has started, but before it gets too hot and dry, will give you the best results, in my experience.
Supplies You’ll Need
Before we get our hands dirty, let’s gather our tools. Having everything ready beforehand makes the process so much smoother:
- Sharp Pruning Shears or a Clean Knife: For taking clean cuttings.
- Well-Draining Potting Mix: A mix formulated for cuttings or a blend of perlite and peat moss works wonderfully. Avoid heavy garden soil.
- Small Pots or Seed Tray: Clean containers are essential to prevent disease.
- Rooting Hormone (Optional but Recommended): This gives cuttings an extra boost.
- Plastic Bag or Humidity Dome: To maintain high humidity for your cuttings.
- Watering Can with a Fine Rose: For gentle watering.
- Labels and a Waterproof Marker: To keep track of your projects!
Propagation Methods
There are a couple of lovely ways to propagate Stachys clingmanii, and both are quite straightforward. I usually lean towards stem cuttings, as they’re so quick and effective.
Stem Cuttings: My Go-To Method
- Take Your Cuttings: Using your clean shears, snip off healthy, non-flowering stems that are about 4-6 inches long. Make sure to take them from new growth in late spring or early summer.
- Prepare the Cuttings: Gently remove the lower leaves from the stem, leaving just 2-3 at the top. This prevents them from rotting when in the soil. If you’re using rooting hormone, dip the cut end of the stem into the powder, tapping off any excess.
- Pot Them Up: Fill your small pots with your prepared, moist potting mix. Make a small hole with your finger or a pencil.
- Insert the Cuttings: Gently push the cut end of each cutting into the hole, ensuring it makes good contact with the soil. You can fit several cuttings into one pot, but give them a little breathing room.
- Water Gently: Water the soil thoroughly but gently. You don’t want to dislodge your cuttings.
- Create a Humid Environment: Cover the pot with a clear plastic bag or a humidity dome. Make sure the plastic doesn’t touch the leaves if possible; use stakes to prop it up if needed. Place the pot in a bright spot out of direct sunlight.
- Wait for Roots: Keep the soil consistently moist but not soggy. You should see new growth within a few weeks, which is a good sign that roots are forming. You can gently tug on a cutting after about a month; if you feel resistance, they’ve rooted!
The “Secret Sauce” (Pro Tips)
Over the years, I’ve picked up a few little tricks that seem to make all the difference:
- Bottom Heat is Your Friend: If you have a plant heating mat, using it under your pots can significantly speed up rooting. Stachys clingmanii, like many plants, loves a bit of warmth from below to encourage those roots to get going.
- Don’t Be Afraid to Pinch: Once your cuttings have rooted and have a few sets of leaves, don’t hesitate to pinch off the very tip. This encourages the plant to branch out, resulting in a bushier, fuller plant later on.
- Cleanliness is Paramount: I can’t stress this enough. Always use clean tools and clean pots. Even a tiny bit of old soil can introduce fungal diseases that will doom your precious cuttings.
Aftercare & Troubleshooting
Once your cuttings have developed a good root system and you see new, vigorous growth (usually after about a month or so), it’s time to give them a bit more space. Gently transplant them into their own small pots with fresh potting mix.
Continue to keep them moist and out of direct sun for another week or two to allow them to acclimate. After that, you can gradually introduce them to more light and care for them as you would a mature Stachys.
The most common pitfall with cuttings is rot. If your cuttings look mushy, turn black, or simply wilt without any sign of rooting, it’s usually a sign of too much moisture and not enough air circulation. That’s why that humidity dome or plastic bag is important, but it needs to be balanced with providing some ventilation. If you notice any sign of rot, it’s best to discard the affected cutting and try again, ensuring your soil drains well and you aren’t overwatering.
A Encouraging Closing
And there you have it! Propagating Stachys clingmanii is a wonderfully fulfilling way to expand your garden or share the joy of this lovely plant with friends. Be patient with the process; gardening is always a journey of observation and gentle encouragement. Enjoy the magic of watching a tiny cutting transform into a thriving plant. Happy gardening!
Resource:
https://identify.plantnet.org/k-world-flora/species/Stachys%20clingmanii%20Small/data