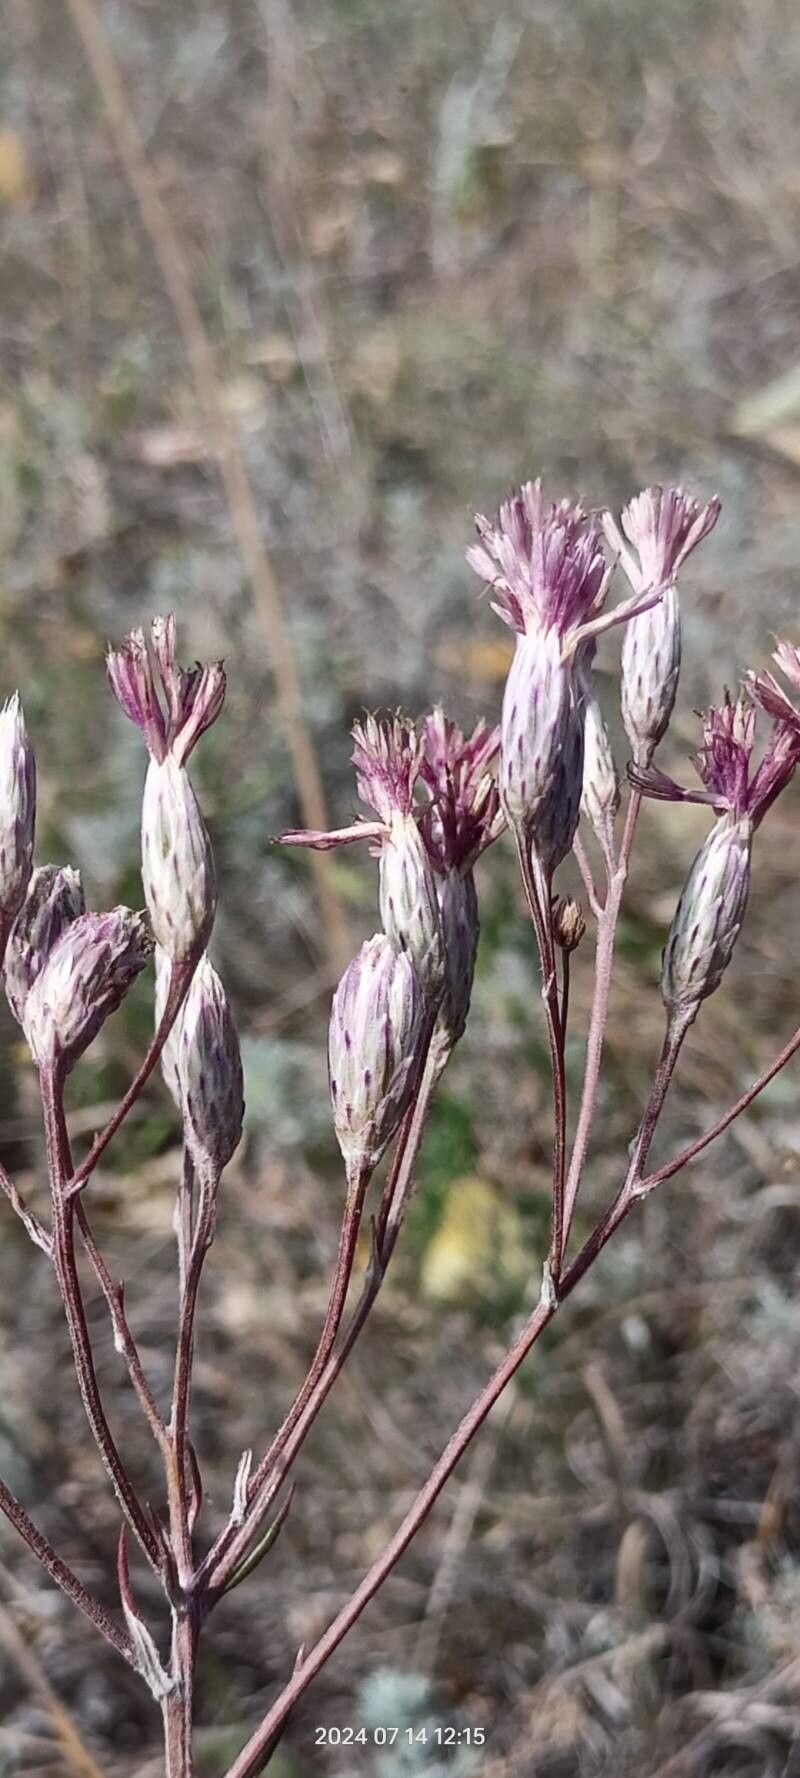
Hello, fellow garden enthusiasts! Today, we’re delving into the delightful world of Jurinea multiflora, often called Turkishahoo. If you’re anything like me, you’re probably smitten with its delicate, thistle-like blooms that dance in the summer breeze. They bring such a charming, wild beauty to any perennial border. Propagating this gem is not only a fantastic way to expand your collection but also incredibly satisfying. Now, I won’t sugarcoat it: Jurinea multiflora can be a tad fussy with propagation, especially for absolute beginners, but with a little patient attention, you’ll be rewarded.
The Best Time to Start
For the highest success rate, I find that late spring to early summer is your sweet spot. This is when the plant is actively growing and has the most energy to put into establishing new roots. You want to work with tender, young shoots that haven’t yet started to stiffen up.
Supplies You’ll Need
Gathering your tools beforehand makes the whole process smoother. Here’s what I typically have on hand:
- Sharp pruning shears or a clean, sharp knife: Essential for making clean cuts to avoid bruising.
- Rooting hormone powder (optional but helpful): A little dip can give your cuttings a significant boost.
- Well-draining potting mix: I like a blend of equal parts peat moss or coco coir, perlite, and a little coarse sand. This is crucial to prevent waterlogged roots.
- Small pots or a seed tray with good drainage holes: Choose pots that are appropriately sized for your cuttings.
- Plastic bags or a propagator lid: To create a humid environment for your cuttings.
- Watering can with a fine rose or a spray bottle: Gentle watering is key.
- Labels and a permanent marker: So you don’t forget what you planted where!
Propagation Methods
While Jurinea multiflora can be grown from seed (though it’s often slow and germination can be erratic), I find stem cuttings to be the most reliable method for obtaining a genetic match and a quicker start.
Stem Cuttings:
- Select your cuttings: Look for healthy, non-flowering stems that are about 4-6 inches long. Gently snap or cut them just below a leaf node. A leaf node is where a leaf attaches to the stem; this is where roots are most likely to form.
- Prepare the cuttings: Remove the lower leaves, leaving just a few at the top. If the leaves are very large, I often cut them in half horizontally to reduce water loss through transpiration. This is a good little trick that really helps!
- Apply rooting hormone (optional): Dip the cut end of each stem into rooting hormone powder. Tap off any excess.
- Plant the cuttings: Make small holes in your prepared potting mix using a pencil or your finger. Insert the cuttings about 1-2 inches deep, ensuring that at least one leaf node is below the soil surface. Gently firm the soil around the base of each cutting.
- Water gently: Water the potting mix thoroughly but carefully, making sure not to dislodge the cuttings.
- Create humidity: Cover the pots or tray with a plastic bag, securing it with a rubber band, or place a propagator lid on top. This creates a mini-greenhouse effect. You can prop up the bag with a few small sticks if it looks like it will press down on the leaves.
- Placement: Place your cuttings in a bright location but out of direct sunlight. A windowsill that gets filtered light is perfect.
The “Secret Sauce” (Pro Tips)
Here are a couple of things I’ve learned over the years that make a real difference with trickier plants like Jurinea:
- Airflow is your friend, but humidity is king: While you need that humid environment to prevent cuttings from drying out, it’s also important to provide a little ventilation every couple of days. Lift the plastic bag or lid for an hour or so. This helps prevent fungal diseases from setting in, which is the bane of propagation!
- Bottom heat can work wonders: If you have a heated propagator or can place your pots on a heat mat set to a low temperature (around 70-75°F or 21-24°C), this can significantly speed up root development. The warmth encourages the plant to send out those valuable roots.
Aftercare & Troubleshooting
Once your cuttings have been planted, patience is your best friend. Keep the soil consistently moist but not soggy. You should start to see signs of new growth, like tiny leaves unfurling or tiny shoots appearing at the top, within 4-6 weeks. This is your cue that roots are forming!
Once you see genuine new growth, it’s time to gradually acclimate them to normal conditions. Start by removing the plastic bag or lid for longer periods each day.
Troubleshooting:
- Wilting or yellowing leaves: This can be a sign of too much or too little water, or not enough light. Check your watering routine and reposition if necessary.
- Rotting at the base of the stem: This is almost always a sign of too much moisture and poor drainage. Your potting mix might be too heavy, or you’re watering too frequently. If you catch it early, you might be able to salvage a healthy tip if you act fast. Ensure good drainage from now on!
- No sign of roots after several weeks: Don’t despair! Some plants are just slow growers. Ensure consistent moisture and ideal conditions. Sometimes, a little more time is all they need.
A Encouraging Closing
Propagating plants is a journey, and Jurinea multiflora certainly teaches us a few lessons in patience and observation. Don’t be discouraged if your first attempt isn’t a roaring success. Each season brings a new opportunity to learn and refine your technique. Enjoy the process of coaxing new life from a loved plant – it’s one of the most rewarding aspects of gardening. Happy propagating!
Resource:
https://identify.plantnet.org/k-world-flora/species/Jurinea%20multiflora%20(L.)%20B.Fedtsch./data