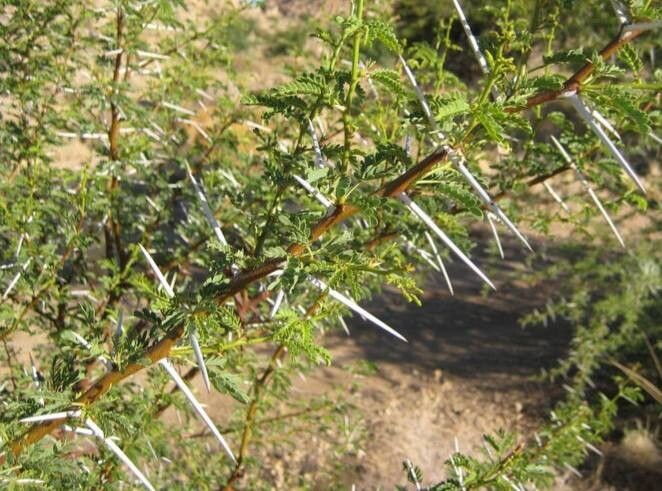
Hello, fellow garden enthusiasts! Today, I want to chat about a truly special tree: Vachellia etbaica, often known as the Etba tree or Cape Wattle. If you’re drawn to plants with a bit of elegance and a whole lot of resilience, you’ll adore this one. Its delicate, feathery foliage and, in season, lovely cream-colored flower spikes, bring a touch of the wild to any garden. And believe me, coaxing a new life from a parent plant? There’s nothing quite like it. For those just starting their propagation journey, Vachellia etbaica can be a rewarding challenge, but with a little know-how, you’ll be well on your way.
The Best Time to Start
Timing is everything, as any seasoned gardener will tell you. For Vachellia etbaica, I’ve found the late spring or early summer is your sweet spot. This is when the plant is in its active growth phase, meaning it’s got plenty of energy to put into developing new roots. You’re looking for young, vigorous shoots that are still somewhat soft and pliable – not the old, woody stems. Think of it like a teenager; full of life and ready to spread their wings!
Supplies You’ll Need
Gathering your tools before you start makes the whole process smoother. Here’s what I usually have on hand:
- Sharp Pruning Shears or a Craft Knife: For clean cuts, which is crucial for preventing disease.
- Well-Draining Potting Mix: A blend of perlite, coarse sand, and peat moss works wonderfully. You can also find pre-made cactus or succulent mixes that do the trick.
- Rooting Hormone (Optional but Recommended): This can significantly boost your success rate, especially for trickier cuttings. Look for one with a fungicide.
- Small Pots or Seedling Trays: Clean ones are a must!
- Watering Can with a Fine Rose: To moisten the soil without disturbing the cuttings.
- Plastic Bag or Propagation Dome: For creating a humid environment.
- Labels and a Marker: So you don’t forget what you’ve planted!
Propagation Methods
While Vachellia etbaica can be propagated from seed, that often requires scarification and can take a long time. For a more immediate connection and to ensure you get a plant true to its parent, I prefer using stem cuttings.
Stem Cuttings:
- Select Your Cuttings: As mentioned, look for healthy, semi-hardwood stems. Aim for cuttings about 4-6 inches long. Make your cut just below a leaf node (where a leaf attaches to the stem).
- Prepare the Cuttings: Gently remove the leaves from the bottom half of the cutting. If the remaining leaves are very large, you can snip them in half to reduce water loss.
- Apply Rooting Hormone: Dip the cut end of each stem into your rooting hormone, tapping off any excess.
- Pot Them Up: Fill your small pots or trays with your well-draining potting mix. Make a hole in the center of the mix with a pencil or your finger. Gently insert the cutting into the hole, ensuring the leaf nodes are buried. Firm the soil around the stem.
- Water Gently: Water the soil thoroughly but delicately, so it’s moist but not waterlogged.
- Create Humidity: Cover the pots or trays with a plastic bag or a propagation dome. This traps moisture and creates that humid microclimate cuttings crave. Ensure the leaves aren’t touching the plastic; if they are, prop the bag up with a few skewers.
The “Secret Sauce” (Pro Tips)
Here are a few little tricks I’ve picked up over the years that can really make a difference:
- Bottom Heat is Your Friend: If you can, place your propagation trays on a heat mat. This gentle warmth from below encourages root development much faster than ambient room temperature. It’s like a cozy blanket for your cuttings!
- Don’t Be Afraid of a Little Fungicide: Especially if your cuttings are taking a while, a small dose of fungicide mixed with your rooting hormone or added to your watering can can prevent rot, which is a common culprit for failure. Cleanliness is paramount here.
- Patience with Peeking: Resist the urge to constantly tug on your cuttings to see if they’ve rooted. You’ll damage delicate new roots. Instead, look for signs of new leaf growth from the tip or sides of the stem. That’s your cue that roots are forming!
Aftercare & Troubleshooting
Once your Vachellia etbaica cuttings have developed a healthy root system (you can gently check by giving a cutting a tiny tug; if there’s resistance, you’re golden!), it’s time to transition them to slightly larger pots or their permanent home.
Continue to keep the soil consistently moist but not soggy. As they grow, you can gradually acclimate them to less humidity by opening the bag a little more each day.
Now, for the inevitable hiccups. The most common sign of failure is wilting and yellowing leaves that don’t improve with watering. This often points to rot, meaning the cutting sat in too much moisture. Unfortunately, a rotten cutting is usually a goner. If you see mold or fuzzy growth on the soil or stem, it’s also a sign of too much humidity or poor air circulation. In this case, try to improve ventilation and perhaps scrape off any visible mold. Don’t despair if a few don’t make it – it’s part of the learning process!
A Encouraging Closing
See? It’s not as daunting as it might seem. Propagating Vachellia etbaica is a wonderful way to connect with nature and expand your green family. Be patient with the process, celebrate the small victories, and don’t get discouraged by the occasional setback. Every cutting you try is a lesson learned, and soon enough, you’ll have magnificent new Etba trees to share and enjoy. Happy propagating!
Resource: