Hey there, fellow plant lovers! Today, we’re diving into the wonderful world of propagating Afzelia quanzensis. If you’ve ever admired the striking foliage and unique charm of this beauty, you know how exciting it is to think about growing your own. And believe me, creating new life from an existing treasure is one of the most satisfying parts of gardening.
Why Grow More Afzelia?
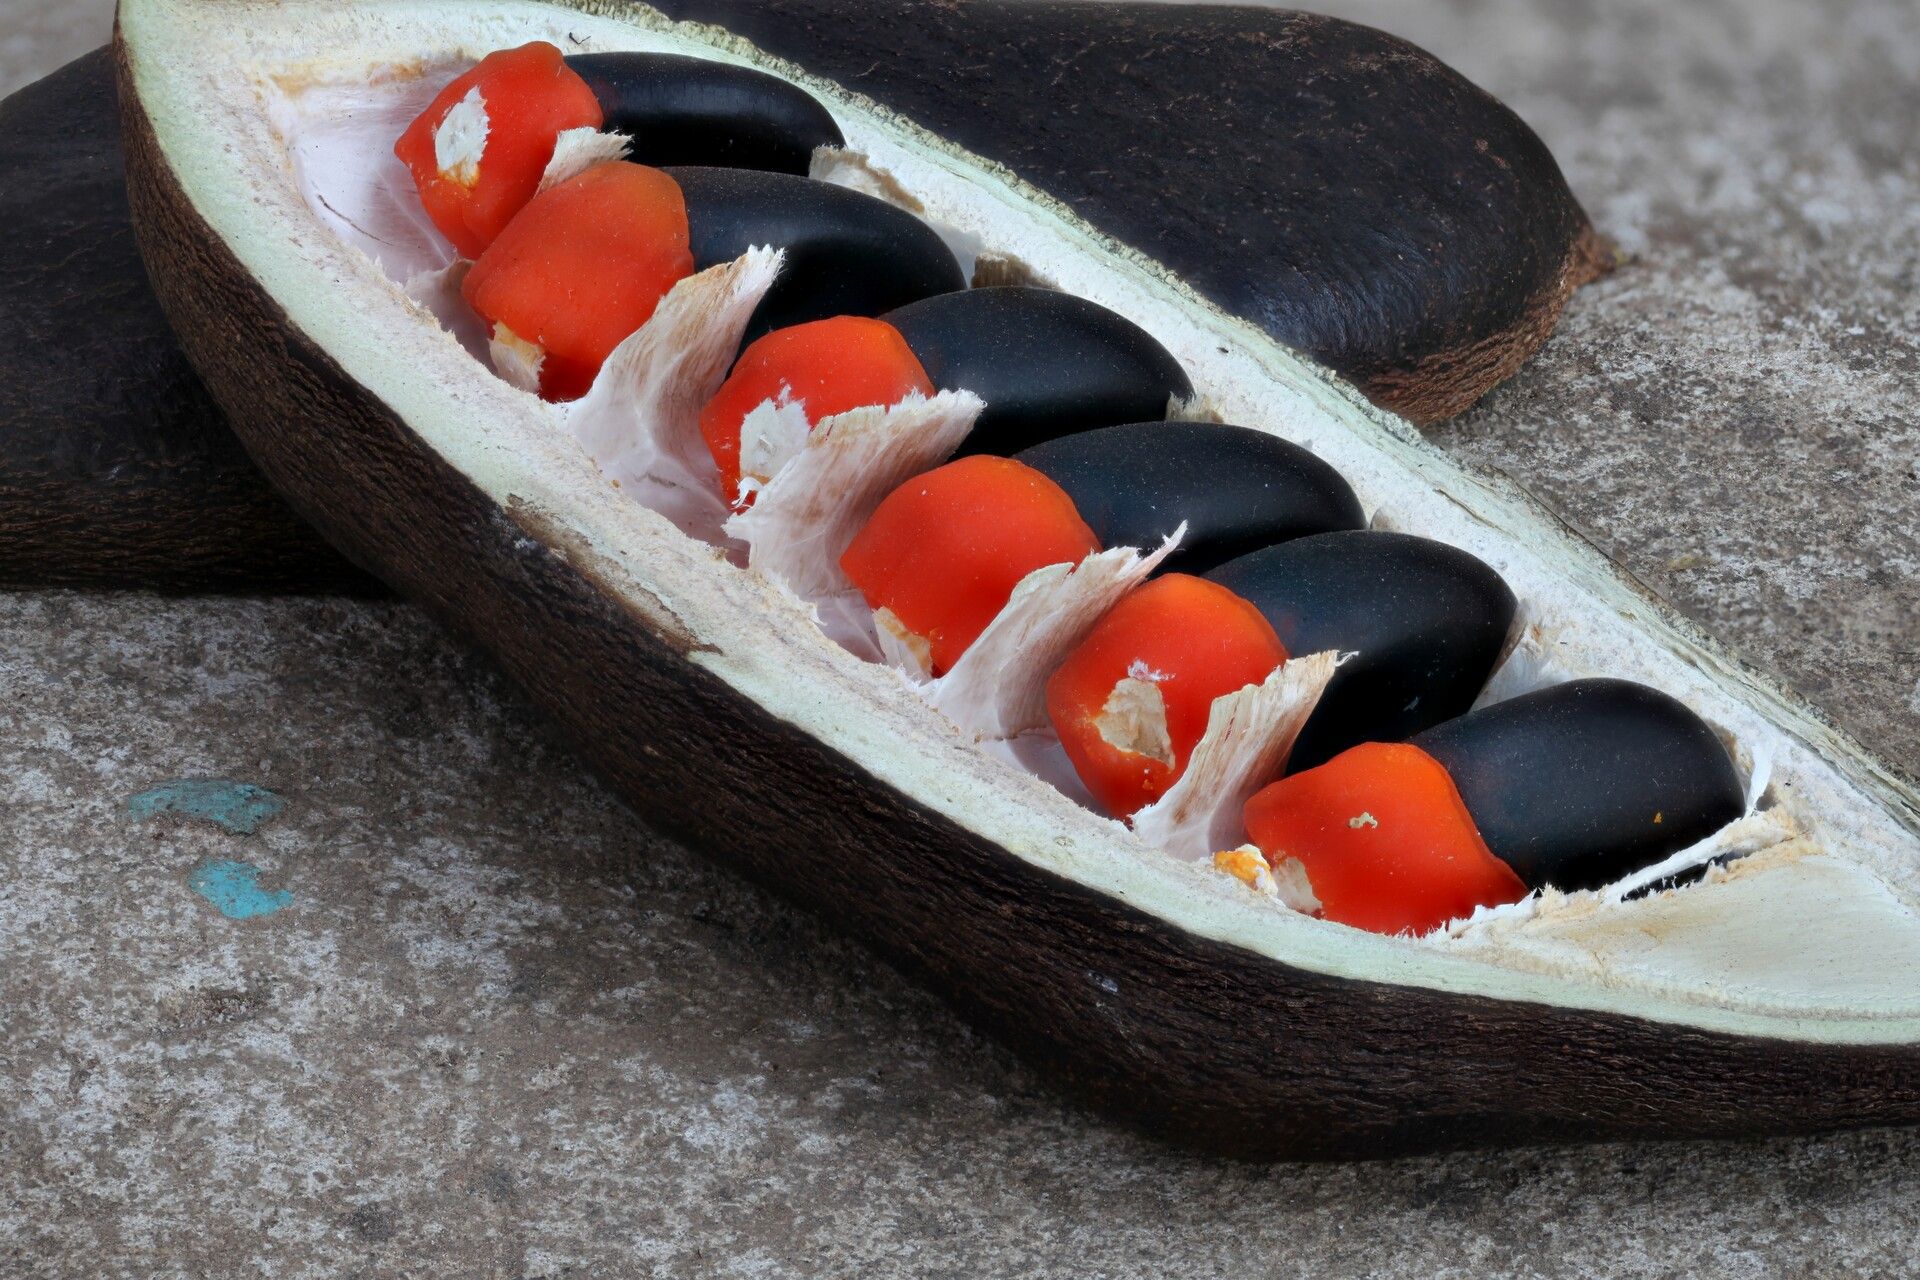
Afzelia quanzensis, often called the “Pod Mahogany” or “African Bean Tree,” has this incredible ability to add a touch of the exotic to any space. Its lush leaves are a joy to behold, and the anticipation of seeing a tiny new plant sprout can be truly thrilling. While it’s not the absolute easiest plant to propagate, with a little understanding and care, it’s definitely within reach for the determined home gardener. Don’t let that deter you; the rewards are well worth the effort!
When to Get Started
The sweet spot for propagating Afzelia quanzensis is during its active growing season. Think late spring or early summer. This is when the plant is full of vigor and has the energy to push out new roots. You’ll want to take cuttings from healthy, mature stems that aren’t flowering or producing new buds.
Your Propagation Toolkit
Before we get our hands dirty, let’s make sure you’ve got everything you need. Having your supplies ready makes the whole process smoother.
- Sharp Pruning Shears or a Knife: Clean, sharp tools are essential for making precise cuts and minimizing damage to the parent plant and your cuttings.
- Well-Draining Potting Mix: A mix of perlite and peat moss (about a 50/50 ratio) is my go-to. You can also use a commercial seed-starting mix.
- Small Pots or Seedling Trays: Choose pots with drainage holes. Small nursery pots work wonderfully.
- Rooting Hormone (Optional but Recommended): This can significantly boost your success rate. Look for one containing IBA.
- Clear Plastic Bag or Humidity Dome: This helps create a humid environment, which is crucial for cuttings.
- Watering Can or Spray Bottle: For gentle watering.
- Labeling Stakes: To keep track of what you’ve planted and when.
Giving Afzelia a New Beginning: Propagation Methods
We’ll focus on the most reliable method for Afzelia quanzensis: stem cuttings.
Stem Cuttings:
- Select and Prepare Your Cuttings: With your clean pruning shears, take stem cuttings that are about 4 to 6 inches long. Look for bright, healthy stems. Make the cut just below a leaf node (where a leaf attaches to the stem).
- Remove Lower Leaves: Gently strip off the leaves from the bottom 2 to 3 inches of the cutting. You can leave a few leaves at the top to help with photosynthesis. If the remaining leaves are very large, you can cut them in half to reduce water loss.
- Apply Rooting Hormone (Optional): Dip the cut end of the stem into water, then into the rooting hormone powder. Tap off any excess.
- Plant Your Cuttings: Fill your pots with the prepared potting mix. Make a small hole in the center with your finger or a pencil. Insert the cutting into the hole, ensuring the leaf nodes are below the soil line. Gently firm the soil around the base.
- Water Gently: Water the soil thoroughly but gently. You don’t want to dislodge the cuttings.
- Create a Humid Environment: Place the pots inside a clear plastic bag, sealing it loosely, or cover them with a humidity dome. This traps moisture, mimicking the humid conditions cuttings need to thrive before developing roots.
- Find the Right Spot: Place the pots in a bright location that receives indirect sunlight. Avoid direct sun, which can scorch the delicate cuttings.
The Green Thumb’s “Secret Sauce”
Now, here are a couple of things I’ve learned over the years that can really make a difference:
- Bottom Heat is Your Friend: If you have a seedling heat mat, pop your pots on top of it. This gentle warmth encourages root development from below, giving your cuttings a real boost. It’s like giving them a cozy, warm bed!
- Be Patient with the Leaves: When you check on your cuttings, resist the urge to let the leaves droop into the water that might collect at the bottom of the bag. If they get consistently wet, they’re more prone to rot. Just make sure they’re sitting above any standing moisture.
Aftercare and What to Watch For
Once your cuttings have been planted, the real waiting game begins!
- Maintain Humidity: Keep the plastic bag or humidity dome on. You can lightly mist the inside of the bag every few days if it seems dry.
- Check for Roots: After a few weeks, you can gently tug on a cutting. If you feel resistance, it’s a good sign that roots are forming. You can also look for new leaf growth.
- Acclimatize Gradually: Once roots have developed, start to gradually introduce your new plants to normal room humidity. Open the plastic bag a little more each day for a week or so before removing it completely.
- Watering: Water your new plants whenever the top inch of soil feels dry. Let the water drain well.
Troubleshooting:
- Rotting Cuttings: This is usually a sign of too much moisture and poor air circulation. Ensure your soil drains well and don’t overwater. If you see mushy, dark stems, unfortunately, that cutting is likely lost.
- Drooping or Wilting: This can happen if the cutting is too dry or the environment is too harsh. Make sure they have consistent moisture and are out of direct sun.
Happy Growing!
Propagating Afzelia quanzensis is a journey, and like all good things in the garden, it requires a bit of patience. Don’t be discouraged if not every cutting takes. Celebrate each success, learn from any setbacks, and most importantly, enjoy the process of nurturing these little green wonders into handsome plants. Happy propagating!
Resource:
https://identify.plantnet.org/k-world-flora/species/Afzelia%20quanzensis%20Welw./data