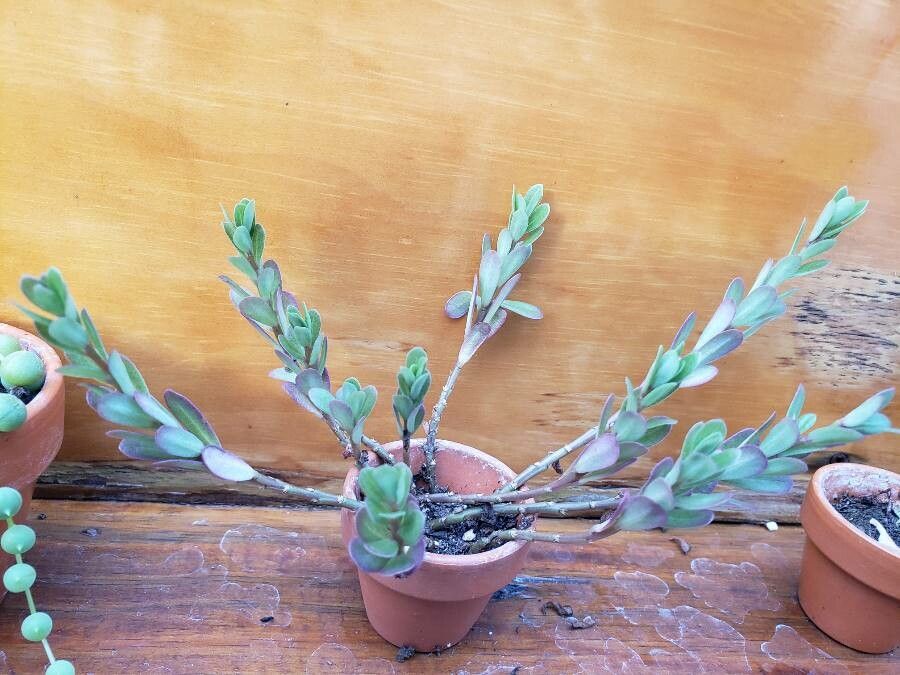
Hello, fellow garden enthusiasts! I’m so excited to chat with you today about one of my absolute favorite sun-lovers: Portulaca brevifolia. If you’re like me, you adore its vibrant, cheerful blooms and its almost succulent-like foliage that can withstand the hottest days without a fuss. Propagating this beauty is not only incredibly rewarding, but it’s also a fantastic way to fill your garden borders or containers with even more color. And the best part? It’s wonderfully forgiving, making it a perfect project for beginners.
The Best Time to Start
For the absolute best success rates, spring is your golden ticket. When the days start to lengthen and the air warms up, your Portulaca brevifolia will be bursting with vigorous new growth. This is the prime time to take cuttings or start divisions, as the plant has plenty of energy to put towards rooting. You can also have some success later in summer, but spring’s gentle warmth is truly ideal.
Supplies You’ll Need
- Sharp pruning shears or a clean knife: For making clean cuts.
- Well-draining potting mix: A cactus or succulent mix is perfect, or you can make your own by combining potting soil with perlite or coarse sand.
- Small pots or seed trays: Enough to hold your cuttings or divisions.
- Rooting hormone (optional but helpful): Especially for cuttings.
- Watering can or spray bottle: For gentle watering.
- Labels and a marker: To keep track of your new arrivals!
Propagation Methods
Let’s dive into the fun part – getting more Portulaca brevifolia!
Stem Cuttings
This is my go-to method for Portulaca brevifolia. It’s so simple and effective.
- Select a healthy stem: Look for a non-flowering stem that’s at least 3-4 inches long. You want to avoid stems with buds or flowers as they’ll divert energy from root development.
- Make the cut: Using your sharp shears or knife, make a clean cut just below a leaf node. This is where the roots will likely emerge.
- Prepare the cutting: Gently remove the lower leaves from the bottom inch or two of the stem. This prevents them from rotting when planted.
- Apply rooting hormone (optional): If you’re using rooting hormone, dip the cut end into the powder.
- Plant your cuttings: Insert the prepared end of the cutting about 1 inch deep into your well-draining potting mix. You can fit several cuttings into one pot, just make sure they have a little space.
- Water gently: Lightly water the soil until it’s moist but not soggy. A gentle spray is often best.
Water Propagation (with a twist!)
While I primarily use soil for this plant, you can attempt water propagation if you’re feeling adventurous.
- Follow steps 1-3 above for preparing your stem cuttings.
- Place cuttings in water: Instead of potting mix, place the cuttings in a jar or glass of clean water.
- The crucial detail: This is where the “twist” comes in. You must ensure that no leaves are submerged in the water. If leaves touch the water’s surface, they’ll most likely rot, taking your cutting with them.
- Change water regularly: Change the water every couple of days to keep it fresh and oxygenated.
- Wait for roots: You should see tiny roots starting to form within a few weeks. Once the roots are about an inch long, you can carefully transplant them into your potting mix.
The “Secret Sauce” (Pro Tips)
- Embrace the drought: Once your cuttings are planted (in soil or after moving from water), let them dry out slightly between waterings. Overwatering is the quickest way to invite rot. Think “thirsty, not drowned.”
- Warmth is key: Portulaca brevifolia loves warmth. If you’re propagating in a cooler period or live in a cooler climate, consider placing your pots on a heat mat. This “bottom heat” significantly speeds up root development by mimicking the warm soil of spring.
- Don’t be afraid to pinch: Once your cuttings have established roots and are showing new growth, pinch out the very tip. This encourages them to branch out, resulting in a bushier, fuller plant.
Aftercare & Troubleshooting
Once you see those first tiny leaves unfurling or feel a gentle tug when you lightly pull on a cutting, congratulations! You have roots!
Continue to water sparingly, allowing the soil to dry out between waterings. As your new plants grow, you can gradually introduce them to more direct sunlight.
The most common issue you might encounter is rot. If you see a stem turn mushy and black, it’s a sure sign of too much moisture. Don’t be discouraged; often, you can salvage remaining healthy parts of the stem or take more cuttings. If your cuttings shrivel up and die, they may have dried out too much, or the environment might be too cool.
A Bit of Patience, a Lot of Joy
Watching a tiny cutting transform into a beautiful, blooming plant is one of the most satisfying experiences in gardening. Be patient with your Portulaca brevifolia youngsters. They’ll show you when they’re ready. Enjoy the process, and get ready to be showered with more of those dazzling blooms! Happy propagating!
Resource:
https://identify.plantnet.org/k-world-flora/species/Portulaca%20brevifolia%20Urb./data