Oh, hello there! I’m so glad you’re curious about propagating Peristeria guttata. This orchid, often called the ‘Dove Orchid’ because of its stunning, bird-like flower, is truly a marvel. Seeing a new little plant sprout from a piece of what you already have is one of the most magical feelings in gardening, in my opinion. It’s a wonderfully rewarding process that lets you share the beauty of this special orchid. For beginners, I’d say Peristeria guttata is a bit of a thoughtful project. It’s not as hands-off as some houseplants, but with a little attention and the right approach, you’ll be well on your way to success.
The Best Time to Start
For most orchids, and especially for Peristeria guttata, the late spring or early summer is your sweet spot. This is when the plant is likely active, pushing out new growth and gathering energy. Starting when it’s naturally in a growth spurt really gives your cuttings or divisions the best chance to establish themselves quickly. You’re essentially working with the plant’s natural rhythms, which always makes things easier.
Supplies You’ll Need
Before we dive in, let’s gather our tools. Think of this as your propagation toolkit, ready for action:
- Sharp, sterile pruning shears or a clean knife: Essential for making clean cuts.
- Orchid potting mix: A chunky, well-draining blend is crucial. I like a mix of bark, perlite, and charcoal.
- Small pots or individual growing containers: New plants need their own cozy space.
- Rooting hormone (optional but helpful): Especially if you’re taking cuttings. Look for one specifically for orchids.
- Sphagnum moss or perlite: To help retain a bit of moisture around cuttings.
- Watering can with a fine rose or a spray bottle: For gentle watering.
- Clear plastic bags or a small greenhouse/propagation box: To create a humid environment.
- Labels and a marker: So you don’t forget what you’ve propagated!
Propagation Methods
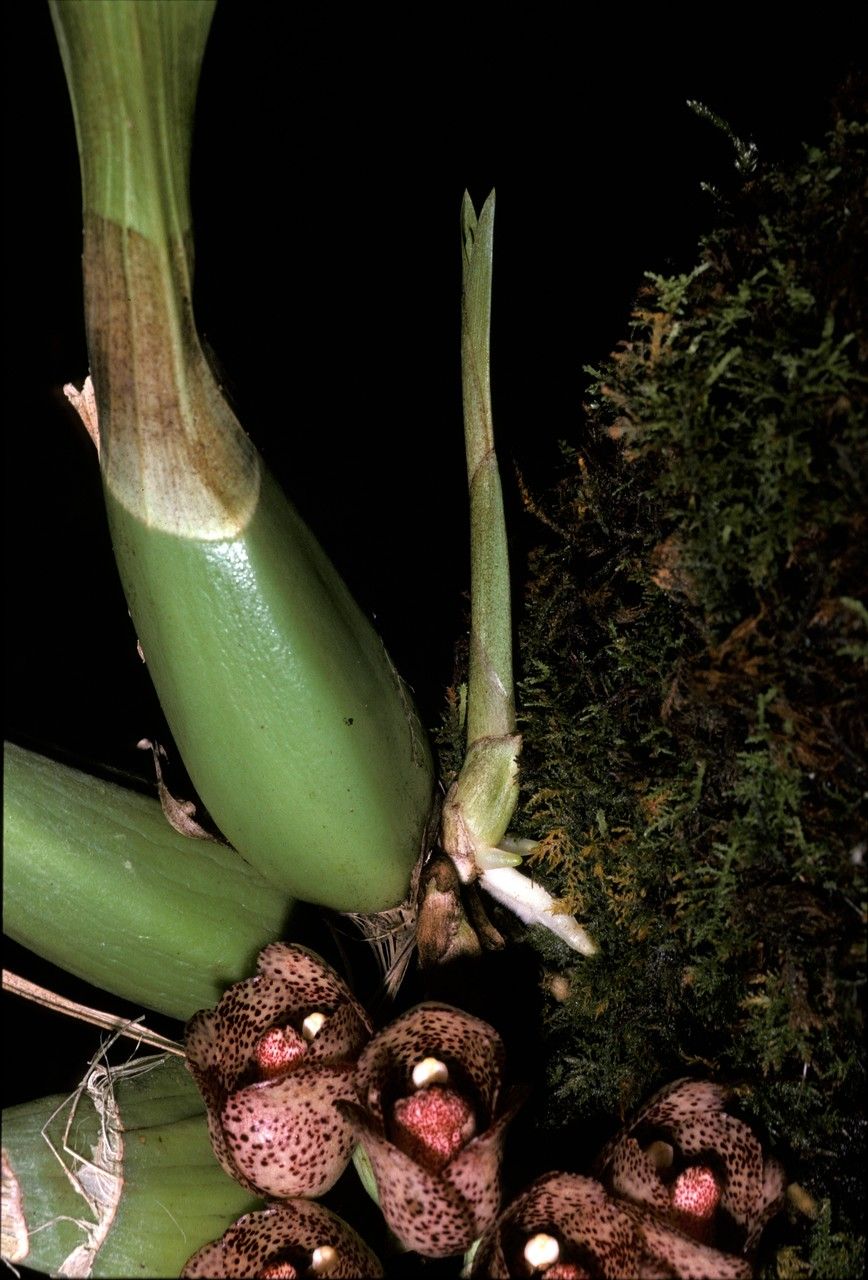
Peristeria guttata is primarily propagated through division. This is where you carefully split a mature plant into smaller sections, each with its own roots and pseudobulbs.
- Prepare Your Plant: Gently remove your Peristeria guttata from its pot. You might need to coax it out. If it’s tightly bound, a little repotting will be necessary.
- Identify Natural Divisions: Look for points where the plant naturally splits. You’re looking for sections that have at least a couple of healthy pseudobulbs (those swollen stem-like structures) and some existing roots.
- Make the Cut: Using your sterile shears or knife, carefully cut between the divisions. Be brave, but also be gentle. You want to minimize damage to the roots as much as possible. If you have a particularly stubborn division, you might need to use a sterilized screwdriver or even your fingers to gently tease it apart.
- Potting Up: Now it’s time to give these new babies their own homes. Plant each division in its own small pot filled with your orchid mix. Make sure the pseudobulbs are mostly above the surface, just like you would for a mature plant.
- Initial Watering: Water lightly. You don’t want to drown them, especially right after dividing.
The “Secret Sauce” (Pro Tips)
Here are a few things I’ve learned over the years that can really make a difference:
- Don’t be afraid of a little decay: Sometimes, when dividing, you’ll notice a
back bulbor a pseudobulb that’s a bit shriveled. Don’t automatically toss it! If it still has any life to it and is attached to roots or a viable part of the plant, it can sometimes surprise you and send out new growth. I’ve had success reviving seemingly spent pseudobulbs. - The importance of air circulation: While we want to create humidity for new propagations, stagnant air is an invitation for rot. Make sure your propagation setup isn’t completely sealed. A little airflow will help prevent fungal issues and keep your new plants happy and healthy. Open the bag or greenhouse lid for a short while each day if it feels too stuffy.
- Patience with pseudobulbs: For Peristeria guttata, sometimes the new growth will emerge from the base of a pseudobulb, rather than as a new spike off the top. It can take a little while for this new growth to show, so don’t panic if you don’t see immediate results. Keep the conditions consistent and trust the process.
Aftercare & Troubleshooting
Once your new divisions are potted, keep them in a bright, indirect light spot. Mist them lightly every few days, or when the potting mix starts to feel dry. You want them to be moist but not waterlogged. If you’ve enclosed them in a plastic bag, mist the inside of the bag to increase humidity.
The biggest challenge you might face is rot. If you see mushy, blackening sections on your pseudobulbs or roots, that’s a sign of too much moisture and not enough air. If this happens, you’ll need to remove the affected parts with a sterile tool, allow the cut end to dry for a day or two, and then repot into fresh, drier mix. It’s a tough situation, but often salvageable if caught early. You might also see shriveling pseudobulbs if the plant isn’t getting enough moisture, so adjust your watering accordingly.
Encouraging Closing
Propagating Peristeria guttata is a journey. It requires a keen eye and a good deal of patience. There will be moments of excitement when you see new roots or a tiny new shoot, and maybe a moment or two of concern if things aren’t going exactly to plan. But that’s all part of the gardening adventure! Enjoy the process, learn from each step, and soon you’ll have more of these gorgeous Dove Orchids to admire and even share. Happy propagating!
Resource:
https://identify.plantnet.org/k-world-flora/species/Peristeria%20guttata%20Knowles%20&%20Westc./data