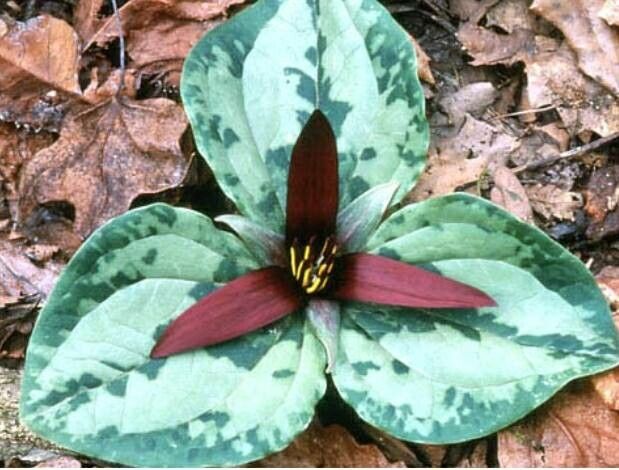
Ah, Trillium decumbens! What a delight. If you’ve ever seen this beautiful native trillium gracing a woodland floor, you know its quiet charm. Those lovely recurved petals, often a deep maroon or reddish-brown, held above mottled leaves, have a way of drawing you in. Propagating trilliums can feel a bit like unlocking a little garden secret, and the reward of watching something you’ve nurtured from a tiny beginning take root and flourish is truly special. Now, a word of gentle encouragement: Trillium decumbens isn’t the most beginner-friendly plant to propagate, but with a bit of patience and the right approach, it’s absolutely achievable, and oh-so-worth-it!
When the Magic Happens: The Best Time to Start
For Trillium decumbens, timing is key. The most successful propagation usually happens when the plant is actively growing, but ideally after it has finished flowering and is beginning to set seed. This typically falls in late spring to early summer. You want to catch it when its energy is directed towards growth, but before it goes fully dormant. Think of it as capturing that peak vitality.
Your Trusty Toolkit: Supplies You’ll Need
Don’t worry, you won’t need a fancy greenhouse for this! Here’s what you’ll want to gather:
- Sharp, sterile pruning shears or a clean knife: For making precise cuts.
- Rooting hormone (optional, but helpful): A powder or gel can give your cuttings a little boost.
- A good seedling or propagation mix: Something light and airy that drains well. I like to mix equal parts peat moss, perlite, and a bit of coarse sand. For trilliums, a slightly acidic mix is a bonus.
- Small pots or seed trays: With drainage holes, of course!
- A mister or spray bottle: For keeping things humid.
- Clear plastic bags or domes: To create a mini-greenhouse effect.
- A dibber or pencil: For making planting holes.
- A small trowel: For handling the soil.
- Labels and a waterproof marker: You’ll thank me later!
Your Guide to New Beginnings: Propagation Methods
Trillium decumbens can be a bit fussy, so we’ll focus on the method that generally offers the highest success rate: division. While seed propagation is possible, it takes a very long time to get mature plants. Cuttings are exceptionally difficult with this species.
Division: Spreading the Love
This is the most reliable way to propagate Trillium decumbens.
- Wait for the Right Time: As mentioned, late spring or early summer, after flowering, is ideal. The plant should still have some green foliage.
- Gentle Excavation: Carefully dig around the perimeter of the trillium clump. I like to use a hand fork or trowel, working from a little distance away to avoid damaging the rhizome. Gently lift the entire clump from the soil.
- Scrutinize the Rhizome: You’ll see a thick, creeping rhizome (which is essentially a modified stem). Look for natural divisions or points where the rhizome has branched. You want to aim for divisions that have at least one bud or growth point and some healthy root material attached.
- The Clean Break: Using your sharp, sterile knife or pruning shears, carefully cut or break the rhizome into smaller sections. Ensure each section has a bud and some roots. Don’t be too aggressive; you’re looking for natural separation points.
- Apply Rooting Hormone (Optional): If you’re using rooting hormone, lightly dip the cut end of each division into the powder or gel. This isn’t always necessary if the rhizome is already robust with roots.
- Planting Time: Fill your small pots with your well-draining propagation mix. Use your dibber or pencil to create a hole deep enough for the roots.
- Place and Cover: Gently place the divided rhizome into the hole and carefully cover the roots with soil. The top of the rhizome, where the bud is, should be at or just below the soil surface. Don’t bury it too deeply.
- Water Wisely: Water gently to settle the soil around the roots. You want the soil to be consistently moist but not waterlogged.
- Create Humidity: Place the pots into a clear plastic bag, sealing it loosely, or cover them with a clear plastic dome. This traps humidity, which is crucial for the plant to establish its roots before it needs to draw much water from the soil.
The “Secret Sauce”: Insider Tips from the Garden
- Rhizome “Eye” is Everything: When dividing, always look for the “eye” or bud on the rhizome. This is where new growth will emerge. A piece without an eye, even with roots, is unlikely to sprout.
- Don’t Overcrowd: Resist the urge to cram too many divisions into one pot. Give each new plant a bit of space to breathe and develop. Overcrowding leads to poor air circulation and increases the risk of rot.
- Bottom Heat is Your Friend (Sometimes): While not strictly essential for Trillium decumbens, if you have access to a heat mat, placing your pots on it can speed up the rooting process. A gentle, consistent warmth (around 70-75°F or 21-24°C) can be very beneficial, especially if your home is a bit cooler.
Nurturing New Life: Aftercare & Troubleshooting
Once your divisions are planted and tucked into their humid environment, the waiting game begins.
- Keep it Moist, Not Soaked: Periodically check the soil moisture. The propagation mix should stay consistently damp. If it feels dry to the touch, give it a gentle misting or a light watering. Avoid drowning it!
- Ventilation is Key: Every few days, open the plastic bag or dome for a short while (15-30 minutes) to allow for air circulation. This prevents fungal diseases from taking hold.
- Patience, Young Padawan: New growth can take several weeks, sometimes even a couple of months, to appear. Don’t despair if you don’t see immediate results.
Common Signs of Trouble:
- Rot: This is the biggest culprit. If you see the rhizome turning brown, slimy, and mushy, it’s likely rotting. This is usually due to overwatering and poor drainage. Try to salvage any healthy-looking parts if you catch it early, repot in fresh, dry mix, and be much more conservative with watering.
- Wilting: This can happen if the propagation environment is too dry, or if the division didn’t have enough healthy roots to sustain itself. Ensure good humidity and adequate moisture.
Breathe Deep and Bloom
Propagating Trillium decumbens is a practice in gentle observation and patient nurturing. It’s not about instant gratification, but about the quiet joy of fostering new life. Be kind to yourself, learn from any hiccups, and celebrate each tiny sprout. Before you know it, you’ll have more of these woodland treasures to admire and share. Happy gardening!
Resource:
https://identify.plantnet.org/k-world-flora/species/Trillium%20decumbens%20Harb./data