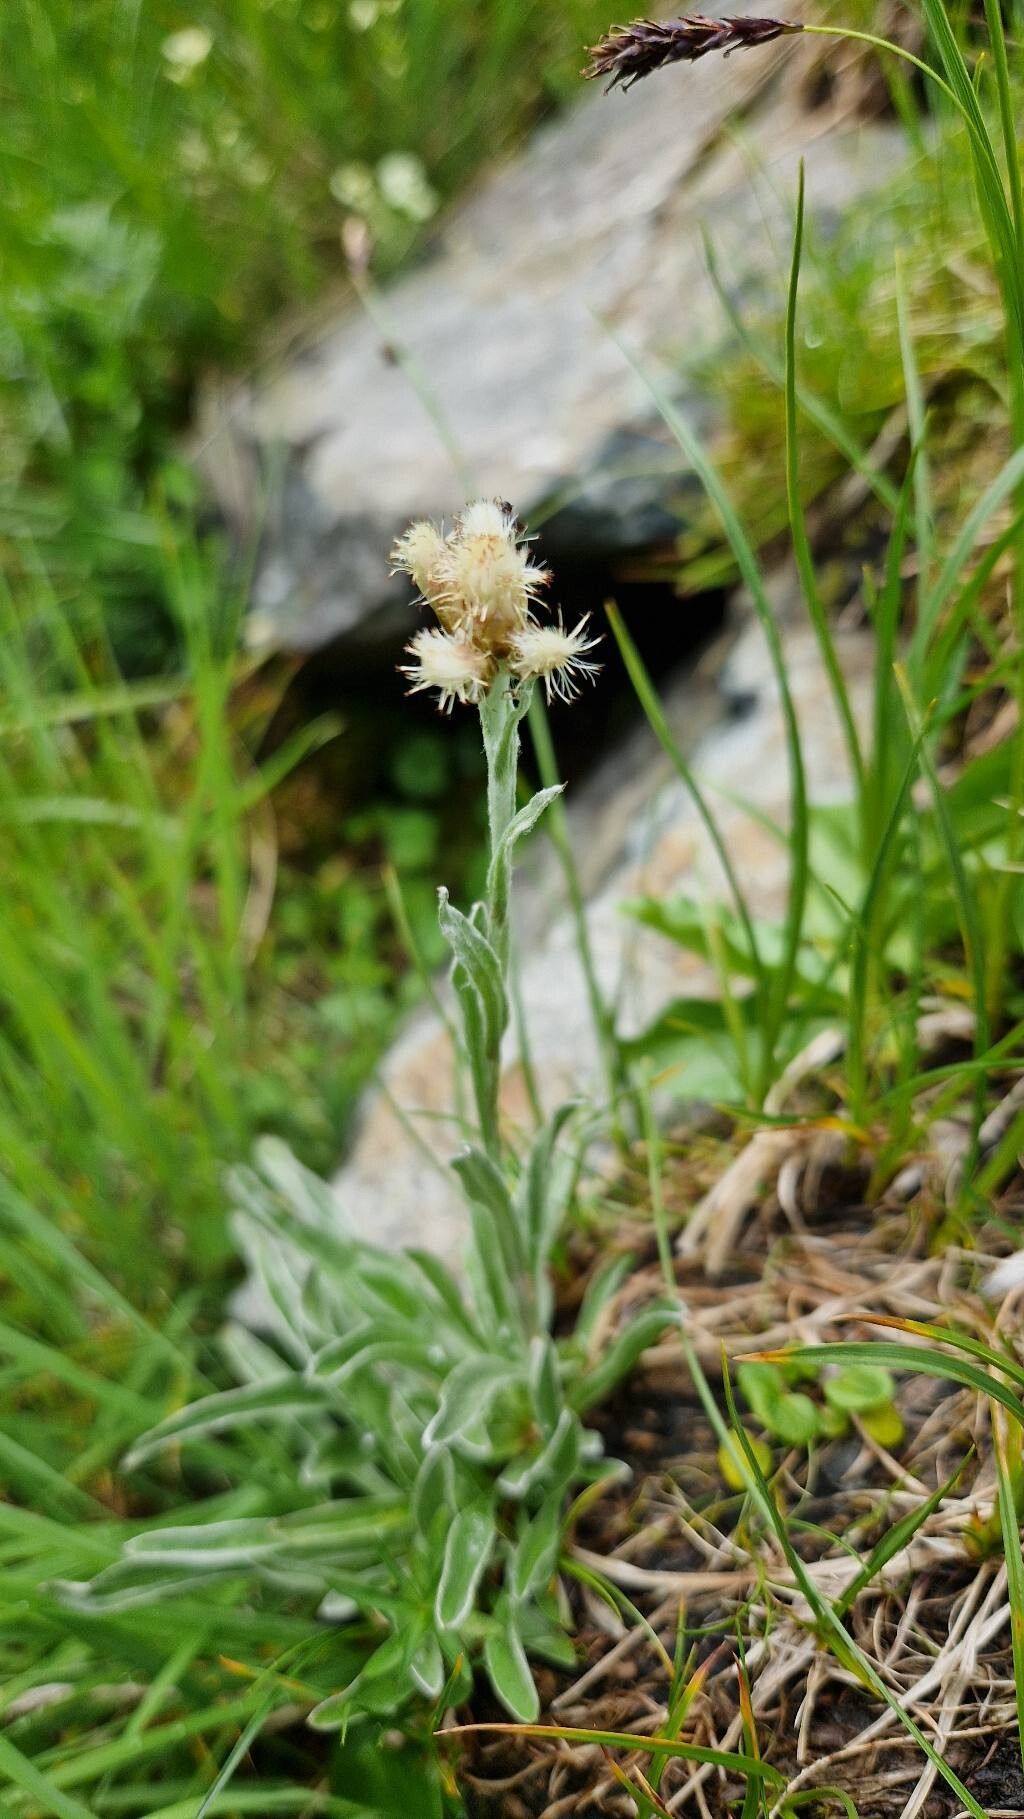
Oh, Antennaria carpatica! If you’ve ever admired those delicate, silvery mats of foliage, often sprinkled with charming little button-like flowers, you’re in for a treat. It’s a plant that whispers charm rather than shouts for attention, and once you get a little patch going, it’s incredibly rewarding to see it spread. I’ve been working with these little beauties for years, and I can tell you, propagating them is a wonderfully satisfying endeavor. While it’s not quite as foolproof as a succulent, I wouldn’t call it challenging either. With a little attention, any gardener looking to expand their collection can achieve success.
The Best Time to Start
My absolute favorite time to get started with Antennaria carpatica propagation is in the late spring or early summer. Once the plant has put on some good growth after winter and is actively producing new shoots, you’ll have the best chance of success. You’re essentially working with vibrant, energetic material that’s just begging to sprout roots.
Supplies You’ll Need
Before we dive in, let’s gather our essentials. Having everything ready makes the process smooth and enjoyable.
- Sharp Pruning Shears or a Clean Knife: For taking your cuttings. Cleanliness is key here!
- Potting Mix: A well-draining, gritty mix is crucial. I like to use a blend of equal parts peat moss, perlite, and coarse sand. Or, a good quality succulent or cactus mix works beautifully.
- Small Pots or Seed Trays: Clean, with drainage holes, of course.
- Rooting Hormone (Optional but Recommended): Especially helpful for a little boost.
- Watering Can or Spray Bottle: For gentle watering.
- Plastic Bags or a Propagator Lid: To create a humid environment.
- Gravel or Small Stones: For decorative and drainage purposes in some methods.
Propagation Methods
Antennaria carpatica is rather versatile, but for ease and success, I tend to favor two main approaches: division and stem cuttings.
Division
This is honestly the most straightforward method, especially if you already have a mature plant.
- Gently Unearth: In late spring or early summer, carefully dig up your established Antennaria carpatica plant. Try to disturb the roots as little as possible.
- Separate the Clumps: You’ll likely see that the plant has formed several distinct sections or clumps. Using your hands or a clean knife, gently pull or cut these clumps apart. Make sure each division has some healthy roots attached.
- Replant Immediately: Dig a small hole in your prepared garden bed or a pot filled with your gritty potting mix. Place the new division in the hole, ensuring the crown (where the stems meet the roots) is at soil level.
- Water Well: Give your newly planted divisions a good watering to help settle the soil around the roots.
Stem Cuttings
This method is a bit more involved but excellent for creating new plants from a single parent.
- Take Your Cuttings: Select healthy, non-flowering stems from your Antennaria carpatica. Using your sharp shears, cut stems that are about 3-4 inches long. Aim for pieces that have at least a couple of sets of leaves.
- Prepare the Cuttings: Carefully remove the lower leaves from the bottom inch or so of each cutting. This prevents them from rotting when they’re in the soil.
- Dip in Rooting Hormone (Optional): If you’re using rooting hormone, dip the cut end of each stem into the powder, tapping off any excess.
- Plant Your Cuttings: Fill your small pots or trays with your well-draining potting mix. Make small holes in the soil with a pencil or your finger. Insert the prepared cuttings into these holes, firming the soil gently around them.
- Create a Humid Environment: Water the soil lightly. Then, cover the pots with a plastic bag or a propagator lid. This traps moisture and humidity, which is essential for the cuttings to root.
The “Secret Sauce” (Pro Tips)
Now, for those little nuggets of wisdom that make all the difference.
- Air Circulation is Key for Cuttings: While humidity is vital, you don’t want stagnant, moldy air. Lift the plastic bag or propagator lid daily for a few minutes to allow for fresh air exchange. This prevents fungal issues from taking hold.
- Bottom Heat for Stamina: If you’re struggling with cuttings to root, consider placing your pots on a heated propagator mat. A gentle warmth from below encourages root development much faster and more reliably, especially if your home is a bit on the cool side.
Aftercare & Troubleshooting
Once your Antennaria carpatica has settled in, whether from division or successful cuttings, it’s time for continued care.
- Watering: Water moderately. Allow the soil to dry out slightly between waterings. Overwatering is the quickest way to invite trouble.
- Light: Place your new plants in a spot that gets bright, indirect light. Direct, scorching sun can be too much for young plants.
- Rooting Check: For cuttings, you should start to see signs of new growth within a few weeks. You can also gently tug on a cutting; if there’s resistance, it has rooted! Once rooted, you can gradually acclimate them to slightly less humid conditions before transplanting them into larger pots or their final garden location.
The most common problem you’ll encounter is rot. If you see stems turning black and mushy, or leaves browning and dropping excessively, it’s almost always due to too much moisture. Adjust your watering routine immediately and ensure good drainage.
A Encouraging Closing
See? It’s really quite manageable, isn’t it? Patience is your best friend when propagating plants. Don’t get discouraged if your first attempt isn’t perfect. Each gardening endeavor is a learning experience. Just keep nurturing those little green shoots, and soon enough, you’ll have a charming carpet of Antennaria carpatica to enjoy. Happy gardening!
Resource: