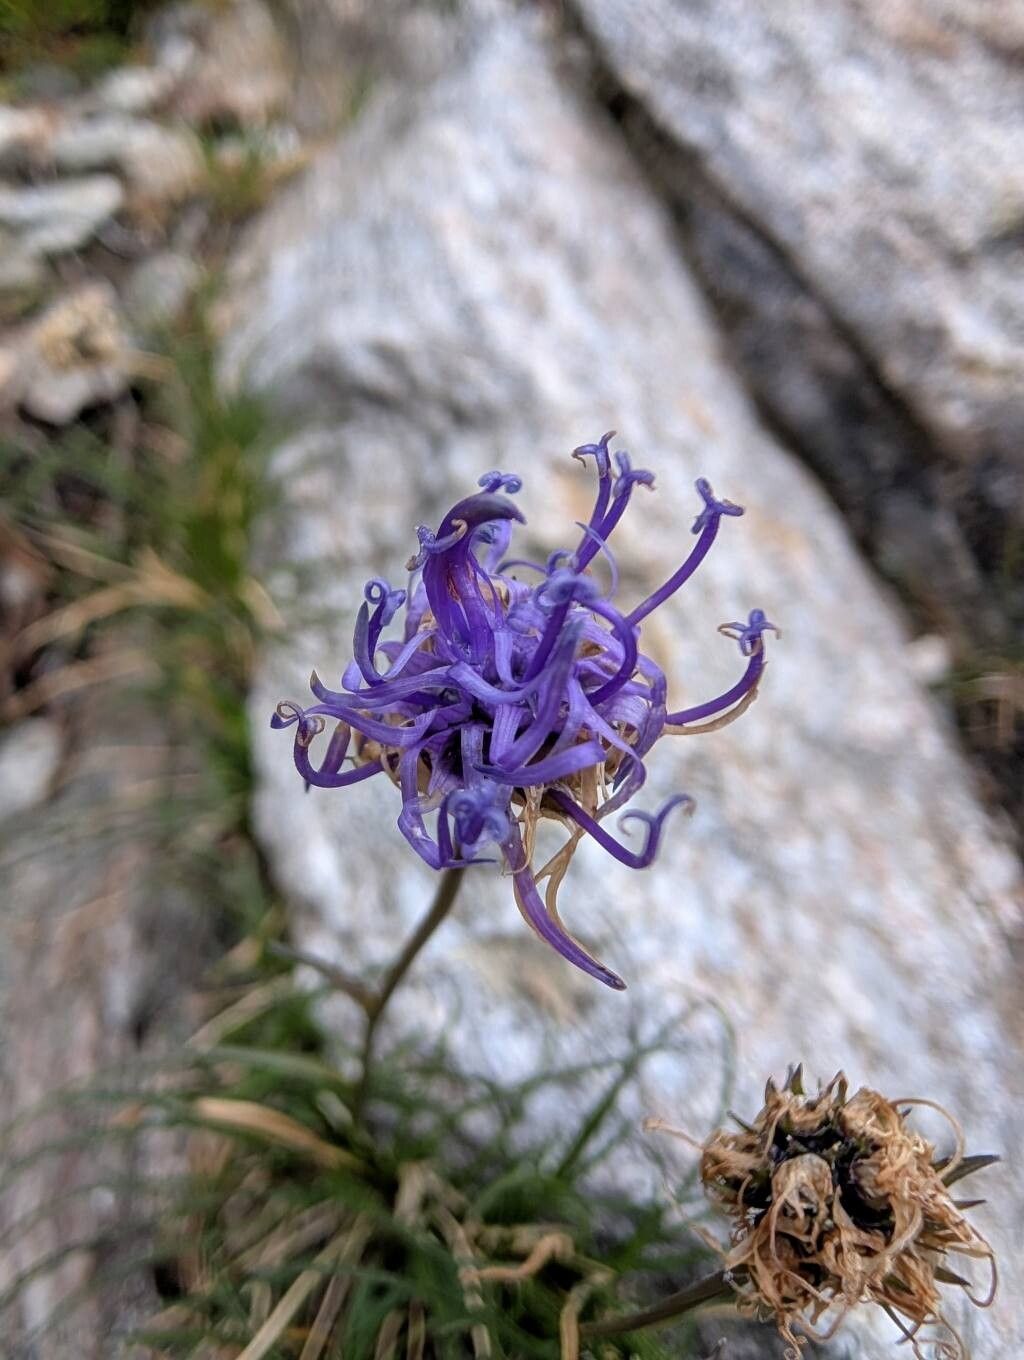
Hello, fellow garden lovers! Today, we’re diving into the delightful world of Phyteuma hemisphaericum, also known as the dwarf rampion. If you’ve ever seen these charming little plants dotting a rock garden or spilling over a pot, you’ll know their appeal. Their delicate, star-shaped blue flowers are simply captivating, and unlike some of their more demanding alpine cousins, they offer a really rewarding gardening experience. Best of all, propagating them is surprisingly achievable, even for those of you just starting your green-thumb journey! It’s a wonderful way to multiply your joy and share these beauties with friends.
The Best Time to Start
For Phyteuma hemisphaericum, the sweet spot for propagation is in late spring to early summer. This is when the plant is actively growing, full of energy, and most receptive to new beginnings. You want to catch it before it gets too stressed by the peak heat of summer.
Supplies You’ll Need
Gathering your materials beforehand makes the whole process smoother. Here’s what I usually have on hand:
- Sharp, clean pruning shears or a small knife: For making clean cuts.
- Well-draining potting mix: A good blend for alpine plants, or a mix of 50% perlite and 50% peat moss or coco coir works wonders.
- Small pots or seedling trays: With drainage holes, of course!
- Rooting hormone (optional but helpful): A powder or gel can encourage faster root development.
- Watering can with a fine rose: To water gently without disturbing young plants.
- Plastic bag or propagation dome: To create a humid environment.
- Bottom heat mat (optional): Can speed things up considerably.
Propagation Methods
There are a couple of ways we can go, but division is often the most reliable for Phyteuma hemisphaericum.
Division, My Favorite Go-To
This is where we gently split a mature plant into smaller, individually rooted sections.
- Gently excavate the parent plant: Carefully remove the Phyteuma hemisphaericum from its pot or its spot in the garden. I like to do this on a slightly overcast day if possible, or in the late afternoon.
- Loosen the root ball: Work your fingers gently through the soil around the roots. You’re looking for natural separations where the plant has divided itself over time. Sometimes you might need to use your shears to carefully cut through tougher root sections, but always aim to preserve as many roots as possible on each new division.
- Separate the divisions: Pull or gently tease apart the sections. Aim for divisions that have at least a few leaves and a healthy root system.
- Pot them up: Fill your small pots with the well-draining mix. Make a little hole in the center and place each division in, ensuring the roots are spread out. Backfill with soil, firmed gently around the base.
- Water thoroughly: Give them a good soak.
Stem Cuttings (A Bit Fiddlier)
This method can also work, but it requires a bit more attention to detail.
- Select healthy stems: In late spring or early summer, choose vigorous, non-flowering shoots. Look for stems that are about 3-4 inches long.
- Make the cut: Using your clean shears, make a clean cut just below a leaf node (the point where a leaf attaches to the stem).
- Prepare the cutting: Remove the lower leaves, leaving just a few at the top to photosynthesize. If you’re using rooting hormone, dip the cut end into it now.
- Pot the cuttings: Fill small pots with your well-draining mix and make a hole with a pencil or dowel. Insert the cutting, ensuring the node is buried. Gently firm the soil around it.
- Water and cover: Water gently and then place the pot into a plastic bag or cover it with a propagation dome. This keeps humidity high, which is crucial for cuttings.
The “Secret Sauce” (Pro Tips)
After years of trial and error, I’ve learned a few tricks that really boost my success rate.
- Don’t let the leaves touch the water in cuttings: If you choose water propagation (which I find less successful for this particular plant), ensure the leaves are above the water line. Rot sets in fast otherwise!
- Bottom heat is your friend: For both divisions and cuttings, placing them on a gentle bottom heat mat can dramatically speed up root development. Think of it as giving them a cozy warm hug from below. I aim for around 70-75°F (21-24°C).
Aftercare & Troubleshooting
Once your Phyteuma hemisphaericum divisions or cuttings are potted, they need a little tender loving care.
- Keep them humid: For cuttings in particular, maintain that high humidity. You might need to vent the plastic bag or dome for a few minutes each day to prevent fungal issues.
- Provide bright, indirect light: Avoid harsh, direct sun, which can scorch delicate new growth.
- Water when the soil surface feels dry: Don’t let them dry out completely, but avoid soggy conditions, which can lead to rot.
- Watch for roots: You’ll know they’re happy when you see new growth appearing. For cuttings, you can give them a gentle tug after a few weeks; resistance means roots have formed.
- Troubleshooting rot: The most common problem is rot. If you see stems turning mushy and black, it’s usually a sign of too much moisture and poor air circulation. Act quickly: try to remove the affected parts, improve drainage if possible, and increase ventilation. This is why a well-draining mix and not overwatering are so critical.
A Little Patience Goes a Long Way
Propagating plants is a journey, and like all good journeys, it requires patience. Don’t be discouraged if a few don’t make it – it happens to us all! The reward of nurturing a new life from an existing one, and seeing it eventually flourish in its own right, is truly special. So grab your tools, get your hands a little dirty, and enjoy the beautiful process of growing more Phyteuma hemisphaericum! Happy gardening!
Resource:
https://identify.plantnet.org/k-world-flora/species/Phyteuma%20hemisphaericum%20L./data