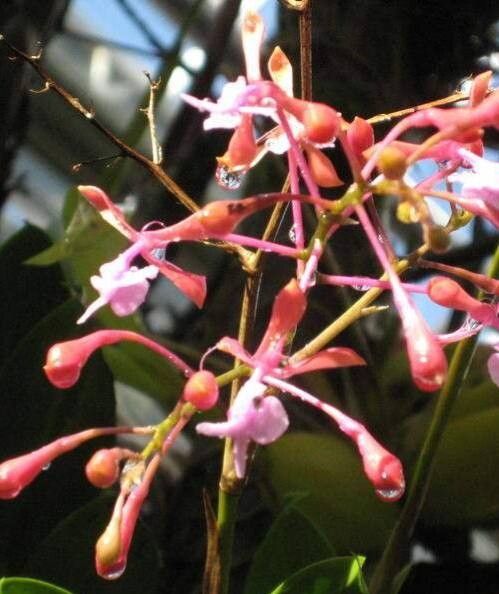
Hey there, fellow plant lovers! I’m so excited to chat with you today about a truly special orchid: Epidendrum atacazoicum. If you haven’t had the pleasure, imagine a cascade of vibrant, star-shaped blooms, often in fiery reds and oranges, gracing slender stems. It’s a real showstopper, and honestly, propagating it yourself feels like unlocking a little bit of horticultural magic. Now, is this one for the absolute beginner? I’d say it’s moderately easy. It’s not as fussy as some delicate species, but it does appreciate a bit of know-how. Trust me though, the rewards are absolutely worth it!
The Best Time to Start
For Epidendrum atacazoicum, like many orchids, spring is your golden ticket. As the plant begins its active growth phase after its winter rest, it’s bursting with energy. You’ll see new pseudobulbs forming and fresh leaves unfurling. This is the perfect moment to take cuttings or divide it, as the plant is most robust and has the best chance of recovering and rooting quickly.
Supplies You’ll Need
Gathering your tools beforehand makes the whole process smoother. Here’s what you’ll want to have on hand:
- Sharp, sterilized pruning shears or a clean knife: This is crucial to prevent disease transfer. I usually wipe mine down with rubbing alcohol.
- Orchid bark mix: A well-draining mix is essential. Look for one with perlite and maybe some charcoal.
- Sphagnum moss: This is great for keeping cuttings moist while they root.
- Small pots or containers: Terracotta or plastic pots with good drainage holes work well.
- Rooting hormone (optional, but recommended): This can give your cuttings a nice boost.
- Clear plastic bags or a small greenhouse: To create a humid environment for your cuttings.
- Watering can with a fine rose: For gentle watering.
Propagation Methods
Epidendrum atacazoicum is most commonly and successfully propagated through stem cuttings and division.
Stem Cuttings
This is my favorite method for increasing my collection!
- Choose your stem: Look for a healthy, mature stem that has at least two or three pseudobulbs (the swollen sections of the stem). Avoid very old, woody stems or brand-new, soft growths.
- Make the cut: Using your sterilized shears, carefully cut the stem about an inch below a pseudobulb. You can also take longer sections as long as each section has at least two pseudobulbs.
- Prepare the cutting: If you’re using rooting hormone, dip the cut end into the powder.
- Plant your cutting: You have a couple of options here. You can gently press the cut end into a pot filled with damp orchid bark mix, ensuring the pseudobulbs are slightly exposed. Alternatively, you can place the cutting directly into a pot of slightly damp sphagnum moss, making sure the pseudobulbs are nestled in.
- Create humidity: Place the pot inside a clear plastic bag or a small propagation box. Seal it loosely or poke a few holes for ventilation. This creates a mini-greenhouse effect.
Division
When your Epidendrumatacazoicum gets a bit crowded in its pot, division is a great way to get more plants and give the mother plant a refresh.
- Gently remove the orchid: Carefully take the entire plant out of its pot.
- Inspect the root system: Gently tease apart the roots to see where the natural breaks are between the pseudobulbs. You’re looking for sections that have healthy roots attached.
- Divide the plant: Using your sterilized knife or shears, carefully cut through the rhizomes (the thick, fleshy stems connecting the pseudobulbs). Make sure each new division has at least two or three healthy pseudobulbs and a good root system. Remove any dead or mushy roots.
- Pot up the divisions: Plant each division in its own pot with fresh orchid bark mix. Again, ensure the pseudobulbs are not buried too deeply.
The “Secret Sauce” (Pro Tips)
Here are a few little tricks I’ve learned over the years that can really make a difference:
- Airing out your cuttings is key! While humidity is essential, you don’t want stagnant air. Every day, for a few minutes, open up that plastic bag or propagation box to allow fresh air to circulate. This helps prevent fungal issues, which can be the downfall of many new propagations.
- Resist the urge to waterlogged: When you first pot up your cuttings or divisions, they won’t have roots to absorb much water. The goal is moist, not wet. Overwatering is the quickest way to invite rot. Let the potting medium almost dry out between waterings.
Aftercare & Troubleshooting
Once your cuttings or divisions are in their new homes, the real waiting game begins!
- Maintain humidity: Keep that humid environment going, but remember to ventilate regularly.
- Light: Place them in a bright, but indirect light spot. Direct sunlight will scorch those tender new growths.
- Patience is a virtue! It can take several weeks, sometimes even a couple of months, for new roots to appear. Look for signs of growth – tiny white nubs emerging from the pseudobulbs or new leaf development. Don’t be discouraged if it takes time.
Troubleshooting: The most common issue you’ll encounter is rot. If you notice a pseudobulb turning black and mushy, it’s likely rot. This is almost always due to overwatering and poor air circulation. If you catch it early, you might be able to cut away the affected part and place the cutting in a drier medium. Unfortunately, if it’s widespread, that cutting may be a lost cause. Don’t give up though! Learn from it and try again.
A Little Encouragement
Propagating Epidendrum atacazoicum is such a wonderfully rewarding experience. Seeing those first new roots emerge, followed by fresh growth, is a feeling like no other. Be patient with yourself and the process. Enjoy the journey, and before you know it, you’ll have a whole new batch of these stunning orchids to admire! Happy growing!
Resource:
https://identify.plantnet.org/k-world-flora/species/Epidendrum%20atacazoicum%20Schltr./data