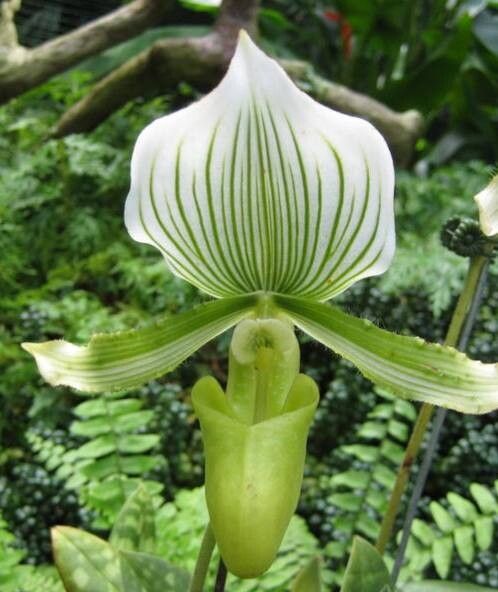
Hey there, fellow plant lovers! I’m so excited to dive into a topic that’s close to my heart: bringing more of those gorgeous Paphiopedilum lawrenceanum orchids into our lives. You know, the ones with those stunning, slipper-like pouches and intricate markings? They’re truly showstoppers, and there’s a special kind of joy that comes from growing them from scratch.
Now, let’s be honest. Paphiopedilum lawrenceanum, while absolutely worth it, isn’t typically the first orchid many beginners tackle. It can be a little finicky. But with a bit of care and patience, you can absolutely succeed. Think of it as a rewarding challenge that teaches you so much about orchid physiology.
The Best Time to Start
For Paphiopedilum lawrenceanum, the end of winter or early spring is usually your sweet spot. This is when the plant is typically finishing its blooming cycle and preparing for active new growth. You’re aiming to propagate when the plant has good energy reserves, which gives your new divisions or cuttings a much better chance of taking off.
Supplies You’ll Need
Before we get our hands dirty, let’s gather our trusty tools:
- Sharp, sterilized pruning shears or a clean knife: Essential for making clean cuts. Sterilize them with rubbing alcohol before and between each cut to prevent disease.
- Paphiopedilum potting mix: This is usually a chunky, well-draining blend. I often use a mix of medium orchid bark, perlite, and a bit of charcoal. You can also find specific Paphiopedilum mixes.
- Small pots or community trays: Choose containers with plenty of drainage.
- Rooting hormone (optional but helpful): A sprinkle of a good orchid rooting hormone can give your cuttings an extra boost.
- Clean water: Preferably rainwater or distilled water.
- Labels and a marker: Don’t skip this! You’ll thank yourself later.
- Clear plastic bags or propagation domes (for division method): To maintain humidity.
Propagation Methods
The most common and successful way to propagate Paphiopedilum lawrenceanum is through division. These orchids grow by producing new growths, or “pups,” from the base of the mother plant.
Division Steps:
- Wait for Dormancy or New Growth: Ideally, propagate when the plant isn’t actively blooming and shows signs of new growth emerging from the base.
- Gently Remove from Pot: Carefully ease your Paphiopedilum lawrenceanum out of its current pot. You might need to gently squeeze the pot or run a knife around the edge if it’s stuck.
- Clean the Roots: Gently tease away the old potting mix from the root ball. This is a good time to inspect the roots. Remove any dead or mushy roots with your sterilized shears. You’re looking for healthy, plump roots.
- Identify Divisions: Look for distinct new growths that have their own roots emerging. You want to divide the plant into sections, with each section having at least two or three healthy growths and a good root system.
- Make the Cut: Using your sterilized shears or knife, carefully cut between the divisions. Make sure each division has enough roots to support it. If the plant is very dense, you might need to be a bit firm.
- Pot Up Your New Plants: Fill your small pots with your prepared Paphiopedilum potting mix. Place each division into its own pot, ensuring the base of the plant is at or slightly above the surface of the mix. Firm the mix gently around the roots.
- Water Lightly: Water sparingly after potting. You don’t want the new potting mix to be saturated, just lightly moist.
The “Secret Sauce” (Pro Tips)
Here are a few things I’ve learned over the years that can make a real difference:
- Don’t Over-Pot: Resist the urge to put a tiny division into a huge pot. A pot that’s too large can hold too much moisture, leading to rot. Use pots that are just slightly larger than the root ball.
- Bottom Heat is Your Friend: For divisions, placing the pots on a seedling heat mat set to a low temperature (around 70-75°F or 21-24°C) can significantly encourage root development. It mimics the warmth they love.
- When in Doubt, Less is More with Watering: New divisions are very susceptible to overwatering. They don’t have a fully established root system to take up moisture. Water only when the potting mix is approaching dryness, and always err on the side of caution.
Aftercare & Troubleshooting
Once your divisions are potted, maintain high humidity. You can achieve this by placing the pots in a clear plastic bag with a few ventilation holes, or using a propagation dome. Keep them in bright, indirect light. Avoid direct sunlight, which can scorch the young leaves.
You’ll know your division is happy when you start to see new leaf growth or the roots beginning to grow and fill the pot. Be patient – this can take several weeks, even a few months.
The most common issue you’ll encounter is rot. If you see leaves turning yellow and mushy, or the base of the plant looks dark and wet, it’s a sign of too much moisture and potential rot. If caught early, you might be able to salvage it by removing the rotted parts, letting it air dry for a day or two, and then repotting in dry, fresh potting mix.
A Encouraging Closing
Propagating Paphiopedilum lawrenceanum is a journey, and like any good garden project, it’s about the process. Don’t be discouraged if your first attempt isn’t perfect. Every plant you nurture, every lesson learned, brings you closer to mastering these beauties. So take a deep breath, gather your supplies, and enjoy the rewarding experience of growing more of these incredible orchids. Happy propagating!
Resource: