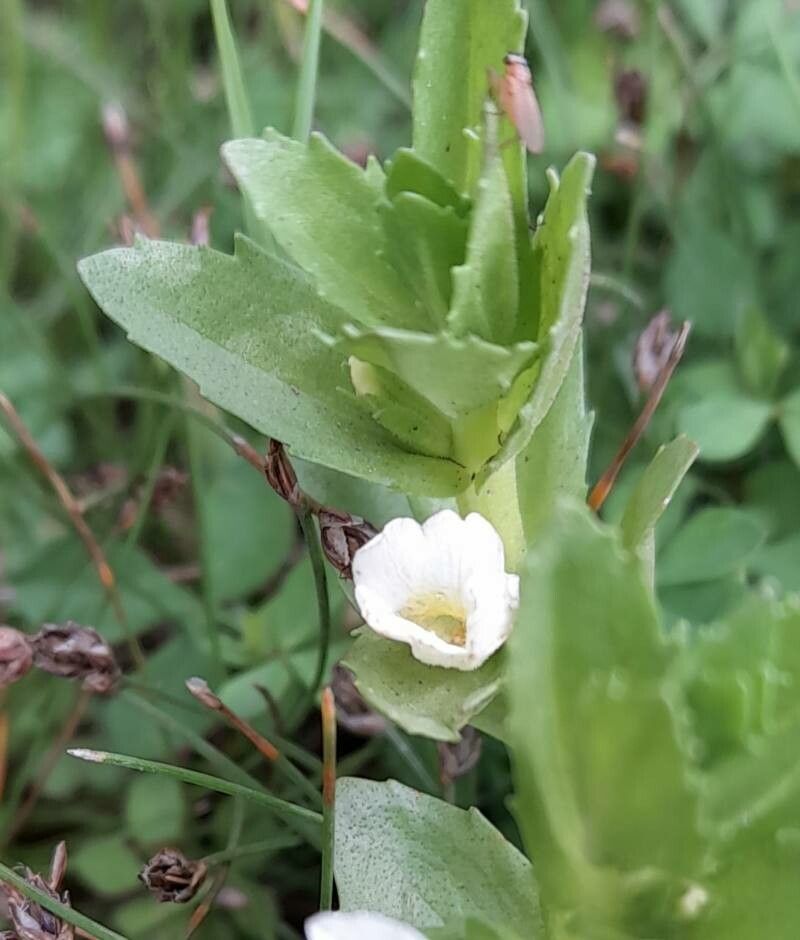
Oh, hello there! Come on in and pull up a chair. It’s so lovely to chat about plants with you today. We’re diving into the wonderful world of Gratiola peruviana, also known as Peruvian Hedge Hyssop. If you’re looking for a charming, delicate beauty for your water garden or damp perennial border, this is it. Its little trumpet-shaped flowers are just delightful, and honestly, watching a new plant sprout from a tiny piece of the parent? That’s pure gardening magic, and I find it incredibly rewarding. Don’t let the fancy name fool you; propagating this beauty is surprisingly straightforward, even for those just starting out.
The Best Time to Start
My favorite time to get started with Gratiola peruviana propagation is in the late spring or early summer. Think of it as when the plant is just hitting its stride, bursting with new growth. The days are getting longer, the sun is warmer, and everything is primed for speedy root development. You’ll want to take cuttings from healthy, vigorous stems that aren’t yet flowering.
Supplies You’ll Need
No need for a fancy lab, just a few trusty companions:
- Sharp Pruning Shears or a Craft Knife: Cleanliness is key here to prevent disease.
- Seed Starting Mix or a Light Potting Mix: Something with good drainage is essential. You can also amend regular potting soil with perlite or vermiculite.
- Small Pots or Trays: Clean ones, of course!
- Rooting Hormone (Optional but Recommended): This is like a little boost for your cuttings.
- Plastic Bag or Propagation Dome: To create a humid environment.
- Water: For watering and for stem cuttings.
- Marker: To label your precious new plants!
Propagation Methods
Let’s get our hands dirty! Here are a couple of methods that work beautifully for Gratiola peruviana:
1. Stem Cuttings: My Go-To Method
This is my favorite for a reason – it’s efficient and produces great results.
- First, select a healthy stem on your established plant. Look for a piece that’s about 3-4 inches long and has plenty of leaves.
- Using your sharp shears or knife, make a clean cut just below a leaf node. This is the little bump where a leaf grows from the stem. Roots tend to form best here.
- Gently remove the lower leaves from the cutting, leaving just a couple of leaves at the very top. This prevents them from rotting in the soil.
- If you’re using rooting hormone, dip the cut end of the stem into the powder. Tap off any excess.
- Fill your small pots with your prepared soil mix. Make a little hole in the center with your finger or a pencil.
- Carefully insert the cutting into the hole, ensuring the leaf nodes where you removed the leaves are below the soil surface. Gently firm the soil around the stem.
- Water the soil lightly to settle it in.
- Place the potted cutting into a plastic bag or cover it with a propagation dome. This traps humidity, which is vital for cuttings to root. Ensure the leaves aren’t touching the sides of the bag if possible.
- Place the pots in a bright spot with indirect light. Avoid direct sun, which can scorch the delicate cuttings.
2. Water Propagation: A See-Through Success
This method is a bit more visual and can be really satisfying to watch.
- Take your stem cuttings just as described above – a 3-4 inch piece with the lower leaves removed.
- Place the cuttings in a glass or jar of clean water. Crucially, make sure no leaves are submerged in the water. Only the bare stem should be in contact with the water.
- Change the water every few days to keep it fresh and oxygenated. Algae can be a problem otherwise.
- Position the jar in a bright location out of direct sunlight.
- You should start to see tiny white root nubs appearing in a week or two. Once the roots are about an inch long, you can transplant them into pots with soil using the steps for stem cuttings.
The “Secret Sauce” (Pro Tips)
Here are a few things I’ve learned over the years that can really boost your success:
- Don’t let those leaves touch the water! I know I mentioned it, but it’s so important for water propagation. Submerged leaves will rot, and that’s a fast track to failure.
- A little bit of bottom heat goes a long way. If you can, place your pots on a seedling heat mat. It gently warms the soil and encourages faster root development. It’s like a cozy little spa for your cuttings!
- Mist your cuttings daily, especially if you don’t have a dome. A gentle misting with plain water helps keep the humidity high and prevents the foliage from drying out while the roots are still forming.
Aftercare & Troubleshooting
Once you see new leafy growth appearing on your cutting, that’s a great sign! It means roots are forming. If you’re propagating in soil, you can gently tug on the cutting. If there’s a bit of resistance, you have roots!
- Gradually acclimate your new plants to less humid conditions. Start by opening the plastic bag or dome for a few hours each day. Then, remove it completely.
- Continue to keep the soil consistently moist but not waterlogged. Overwatering is a common culprit for rot.
- If you see any yellowing leaves, wilting, or a slimy base to your stem, it’s a sign of rot. This usually happens from too much moisture or poor air circulation. Sadly, once rot sets in, it’s hard to recover. Don’t be discouraged, though! Just start again with fresh cuttings and adjust your watering.
A Encouraging Closing
So there you have it! Propagating Gratiola peruviana is a delightful way to expand your garden and share these lovely plants with friends. Be patient with the process. Not every cutting will make it, and that’s perfectly okay. Gardening is a journey of learning and experimentation. Enjoy the little victories, soak up the sunshine (that’s you and your plants!), and have fun creating more beauty!
Resource:
https://identify.plantnet.org/k-world-flora/species/Gratiola%20peruviana%20L./data