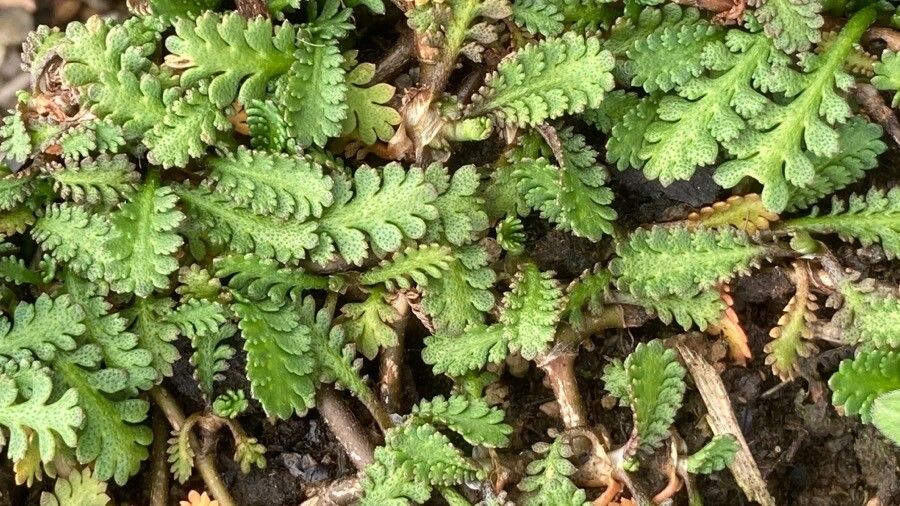
Oh, fall is in the air, and my mind’s already wandering to all the gardening projects I can tackle as the seasons change! One plant that’s been on my mind lately, and for good reason, is Leptinella atrata. If you haven’t met her yet, she’s a real beauty. Think delicate, fern-like foliage in a rich, inky black or deep bronze, with a lovely creeping habit that makes her perfect for spilling over the edges of pots or blanketing a shady spot in your garden.
Why Propagate Leptinella atrata?
Now, I know what you might be thinking: “Is this a tricky one?” Honestly, compared to some fussy plants, Leptinella atrata is quite amenable to propagation. It’s one of those rewarding tasks that doesn’t require a degree in botany. You’ll get to watch those tiny pieces of your favorite plant transform into new, thriving specimens. Plus, think of all the gifts you can share with gardening friends!
The Best Time to Start
For the highest success rate with Leptinella atrata, I always aim for spring and early summer. This is when the plant is actively growing, full of energy, and eager to put out new roots. Waiting until after the main flush of growth has begun, but before it gets too hot and dry, is your sweet spot.
Supplies You’ll Need
To get your Leptinella atrata propagation station ready, you’ll want to gather a few things:
- Sharp pruning shears or a clean craft knife: For making clean cuts.
- Small pots or seed trays: Whatever suits the number of cuttings you’re taking.
- Well-draining potting mix: I like a blend of peat moss or coco coir with perlite or coarse sand. A good commercial seedling mix often works wonders too.
- Rooting hormone (optional but recommended): A powder or gel can give your cuttings a helpful boost.
- Plastic bags or a propagator lid: To maintain humidity.
- Watering can with a fine rose: For gentle watering.
- Labels: Don’t forget to label your pots!
Propagation Methods
Let’s get our hands dirty with the most reliable ways to multiply your Leptinella atrata.
Stem Cuttings
This is my go-to method for Leptinella atrata. It’s straightforward and usually yields great results.
- Take your cuttings: In spring or early summer, select healthy, non-flowering stems. I look for stems that are about 3-4 inches long. Using your sharp pruning shears or knife, make a clean cut just below a leaf node (where a leaf meets the stem). This is where new roots are most likely to form.
- Prepare the cuttings: Gently remove the lower leaves from the cutting. You want to leave 2-3 pairs of leaves at the top. If the leaves are very large, you can even snip them in half to reduce water loss.
- Dip in rooting hormone (optional): If you’re using it, dip the cut end of the stem into the rooting hormone, tapping off any excess.
- Plant your cuttings: Fill your small pots or trays with your prepared potting mix. Make small holes with a pencil or your finger, and gently insert the cuttings, ensuring the leaf nodes are covered by the soil.
- Water and cover: Water gently until the soil is moist but not waterlogged. Then, cover the pots with a plastic bag or a propagator lid. This creates a humid environment, which is crucial for cuttings. Poke a few small holes in the bag for ventilation.
Division
If your Leptinella atrata is already a well-established clump, division is a fantastic way to get larger, more mature plants right away.
- Gently unpot: Carefully remove the entire plant from its pot or the ground.
- Separate the root ball: Gently tease apart the root ball with your fingers. You’re looking for sections that have their own roots and shoots. If it’s a bit stubborn, you can use a clean, sharp knife to help separate them.
- Replant: Pot up each division into its own container filled with well-draining soil. Water them in well. These divisions will establish faster than cuttings.
The “Secret Sauce” (Pro Tips)
Here are a couple of little tricks I’ve learned over the years that can really make a difference:
- Don’t let leaves touch the water (if water propagating): While I usually stick to soil for Leptinella atrata, if you do try water propagation (simply placing cuttings in a jar of water), make sure absolutely no leaves are submerged. Any foliage below the waterline will rot and can infect the entire cutting.
- Consider bottom heat: For faster rooting, especially if your room is a bit on the cooler side, placing your pots on a heated propagator mat can significantly speed things up. It mimics the warmth of spring soil beautifully.
- Patience with the bloom: If your cuttings start to show flower buds, it’s tempting to leave them. But for the best chance of successful rooting, pinch off any flower buds as soon as you see them. The plant’s energy is much better spent on root development.
Aftercare & Troubleshooting
Once your Leptinella atrata cuttings have been in their humid environment for a few weeks, you’ll want to check for roots. Gently tug on a cutting; if there’s resistance, you’ve got roots!
- Introduce to drier air: Gradually start to acclimatize your new plants to normal room humidity. Open the plastic bag a little more each day over a week or so.
- Light: Once they’re rooted and settled, place them in a spot with bright, indirect light. Avoid harsh, direct sun, which can scorch their delicate leaves.
- Watering: Keep the soil consistently moist but never soggy. Overwatering is a common culprit for failure.
Troubleshooting:
The most frequent issue you might encounter is rot. This is almost always due to too much moisture and poor air circulation. If you see stems turning mushy or blackening, try removing the affected cutting, ensuring better airflow, and letting the soil dry out slightly between waterings. If you’re starting from seed (less common for Leptinella atrata), damping-off is a risk, which is why good drainage and avoiding overwatering are key.
Keep Growing!
Propagating Leptinella atrata is a wonderfully satisfying way to expand your collection or share the joy of gardening. Be patient with the process – nature has its own rhythm. Enjoy watching those tiny cuttings transform, and before you know it, you’ll have more of this gorgeous, dark-leaved groundcover than you know what to do with! Happy propagating!
Resource: