Hello, garden friends! It’s so lovely to have you join me today. We’re going to dive into a topic that brings me an immense amount of joy: propagation. And our star today is a wonderfully resilient succulent: Sedum frutescens.
Why You’ll Love Propagating Sedum frutescens
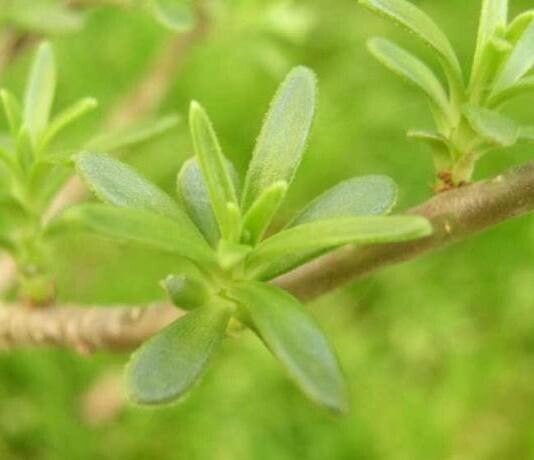
Sedum frutescens, often called “Burro’s Tail” if it’s the more trailing variety (though there are similar upright Sedum species that can look this way too!), is just a delight. Those plump, adorable leaves create such a lovely cascade or a charming mound. It brings a touch of carefree charm to any space, whether it’s gracing a sunny windowsill indoors or adding texture to a rock garden outdoors.
The best part? Propagating them is incredibly rewarding, and I’m happy to tell you that Sedum frutescens is quite forgiving for beginners. It’s a fantastic way to multiply your collection, share cuttings with friends, or simply fill in those bare spots in your containers.
When to Get Your Hands Dirty
The sweet spot for propagating Sedum frutescens is during its active growing season. For most of us, this means late spring through early summer. The plant is actively producing new growth, and the warmer temperatures encourage faster rooting. You can propagate at other times, but you’ll likely see the best, most vigorous results during this prime window.
What You’ll Need for Success
Gathering your tools beforehand makes the whole process feel so much smoother. Here’s what I usually have on hand:
- Sharp Pruning Shears or Scissors: Clean cuts are crucial to prevent disease.
- Well-Draining Potting Mix: A cactus and succulent mix is ideal. You can also create your own by mixing equal parts potting soil, perlite, and coarse sand.
- Small Pots or Seedling Trays: Terracotta pots are great because they breathe.
- Rooting Hormone (Optional but Recommended): This can give your cuttings a little boost to get started.
- Gloves: Especially if you find working with soil a bit messy!
- A Spray Bottle: For gently misting.
My Favorite Ways to Grow More Sedum
There are a couple of really effective ways to propagate Sedum frutescens. I tend to lean towards what feels most natural and has consistently good results for me.
Method 1: Stem Cuttings (My Go-To!)
This is by far my favorite method, and it’s super easy.
- Take Your Cuttings: Using your clean shears, snip off sections of the stem that are about 3-6 inches long. Try to get pieces that have a good amount of leaves.
- Let Them Callus: This is important! Lay your cuttings out on a dry surface (like a paper towel or a clean tray) in a shaded spot for about 2-5 days. You want the cut end to dry and form a callus. This prevents rot when you plant them.
- Dip in Rooting Hormone (Optional): If you’re using rooting hormone, lightly dip the callused end into the powder or gel. Just tap off any excess.
- Plant Them Up: Fill your small pots with your well-draining soil mix. Make little holes with your finger or a pencil. Gently insert the callused end of each cutting into the soil. You can plant several cuttings in one pot, giving them a little space.
- Wait for Roots: Do not water immediately. Let them sit for a day or two after planting. Then, water very sparingly. The soil should be barely moist. Place them in a bright spot but out of direct, harsh sunlight.
Method 2: Leaf Cuttings (For the Patient Gardener)
While stem cuttings are quicker, you can also propagate Sedum frutescens from individual leaves. It takes longer, but it’s a fun experiment!
- Gently Remove Leaves: Carefully twist or cut individual leaves from the stem. Try to get the whole leaf, including the tiny part where it attaches to the stem.
- Callus, Callus, Callus: Just like stem cuttings, let these leaves callus over for a few days in a dry, shaded spot.
- Lay Them on Soil: Fill a shallow tray or pot with your succulent mix. Lay the callused leaves on top of the soil. You don’t need to bury them.
- Mist Gently: Lightly mist the soil surface every few days. The goal is to keep it just barely humid, not wet.
- Patience is Key: You’ll start to see tiny roots and even baby plantlets emerge from the base of the leaf. This can take several weeks! Once the new plantlet is a decent size and has roots, you can carefully plant it deeper into the soil.
My “Secret Sauce” for Extra Green Thumbs
After years of trial and error, I’ve picked up a few little tricks that make a big difference.
- The “No Touch” Rule for Water: If you decide to try water propagation (which I find less reliable for Sedum frutescens than soil methods, but some swear by it!), ensure the leaves absolutely do not touch the water at all. Only the stem should be submerged. They tend to rot if the leaves get wet.
- A Warmed Bottom: For stubborn cuttings, especially if you’re propagating in cooler weather, a seedling heat mat can work wonders. It provides gentle bottom heat, encouraging root development much faster without overheating the plant itself.
- Don’t Overcrowd: While it’s tempting to cram as many cuttings as possible into a pot, give them a bit of breathing room. Good air circulation is your friend in preventing fungal issues.
Life After Roots & Nipping Problems in the Bud
Once you see those tiny white roots appearing, congratulations! You’re well on your way.
- Gradual Transition: When your cuttings have a good root system (they should feel secure when you gently tug them), you can begin to transition them to their permanent pots. Continue to use your well-draining succulent mix.
- Watering Slowly: Water them thoroughly but allow the soil to dry out completely between waterings. Succulents store water in their leaves, so they don’t like soggy feet.
- Signs of Trouble: The most common issue you’ll encounter is rot. If your cuttings turn mushy, black, or brittle, it’s usually a sign of too much moisture. If you see this, pull out the affected cutting immediately to prevent it from spreading. Ensure your soil drains well and you’re not overwatering. Yellowing leaves can also indicate too much water.
Go Forth and Grow!
Propagating plants is such a wonderfully satisfying experience. It’s a tangible way to connect with nature and witness the miracle of new life. Be patient with your Sedum frutescens, give them the right conditions, and don’t be disheartened if a few don’t make it. Each attempt is a learning experience. Enjoy watching your little cuttings transform into beautiful, thriving succulents! Happy gardening!
Resource:
https://identify.plantnet.org/k-world-flora/species/Sedum%20frutescens%20Rose/data