Oh, hello there! Come on in, pull up a chair. I’m so glad you stopped by. Today, we’re going to talk about a little gem that I absolutely adore: Geum glaciale. If you’re looking to add some delicate, alpine charm to your garden, and want to fill it with more of these beauties, propagating them yourself is an incredibly rewarding endeavor. Think of it as making little gifts for your future self, or for your gardening friends!
Why Geum glaciale Steals My Heart
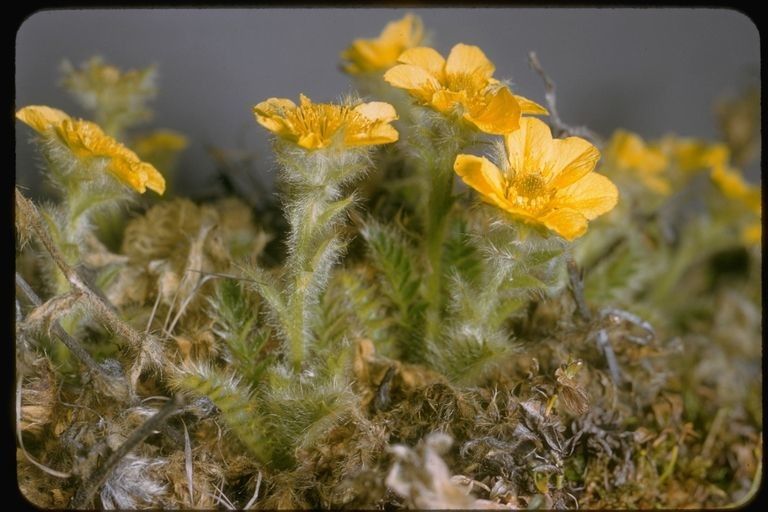
Geum glaciale, with its intricate, often bright flowers and lovely foliage, brings a touch of mountain magic right to our gardens. Seeing it thrive and then being able to create more of it? That’s pure gardening joy. Now, I’ll be honest, Geum can be a tad fussier than your average perennial, but don’t let that intimidate you. With a little attention to detail and these tips, you’ll be well on your way.
When to Get Your Hands Dirty
For Geum glaciale, the best time to propagate, especially through division or by taking cuttings, is typically late spring or early summer. This is when the plant is actively growing but before the intense heat of midsummer can stress young bits too much. After the main flowering flush is also a good window.
Your Propagation Toolkit
Here’s what you’ll want to have on hand:
- Sharp, clean pruning shears or a sharp knife: For making clean cuts.
- Small pots or trays: With good drainage holes.
- Propagating mix: A light, airy blend. I like to use a 50/50 mix of perlite and seed-starting mix or sterilized compost.
- Rooting hormone (optional but recommended for cuttings): Powder or gel form.
- A watering can with a fine rose: For gentle watering.
- Labels and a marker: To keep track of what you’ve planted where.
Bringing New Geums to Life
There are a couple of ways we can go about this. My personal favorite for Geum glaciale is division, as it’s often the most successful.
Method 1: The Gentle Art of Division
- Dig Carefully: In late spring or early summer, gently dig up your established Geum glaciale plant. Try to disturb the roots as little as possible.
- Inspect and Separate: Carefully shake off some of the excess soil. You’ll see that the plant naturally forms clumps. Using your fingers or a clean trowel, gently tease apart the root ball into smaller sections. Aim for pieces that have a good amount of healthy roots and at least one or two shoots.
- Pot Them Up: Plant each division into its own pot filled with your propagating mix. Make sure the crown of the plant (where the leaves emerge from the roots) is just at the soil surface.
- Water Gently: Water thoroughly but gently so you don’t dislodge the soil.
Method 2: Taking Stem Cuttings (A bit more advanced, but doable!)
- Choose Your Stems: Select healthy, non-flowering stems from a vigorous plant. Look for stems that are not too woody but have a bit of substance to them.
- Make the Cut: Using your sharp shears, take cuttings that are about 3-4 inches long. Make the cut just below a leaf node (where a leaf attaches to the stem).
- Prepare the Cutting: Remove the lower leaves, leaving just one or two at the very top. This helps prevent rot.
- Dip in Hormone: If you’re using rooting hormone, lightly dip the cut end into it. Shake off any excess.
- Plant Them: Insert the cuttings into pots filled with your moist propagating mix. Make a small hole with a pencil or skewer first to avoid rubbing off the rooting hormone. Gently firm the soil around the stem.
- Water Lightly: Water again to settle the soil.
My “Secret Sauce” for Success
These little tricks have saved more than a few propagation attempts for me.
- Think “Sparkling Clean”: This is crucial. Always use clean tools and pots. Anything harboring disease can quickly undo all your hard work, especially with these delicate plants.
- Bottom Heat is Your Friend (for cuttings): If you’re trying stem cuttings, placing your pots on a heat mat designed for seedlings can significantly speed up root formation. It mimics the warmth of spring soil and encourages those roots to get going.
- Avoid Over-Wicking: Whether you’ve divided or taken cuttings, the biggest mistake is letting them sit in waterlogged soil. Good drainage is non-negotiable. If you see water pooling, your mix is too heavy or your pot has poor drainage.
Aftercare and What to Watch For
Once your new Geum divisions or cuttings are planted, keep them in a bright spot out of direct, harsh sunlight. Water them when the top inch of soil feels dry. Don’t let them dry out completely, but don’t keep them soggy either.
If you’re propagating by division, you should see new growth emerge within a few weeks. For cuttings, it might take a bit longer, maybe 4-6 weeks, before you feel resistance when gently tugging on the stem – that’s a good sign of roots!
Now, let’s talk about the dreaded “rot.” If you see stems turning mushy and black, or the whole cutting wilting dramatically and looking unwell, that’s usually a sign of too much moisture. Sadly, a rotted cutting is usually a goner, but don’t despair! Learn from it and adjust your watering.
Enjoy the Journey
There you have it! Propagating Geum glaciale is a wonderful way to get more of these beauties to fill your garden. Be patient with yourself and with the plants. Some will take off immediately, others might need a little more time to show their true colors. Gardening is all about observation and learning, and the joy of watching a new plant thrive from a little piece of an old one is truly special. Happy propagating!
Resource:
https://identify.plantnet.org/k-world-flora/species/Geum%20glaciale%20Adams%20ex%20Fisch./data