Oh, hello there! Come on in, put your feet up. I’ve got a fresh pot of coffee brewing, and I can’t wait to chat about one of my favorite, less-talked-about beauties: Flagellaria guineensis.
My Love Affair with Flagellaria guineensis
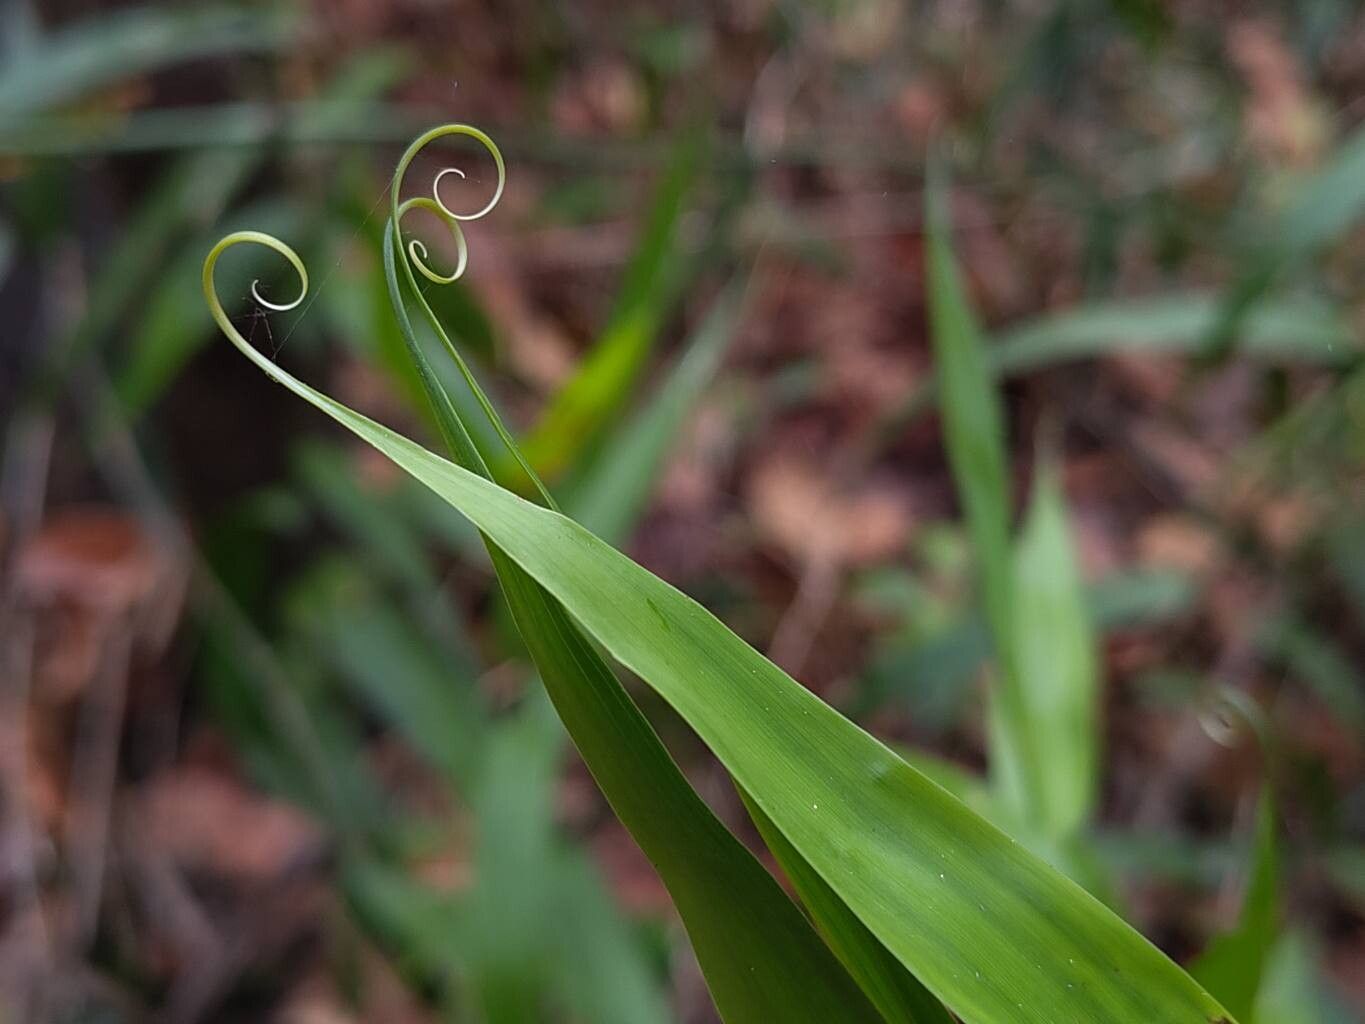
You might know it as the whip vine, or perhaps the even more descriptive crawler lily. This isn’t your average, flashy bloom, and that’s precisely why I adore it. Its delicate, cascading tendrils and those fascinating, almost reed-like leaves bring such an elegant, naturalistic charm to any garden space or indoor collection. Plus, there’s a special kind of joy that comes from coaxing a new life from a piece of an existing plant. It’s a tangible connection to nature’s magic, and honestly, watching that first tiny root emerge is a thrill every single time. Now, is it a beginner’s plant for propagation? I’d say it’s moderately easy, but with a few key tricks, even those newer to the plant-parenting game can achieve success.
The Best Time to Start Your New Friends
For Flagellaria guineensis, I find the late spring to early summer is usually your absolute best bet. This is when the plant is in its active growing phase, meaning it has the energy reserves to push out roots and new shoots. You’ll want to look for healthy, vigorous stems that aren’t flowering – those are the ones packed with potential.
Supplies You’ll Need
Gathering your tools beforehand makes the whole process smoother. Here’s what I usually have on hand:
- Sharp Pruning Shears or a Clean Knife: Essential for clean cuts.
- Potting Mix: A well-draining mix is crucial. I often use a blend of equal parts perlite, coco coir, and a good quality potting soil. For even better aeration, you can add a bit of orchid bark.
- Small Pots or Seed Trays: Choose pots with drainage holes!
- Rooting Hormone (Optional but Recommended): A powder or gel can significantly speed up root formation.
- Watering Can or Mister: Gentle watering is key.
- Clear Plastic Bags or Domes: To create a humid environment.
- Labels and a Pen: Don’t forget to label your propagations!
Propagation Methods: Getting Down to Business
Flagellaria guineensis is quite happy to be propagated by stem cuttings and also through division.
Stem Cuttings: My Go-To Method
This is usually the most reliable way to get a new plant going.
- Take Your Cuttings: Using your sharp shears or knife, select a healthy stem from your parent plant. You want cuttings that are about 4-6 inches long. Make sure each cutting has at least two or three nodes (those little bumps on the stem where leaves or roots can form). Make your cut just below a node. This is vital, as this is where root hormones are most concentrated.
- Prepare the Cuttings: Gently remove the lower leaves from the cutting, leaving just the top one or two. If the remaining leaves are very large, you can cut them in half to reduce water loss.
- Apply Rooting Hormone: If you’re using rooting hormone, dip the cut end of the stem into the powder or gel, tapping off any excess.
- Plant Your Cuttings: Fill your small pots with your prepared, well-draining potting mix. Make a small hole in the center of the soil and insert the cut end of your Flagellaria cutting, ensuring at least one node is below the soil surface. Gently firm the soil around the stem.
- Create Humidity: Water the soil gently until it’s evenly moist but not soggy. Then, cover the pot with a clear plastic bag or a propagation dome. This creates a mini-greenhouse, keeping the humidity high around your cuttings, which is crucial for them to root. You can secure the bag with a rubber band around the pot.
- Placement: Place the pots in a bright location, but out of direct sunlight. A warm spot is ideal.
Division: For When Your Plant is Lush
If your Flagellaria guineensis has grown into a nice, full clump, dividing it is a simple way to get more plants.
- Prepare the Plant: Gently remove the entire plant from its pot.
- Examine the Clump: Look at the root system. You’ll want to find natural divisions where you can separate sections of the plant, each with a healthy root system and some top growth.
- Separate Carefully: Using your hands or a clean trowel, carefully tease apart the root ball. If the roots are tightly matted, you might need to use a sharp knife or even your shears to cut through them. Aim to create smaller clumps, each with at least a few stems and a decent amount of roots.
- Pot Up: Plant each division into its own pot filled with your well-draining potting mix, just as you would with a new purchase. Water thoroughly.
The “Secret Sauce”: My Insider Tips
Here are a few things I’ve learned over the years that make a real difference:
- Don’t Let Leaves Touch the Water (for cuttings): If you opt for water propagation instead of soil (though soil is generally more reliable for Flagellaria), make sure none of the leaves are submerged. Roots will form at the nodes, and if leaves are in the water, they’ll rot, potentially taking the whole cutting with them.
- Bottom Heat is Your Friend: While not strictly necessary, placing your pots on a gentle heat mat (specifically designed for propagation) can really kickstart root development, especially if your home tends to be a bit on the cooler side. It mimics the warmth of spring soil.
- A Little Patience Goes a Long Way: Flagellaria isn’t the fastest grower when it comes to putting out roots. Don’t be tempted to constantly dig them up to check. You’ll know they’re rooting when you see new growth emerging from the top, or if you gently tug on the cutting and feel resistance from developing roots. This can take anywhere from 4 to 8 weeks, sometimes even longer.
Aftercare & Troubleshooting
Once your cuttings have rooted (you can test this by a gentle tug – if there’s a bit of resistance, they’ve made it!), it’s time to adjust their care.
- Acclimatize: Gradually introduce your new plants to higher light levels and lower humidity. Remove the plastic bag or dome for increasing periods over a week or so.
- Watering: Water when the top inch of the soil feels dry.
- Fertilizing: Wait until you see consistent new growth before light feeding with a balanced liquid fertilizer, usually diluted to half strength.
Common Signs of Failure: The most frequent issue you’ll encounter is rot. This usually happens if the soil is too wet, the drainage is poor, or there’s not enough air circulation. Your cutting will turn mushy and black. If you see this, unfortunately, it’s likely past saving. Damping off, a fungal disease that affects seedlings and cuttings, can also be an issue, causing the stem to collapse at the soil line. Good airflow and avoiding overwatering are your best defenses.
The Joy of New Growth
Propagating Flagellaria guineensis is a wonderful way to expand your collection or to share this unique plant with friends. Remember to be patient, to observe your little propagations, and to enjoy the process. It’s a journey, and every new root, every tiny leaf unfurling, is a little victory. Happy propagating!
Resource:
https://identify.plantnet.org/k-world-flora/species/Flagellaria%20guineensis%20Schumach./data