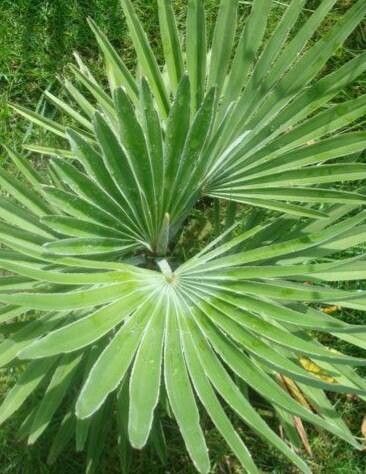
Oh, the King Palm! Trachycarpus princeps is such a stunner, isn’t it? With its regal fronds and the almost prehistoric, fuzzy trunk, it really commands attention in any garden. Growing your own from scratch is incredibly satisfying. Watching a tiny seed or cutting transform into a miniature version of that magnificent palm is a journey I honestly never get tired of. Now, for Trachycarpus princeps, I’d say it’s moderately challenging for absolute beginners. It’s not as fuss-free as, say, a pothos, but with a little patience and the right approach, you’ll be rewarded.
When to Get Your Hands Dirty
The absolute best time to begin propagating your King Palm is in the late spring or early summer. This is when the plant is really coming into its own, with active growth pushing through. Starting around April to June in most climates gives your new propagations plenty of time to establish before the cooler weather sets in. So, as the days get longer and the warmth starts to build, that’s your cue!
Your Arsenal of Tools
Gathering your supplies beforehand makes the whole process so much smoother. Here’s what you’ll want in your propagation kit:
- Sharp Pruning Shears or a Knife: For clean cuts, essential for preventing disease.
- Seed-Starting Mix or a Well-Draining Potting Mix: I like a blend of peat moss, perlite, and a touch of coarse sand. Good drainage is key!
- Small Pots or Seed Trays: Clean, with drainage holes, of course.
- Rooting Hormone (Optional but Recommended): Especially helpful for cuttings. Look for a powder or gel.
- Clear Plastic Bags or a Propagator: To create a humid environment.
- Watering Can with a Fine Rose: For gentle watering.
- Labels and a Marker: To keep track of what you’ve planted.
- Bottom Heat Source (Optional): A seedling heat mat can significantly speed up root development.
Bringing Your King Palms to Life: Propagation Methods
Trachycarpus princeps is primarily propagated from seed, though taking cuttings is possible, albeit trickier. Let’s focus on the most reliable methods.
1. From Seed: The Patient Gardener’s Quest
This is the most common and generally successful way to propagate Trachycarpus princeps.
- Gathering Seeds: If you’re lucky enough to have a mature flowering and fruiting Trachycarpus princeps, you can collect seeds from the fruits. The fruits are usually small, date-like berries that turn black when ripe. If you’re buying seeds, ensure they’re from a reputable source and are fresh.
- Cleaning the Seeds: Gently remove any fruit pulp. You can soak the seeds in water for a day or two to help loosen any remaining fleshy bits.
- Soaking (Optional but Helpful): Some growers report that soaking the seeds in warm water for 24-48 hours can improve germination rates.
- Sowing: Fill your small pots or trays with your seed-starting mix. Sow the seeds about half an inch deep. You can sow them individually in small pots or a few per tray.
- Watering: Water the soil gently but thoroughly. You want it to be consistently moist, but not waterlogged.
- Creating Humidity: Cover the pots or trays with a clear plastic bag or place them in a propagator. This is crucial for maintaining the high humidity seedlings crave.
- Location, Location, Location: Place the pots in a warm spot, ideally with bright, indirect light. If you’re using a heat mat, set it to around 70-80°F (21-27°C).
- Patience is a Virtue: Germination can be slow and unpredictable. It can take anywhere from three months to over a year. Don’t give up! Keep the soil moist and the humidity high. You’ll start to see tiny shoots emerge when you least expect it.
2. Stem Cuttings: A Bit More Adventurous
This method is less common for Trachycarpus princeps and has a lower success rate than seeds. It usually involves taking a piece of the trunk with some roots attached, which is more of a division technique. If you have a very mature palm that you’re looking to divide, this might be an option.
- The Best Time: This is best done in spring or early summer when the plant is actively growing.
- The Cut: Carefully excavate around the base of the main trunk. You’re looking for a section of the trunk that has developed its own root system and ideally a small shoot or two. Use a very sharp, clean knife or saw to cleanly separate this section from the mother plant, ensuring you get a good portion of roots with it.
- Preparation: Trim off any damaged roots. You can dip the cut end into rooting hormone (powder or gel) to encourage new root growth.
- Planting: Pot the cutting in a well-draining mix, similar to what you’d use for seeds. Ensure the base of the cutting is firmly in the soil.
- Watering and Humidity: Water well and then place the pot in a humid environment, just like with seeds. A clear plastic bag or propagator is essential here.
- Careful Monitoring: Keep the soil consistently moist and in a warm spot with bright, indirect light. This method requires even more patience, as root formation can take many months.
The “Secret Sauce”: My Insider Tips
After years of coaxing reluctant plants, I’ve picked up a few tricks.
- Don’t Over-Water Seeds Initially: While you want that consistent moisture, avoid creating a swampy environment when seeds are just starting out. Too much water can lead to fungal issues and rot before they even have a chance to sprout. Aim for “damp, not soggy.”
- Bottom Heat is Your Friend: If you’re serious about speed and success, especially with seeds, a seedling heat mat makes a world of difference. It mimics the warmth of the ground and can dramatically shorten germination times and increase the number of successful sprouts.
- Air Circulation is Crucial for Cuttings: If you’re trying the cutting method, once you see signs of root development, it’s important to gradually introduce more air circulation. This helps prevent fungal issues that can plague newly rooted cuttings. After a few weeks, start opening the plastic bag or propagator for increasing periods each day.
Aftercare and What to Watch For
Once you see that first tiny frond emerge, it’s a cause for celebration!
- Gradual Acclimatization: As your seedling grows, gradually reduce the humidity. Slowly start opening the plastic bag or propagator for longer periods each day over a week or two. Once the seedling has a few established leaves, you can remove the cover entirely.
- Light: Continue to provide bright, indirect light. Avoid direct, harsh sunlight, which can scorch tiny seedlings.
- Watering: Water when the top inch of soil feels dry. Again, avoid overwatering.
- Repotting: When the seedling has outgrown its current pot, typically after a year or so, carefully transplant it into a slightly larger container with fresh, well-draining soil.
Troubleshooting: The most common issue you’ll face is rot. This usually stems from overwatering and poor drainage. If you see your seedling wilting, turning mushy, or developing dark spots, it’s a sign of rot. Unfortunately, at that stage, it’s often too late to save. Prevention through good watering practices and excellent drainage is key. If you’re trying cuttings and see no signs of root development after several months, it might just not have taken. That’s part of the gardening adventure!
Go Forth and Grow!
Propagating Trachycarpus princeps might take a little extra patience and a keen eye, but the reward of nurturing these magnificent palms from their beginnings is truly special. Don’t be discouraged if your first attempt isn’t perfect. Each seedling is a little triumph, a testament to your green thumb and persistence. Happy growing, my friend!
Resource: