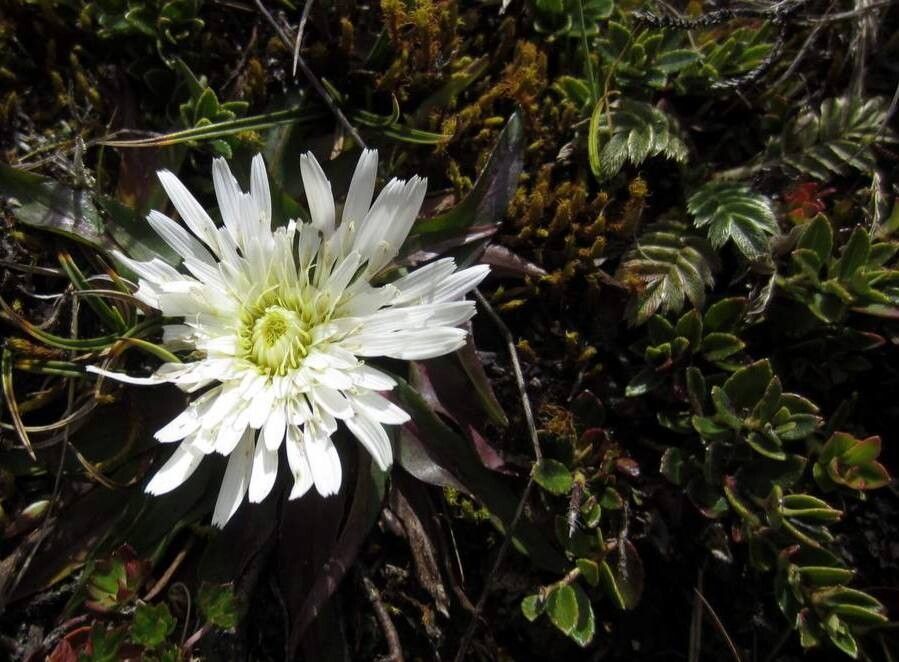
Hey there, fellow plant lovers! Today, we’re diving into the delightful world of Hypochaeris taraxacoides, often called Mediterranean cat’s-ear. If you love a plant that throws out pretty, dandelion-like blooms with a sophisticated flair, then this one’s for you. Propagating them is a lovely way to fill your garden or pots with more of this cheerful beauty without breaking the bank. Good news! For those of you just starting out on your green-thumb journey, Hypochaeris taraxacoides is quite forgiving, making it a wonderful candidate for your first propagation adventure.
The Best Time to Start
When it comes to getting the best results, spring is definitely your golden ticket. As the weather warms up and plants are in full growth mode, they’re brimming with energy, making them more receptive to propagation. You’ll have the most success if you try during this vibrant period, ideally before any intense summer heat sets in.
Supplies You’ll Need
Before we get our hands dirty, let’s gather our tools. It’s always good to be prepared!
- Sharp Pruning Shears or a Craft Knife: For clean cuts.
- Propagation Pots or Trays: Small pots or seed trays work perfectly.
- Well-Draining Potting Mix: A mix of peat moss, perlite, and a bit of compost is ideal. You can also find specific seed-starting or propagation mixes.
- Rooting Hormone (Optional but Recommended): This really gives cuttings a welcome boost.
- Watering Can with a Fine Rose: For gentle watering.
- Plastic Bags or a Propagator Lid: To maintain humidity.
- Labels: To keep track of what you’ve planted!
Propagation Methods
Hypochaeris taraxacoides is a pretty straightforward plant to propagate, and division is usually the easiest and most successful method.
Division: Sharing the Wealth
This is the most common and reliable way to multiply your Hypochaeris taraxacoides.
- Digging Up Your Plant: In early spring, gently dig up your established Hypochaeris taraxacoides. You want to get the entire root ball. If the plant is quite large, you might need to loosen the soil around it first with a trowel.
- Examine the Roots: Once the plant is out of the ground, gently shake off excess soil. You’ll see the main root ball, and often, you can spot where new shoots or crowns are starting to form.
- Making the Cuts: Using your clean pruning shears or a sharp knife, carefully divide the root ball into smaller sections. Each section should have at least one healthy root and a crown with a few leaves. Don’t be afraid to get in there; if you’re unsure, it’s always better to divide into slightly smaller sections than to leave them too crowded.
- Replanting: Immediately replant your divisions in their new homes. Whether it’s back into your garden or into pots, make sure they have good drainage. Bury them so the crown is just at the soil surface.
- Watering In: Water thoroughly after replanting to help settle the soil and reduce transplant shock.
The “Secret Sauce” (Pro Tips)
Here are a few little tricks I’ve picked up over the years that can really make a difference.
- Don’t Overcrowd: When replanting divisions, give each new plant enough space. This isn’t just good for their growth; it also helps prevent fungal issues by improving air circulation.
- Embrace the Shade (Initially): While they love sun once established, newly divided plants can be sensitive to harsh sunlight. Give them a spot with dappled shade for the first week or two until they start showing signs of new growth.
- Observe the Leaves: Pay attention to the leaves of your divisions. If they start to wilt significantly, it’s a sign they’re struggling. A light misting with water can sometimes help perk them up, but usually, consistent, but not waterlogged, soil moisture is key.
Aftercare & Troubleshooting
Once your divisions are planted, give them a little TLC. Keep the soil consistently moist, but never soggy. Think of it like a wrung-out sponge. The goal is to encourage root development without drowning them. You should start to see new leaf growth emerge within a few weeks, which is your cue that the roots are taking hold.
If you notice stems turning mushy and black at the soil line, that’s usually a sign of rot, often due to overwatering or poor drainage. If this happens, gently dig up the affected plant, discard it, and check that your soil mix is indeed well-draining. Sometimes, if only a small part is rotten, you can salvage the healthy section by replanting it.
A Little Patience Goes a Long Way
Propagating plants is such a rewarding process. It’s a chance to connect with nature, understand plant life cycles, and create more beauty for your garden. Don’t get discouraged if your first attempt doesn’t yield a forest of new plants. Be patient, observe your new additions, and enjoy the journey of watching them grow! Happy gardening!
Resource:
https://identify.plantnet.org/k-world-flora/species/Hypochaeris%20taraxacoides%20Ball/data