Hello, fellow plant lovers! Isn’t it wonderful to think about bringing more green life into our homes and gardens? Today, I want to chat about a truly fascinating plant: Cola lepidota.
Bringing Cola lepidota to Life: A Gardener’s Journey
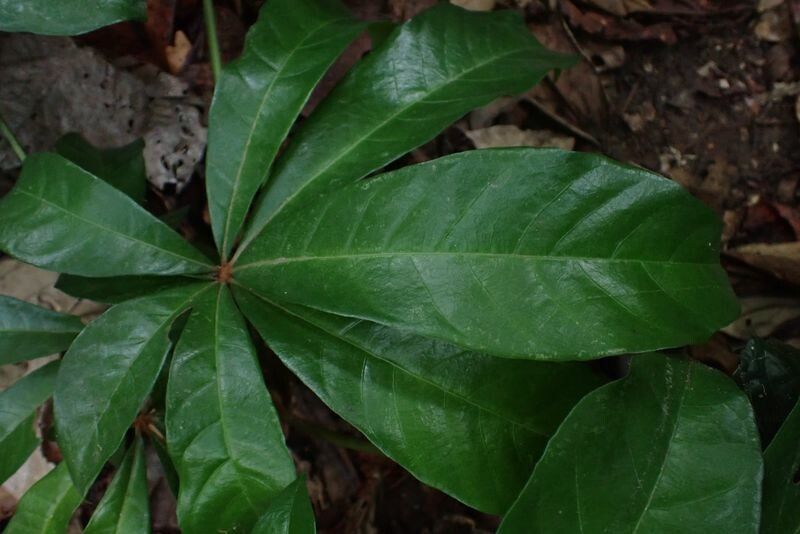
Cola lepidota, often called the “Scaly Cola” or “Cola Nut,” is a real stunner. Its unique, almost architectural foliage and intriguing growth habit make it a conversation starter in any space. I’ve found over the years that successfully propagating a plant you love is one of the most satisfying rewards of gardening. It’s like sharing a secret, creating new life from just a small piece of what you already cherish. Now, is it a walk in the park for a beginner? Honestly, Cola lepidota can be a little finicky. It’s not for the impatient, but with a bit of care and the right approach, you can definitely achieve success. Think of it as a delightful challenge!
The Ideal Moment for Propagation
When it comes to coaxing new life from Cola lepidota, timing is everything. The late spring and early summer, when the plant is in its most vigorous growth phase, is your prime window. You want to take cuttings when the stems are firm and actively growing, not soft or leggy. This surge of energy gives the cuttings the best chance to establish themselves.
Gathering Your Propagation Arsenal
Before we dive in, let’s make sure you have everything you need. Having your supplies ready makes the whole process go so much smoother.
- Sharp Pruning Shears or a Craft Knife: Clean cuts are crucial to prevent disease.
- Rooting Hormone: While not always strictly necessary, it can significantly speed up root development. Look for one with a good reputation.
- Well-Draining Potting Mix: A mix of perlite, coco coir, and a bit of peat moss works wonders. Think airy and not too chunky.
- Small Pots or Propagation Trays: Clean, small pots are ideal for cuttings.
- Plastic Bag or Propagation Dome: This creates a humid environment, which is vital for cuttings.
- Watering Can with a Fine Rose: Gentle watering prevents disturbing your precious cuttings.
- Labels and a Marker: Trust me, you’ll thank yourself later for labeling!
The Art of Creating New Beginnings: Propagation Methods
I’ve found a couple of methods work best for Cola lepidota. Let’s break them down.
Method 1: Stem Cuttings – My Go-To
This is my favorite way to propagate Cola lepidota and usually yields the best results.
- Select a Healthy Stem: Look for a mature, non-flowering stem that is about 6-8 inches long and feels firm.
- Make the Cut: Using your sharp pruning shears or knife, make a clean cut just below a leaf node (where a leaf attaches to the stem). This is where the magic of root formation often begins.
- Prepare the Cutting: Gently remove the lower leaves, leaving 2-3 sets of leaves at the top. This prevents them from rotting when in the soil.
- Apply Rooting Hormone (Optional but Recommended): Dip the cut end into your rooting hormone powder, tapping off any excess.
- Plant Your Cutting: Fill your small pots with your well-draining mix. Make a small hole with your finger and insert the cutting, ensuring the leaf node is buried. Firm the soil gently around the stem.
- Water and Cover: Water thoroughly until you see water drain from the bottom. Then, cover the pot with a clear plastic bag or place it under a propagation dome. This traps humidity, which is essential.
Method 2: Water Propagation (with a caveat)
While you can try water propagation with Cola lepidota, I find it’s often more challenging and prone to rot. If you do try it:
- Prepare the Cutting: Follow steps 1-3 from the stem cutting method.
- Place in Water: Place the cutting in a glass of clean water. Make sure no leaves are submerged below the water line. This is a critical step to prevent rot.
- Change Water Regularly: Change the water every few days to keep it fresh and oxygenated.
- Be Patient: Roots can take a while to develop. Once you see a good root system (at least an inch or two long), you can carefully transplant it into soil.
The “Secret Sauce”: Insider Tips from My Garden
Here’s where a little experience really makes a difference. These little tricks have saved many a cutting for me!
- Bottom Heat is Your Friend: If you can, place your pots on a gentle heating mat. This warmth from below encourages root development much faster. It’s like giving your cuttings a cozy warm hug to get them started.
- Don’t Overwater, Ever! This is HUGE. Cuttings sit in moist soil, but they don’t need to be waterlogged. Allow the top inch of soil to dry out slightly between waterings. Soggy soil is the fastest way to invite rot.
- Indirect Light is Key: While these baby plants need light, direct sunlight will scorch them, especially under a plastic bag. Find a bright spot that gets filtered or indirect light.
Nurturing Your New Growth and Tackling Hiccups
Once you start seeing signs of roots – gently tugging the cutting and feeling resistance, or new leaf growth – you’re on the right track!
- Acclimatization: When roots have formed, gradually begin to harden off your new plant. This means slowly opening the plastic bag for a few hours each day to let it get used to less humidity.
- Repotting: Once your cutting is well-rooted and looks robust, you can transplant it into a slightly larger pot with fresh potting mix.
- Troubleshooting the Rot: The most common problem you’ll face is stem rot. This looks like a dark, mushy spot on the stem, often at the soil line. If you see this, the cutting is likely lost. To prevent it, ensure excellent drainage, avoid overwatering, and use clean tools.
Happy Propagating!
Creating new plants is such a joyful part of gardening, and Cola lepidota is a wonderful candidate to practice on. Be patient with them, observe their needs, and celebrate every tiny bit of progress. You’ve got this! Happy growing!
Resource:
https://identify.plantnet.org/k-world-flora/species/Cola%20lepidota%20K.Schum./data