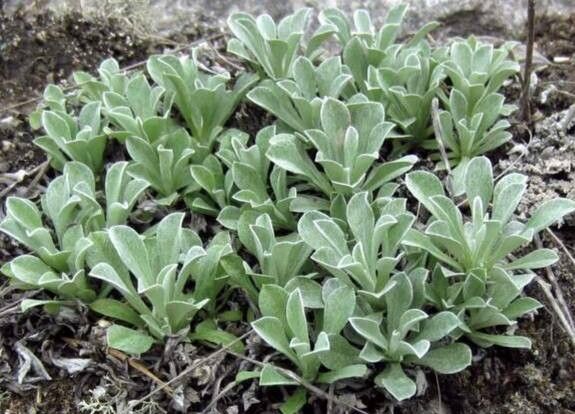
Hello, fellow plant lovers! Today, we’re diving into the wonderful world of propagating Antennaria parvifolia, also known as the Small-leaved Pussytoes. If you’re drawn to its dusty grey foliage and delicate, fuzzy white flowers that resemble tiny cat paws, you’re in for a treat. This little native beauty is surprisingly rewarding to multiply, and I’ve found it to be quite forgiving, even for those of you just dipping your toes into the propagation pond. Getting more of these charming plants for your garden or to share with friends is a joyous pursuit.
The Best Time to Start
For the highest success rate with Antennaria parvifolia, I find late spring to early summer is your sweet spot. This is when the plant is actively growing and has plenty of fresh, pliable stems. You can also propagate successfully through division in early spring, just as new growth begins to emerge.
Supplies You’ll Need
Here’s what you’ll want to have on hand:
- Sharp, clean pruning shears or a small knife: Crucial for making clean cuts.
- Rooting hormone (optional but helpful): Especially for stem cuttings. Look for one containing IBA.
- Well-draining potting mix: A blend of equal parts peat moss or coco coir, perlite, and sand works beautifully for me. Or, a good quality, seed-starting mix is also excellent.
- Small pots or trays: Clean containers are a must to prevent disease.
- A watering can with a fine rose or a spray bottle: For gentle watering.
- Plastic bags or a humidity dome: To create a microclimate for cuttings.
- Labels and a marker: To keep track of your efforts!
Propagation Methods
Let’s get our hands dirty!
1. Stem Cuttings
This is my go-to method for Antennaria parvifolia during its active growth phase.
- Select healthy stems: Look for non-flowering stems that are about 3-4 inches long. They should be flexible, not woody.
- Make the cut: Using your clean shears, make a cut just below a node (where a leaf attaches to the stem). This is where roots are most likely to form.
- Prepare the cutting: Gently remove the lower leaves from the bottom inch of the stem. You want to avoid any foliage that will be buried in the soil.
- Apply rooting hormone (optional): Dip the cut end into your rooting hormone, tapping off any excess.
- Plant your cuttings: Fill your small pots with your well-draining mix. Make a small hole with your finger or a pencil.
- Insert the cutting: Place the cut end of the stem into the hole, ensuring at least one node is below the soil surface. Gently firm the soil around the cutting.
- Water gently: Water the soil until it’s moist but not soggy.
- Create humidity: Cover the pot loosely with a plastic bag or place it under a humidity dome. This helps prevent the cuttings from drying out. Place in a bright spot with indirect light.
- Be patient: It can take 2-4 weeks for roots to form. You can gently tug on a cutting to feel resistance, or if you see new growth, that’s a good sign!
2. Division
This is a great option for refreshing older clumps or when you want more plants quickly.
- Prepare the plant: Water the parent plant thoroughly a day or two before you plan to divide it. This makes it easier to handle and reduces transplant shock.
- Gently lift the plant: Using a trowel or spade, carefully dig around the base of the plant and lift the entire clump from the ground or pot.
- Separate the divisions: Gently separate the clump into smaller sections. You can often do this with your hands, but if the roots are dense, you might need a clean knife or trowel to help. Aim for divisions that have at least a few stems and a good amount of root structure.
- Replant immediately: Plant your divisions in their new locations in the garden or in prepared pots, just as you would transplant a mature plant. Make sure to water them in well.
The “Secret Sauce” (Pro Tips)
Here are a couple of things I’ve learned over the years that really make a difference:
- When taking stem cuttings, make sure the leaves don’t touch the water if you’re experimenting with water propagation. While some plants do well in water, Pussytoes can be prone to rot if their foliage stays submerged. For cuttings, it’s best to keep them in soil.
- If you’re struggling with getting cuttings to root, consider bottom heat. Placing your pots on a propagation mat set to a gentle warmth (around 70-75°F) can significantly speed up root development. It mimics the warmth of spring soil.
Aftercare & Troubleshooting
Once your cuttings have rooted (you’ll feel resistance when you gently tug, or see new leafy growth), or your divisions are replanted, it’s time for gentle care.
- Gradually acclimate: If you’ve been using a humidity dome or plastic bag, slowly introduce your new plants to drier air over a few days by opening the cover a little more each day.
- Water consistently: Keep the soil moist but not waterlogged. Overwatering is the quickest way to lose your precious propagations.
- Aesthetics: Don’t be alarmed if your newly rooted cuttings look a bit leggy or less than perfect initially. They’ll bush out with good care.
- Signs of trouble: The most common issue you’ll face is rot. If a cutting turns black and mushy, or if your divisions wilt dramatically and don’t recover despite watering, it’s likely rot, often caused by too much moisture and poor drainage. Ensure your soil is light and airy.
A Encouraging Closing
Propagating plants is a labor of love, and Antennaria parvifolia is a wonderfully accessible one to try. Don’t be discouraged if your first attempt isn’t a roaring success – every gardener has experienced cuttings that didn’t make it! Just observe, adjust, and most importantly, enjoy the process. Watching a tiny cutting transform into a thriving new plant is one of the most satisfying experiences in gardening. Happy propagating!
Resource:
https://identify.plantnet.org/k-world-flora/species/Antennaria%20parvifolia%20Nutt./data