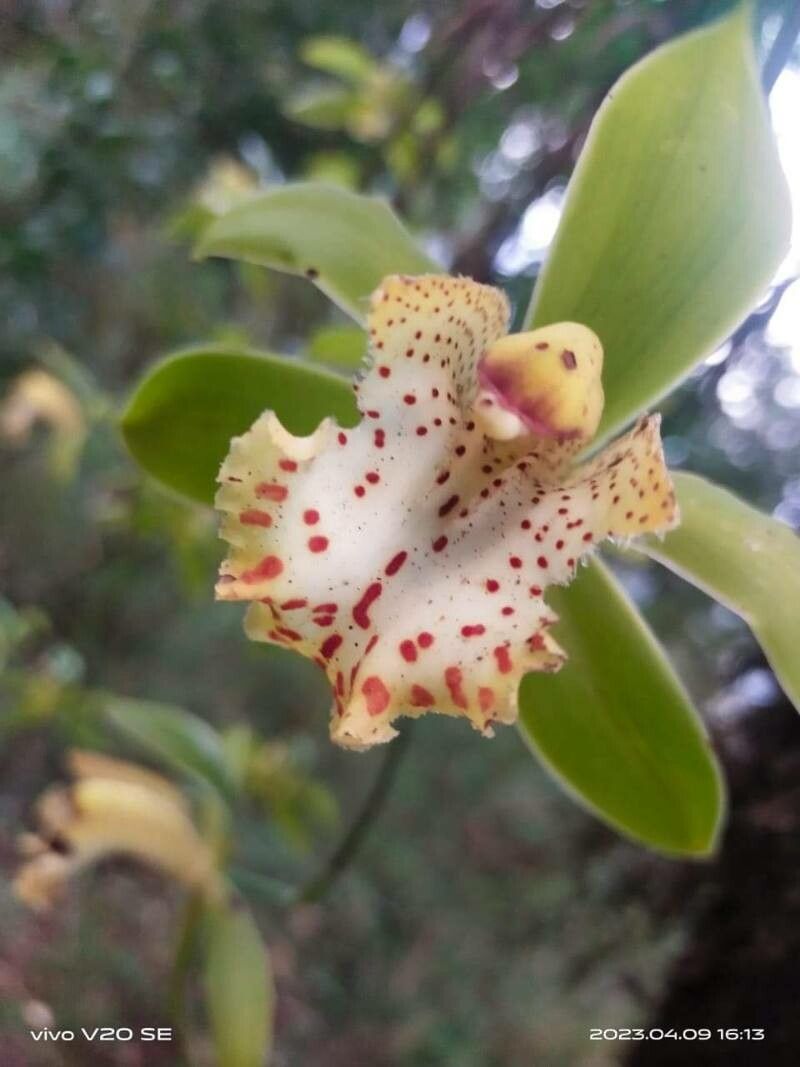
Hello, fellow plant lovers! Today, we’re diving into a truly special orchid: Cymbidium hookerianum. If you’re a fan of those gorgeous, exotic blooms and the unique charm they bring to any space, you’re in for a treat. Propagating these beauties might sound a bit daunting, but trust me, with a little know-how and a dash of patience, you can multiply your collection and share this joy with others. It’s incredibly satisfying to watch a tiny shoot develop into a thriving plant, and Cymbidium hookerianum is a wonderful candidate for this endeavor, though it’s generally considered a medium challenge for beginners – a good goal to work towards!
The Best Time to Start
Timing is everything when it comes to giving your new plants the best shot at success. For Cymbidium hookerianum, the ideal time to propagate is after the plant has finished its blooming cycle and is entering its active growth phase. This typically happens in late spring through summer. You’ll notice new root and shoot growth emerging, which signals the plant has the energy reserves to dedicate to establishing new propagations. Avoid propagating when the plant is stressed or dormant.
Supplies You’ll Need
Gathering your tools beforehand makes the whole process smoother. Here’s what you’ll want to have on hand:
- Sharp, sterile pruning shears or a clean knife: For making neat cuts and avoiding disease.
- Cymbidium-specific orchid potting mix: This should be very well-draining, often containing bark, perlite, and coco coir. A good mix is crucial!
- Small pots or trays: Clean and with drainage holes.
- Rooting hormone (optional, but recommended for cuttings): A powder or gel that encourages root development.
- Clean water: For watering and for any water propagation attempts.
- Small sieve or screen: To rinse roots if dividing a mature plant.
- Labels and a waterproof marker: To keep track of what you’ve propagated and when.
- A spray bottle: For misting.
Propagation Methods
For Cymbidium hookerianum, the most reliable methods are division and, with a bit more care, stem cuttings.
Division (Your Best Bet!)
This is the most straightforward and generally successful method for Cymbidium hookerianum. It involves separating a mature, overgrown plant into smaller, manageable sections, each with its own well-developed roots and pseudobulbs (those swollen stems).
- Gently remove the plant from its pot. You might need to coax it out. If it’s really stuck, a gentle tap on the pot’s sides can help.
- Carefully clean away the old potting mix from the roots. You can use a gentle stream of water or a soft brush. This allows you to clearly see the root structure and where the divisions can be made.
- Identify natural divisions. Look for sections of the plant that have at least two or three healthy pseudobulbs and a good mass of roots attached. They usually grow outwards from a central point.
- Use your sterile pruning shears or knife to carefully divide the plant. Make a clean cut through the rhizome (the connecting stem between pseudobulbs). Ensure each division has sufficient roots to support itself.
- Inspect the cuts. If the cuts look a bit rough, you can lightly dust them with cinnamon or a fungicide to help prevent rot.
- Pot up each division. Use your well-draining orchid mix in clean pots. Plant them so the top of the pseudobulbs are just at or slightly above the surface of the mix. Ensure they are stable.
- Water lightly. Don’t drench them immediately. A light watering or misting is best to allow any damaged roots to callous over a bit.
Stem Cuttings (More Advanced)
This method is a bit trickier with cymbidiums as they are more accustomed to vegetative growth through division, but it can be done. It involves taking pieces of the stem with pseudobulbs.
- Select a healthy, mature stem with at least two or three pseudobulbs. Make sure it’s not a flowering spike.
- Using your sterile knife or shears, make a clean cut just below the lowest pseudobulb, ensuring you have a good section of stem attached.
- If using rooting hormone, dip the cut end of the stem into the powder or gel. Tap off any excess.
- Plant the cutting in a pot filled with your orchid mix. The pseudobulbs should be mostly at the surface.
- Water sparingly. You want the mix to be slightly moist but not waterlogged.
- Place the pot in a warm, humid location with bright, indirect light.
The “Secret Sauce” (Pro Tips)
Here are a few things I’ve learned over the years that can really make a difference:
- Think drainage, drainage, drainage! Cymbidiums absolutely hate sitting in soggy conditions. Your potting mix should be airy enough that you can almost see through it. If you squeeze your mix, it should crumble, not form a dense clod.
- The power of humidity! New cuttings and divisions are vulnerable. I like to put them in a clear plastic bag or a small propagation dome to maintain high humidity around them. Just be sure to open it up for a few minutes daily to allow for air circulation and prevent fungal issues.
- Warmth encourages roots. Providing a little bottom heat can significantly speed up root development for cuttings. A simple seed-starting heat mat placed beneath the propagation tray works wonders. This mimics the conditions they’d experience in their natural habitat.
Aftercare & Troubleshooting
Once your new divisions or cuttings show signs of new growth – usually tiny white roots emerging from the base of the pseudobulbs or a new shoot starting – you’re on the right track!
- Gradually increase watering. As roots develop, you can start watering more thoroughly, but always allow the potting mix to dry out slightly between waterings.
- Continue with bright, indirect light. Avoid direct sun, which can scorch delicate new growth.
- Maintain good air circulation. This is key to preventing problems.
The most common issue you’ll face is rot. If you see a pseudobulb turning black and mushy, or a cutting wilting and becoming soft, it’s likely rot. This is usually due to overwatering or poor air circulation. Unfortunately, if rot sets in significantly, it can be very difficult to save the propagation. Prevention is truly better than cure with these orchids!
A Little Patience Goes a Long Way
Propagating Cymbidium hookerianum is a journey. It requires patience, keen observation, and a gentle hand. Don’t be discouraged if your first attempt isn’t a roaring success; every gardener has faced setbacks. The true reward lies in the learning process and the satisfaction of nurturing new life. So, gather your supplies, choose a healthy specimen, and enjoy the magic of growing your own cymbidiums. Happy planting!
Resource:
https://identify.plantnet.org/k-world-flora/species/Cymbidium%20hookerianum%20Rchb.f./data