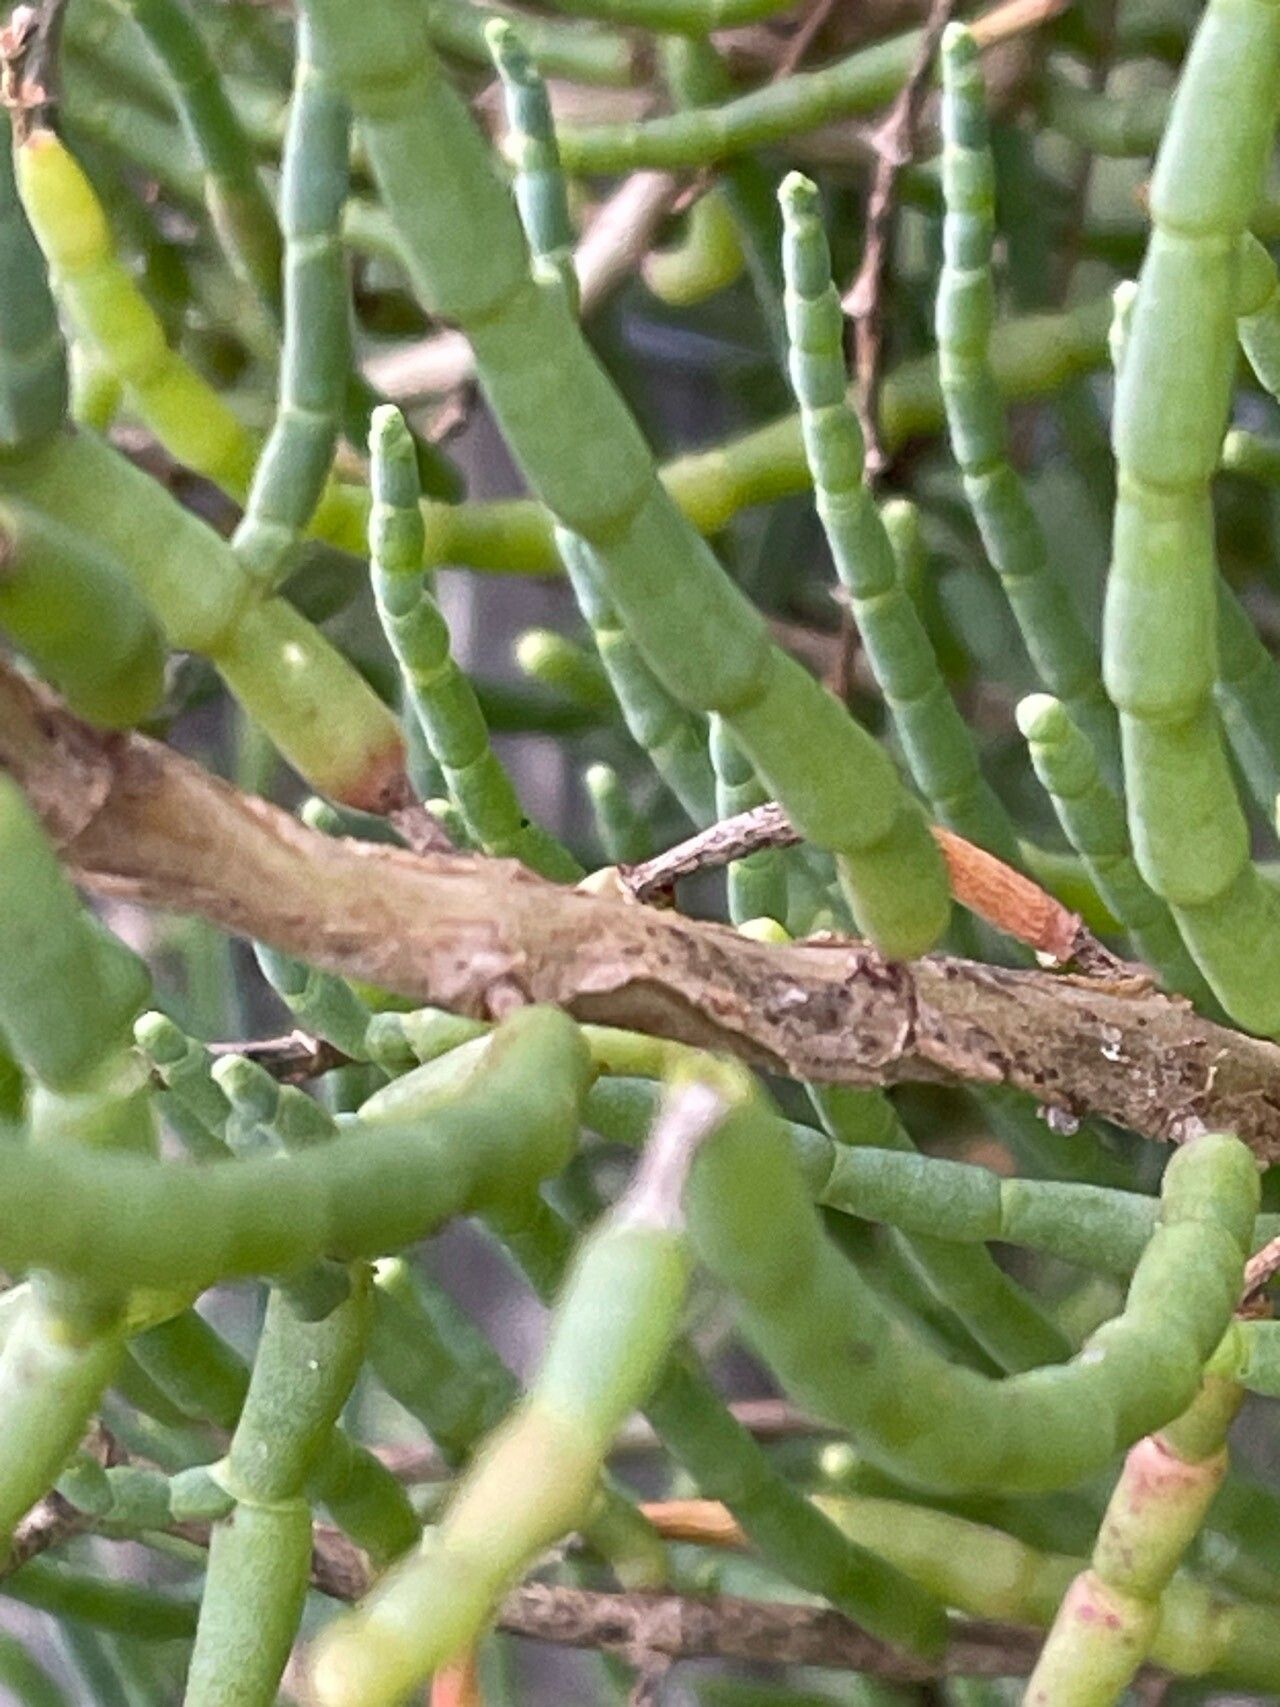
Hello there, fellow plant enthusiasts! Today, I want to chat about a truly unique and rather fascinating plant: Salicornia fruticosa, often called shrubby glasswort or woody glasswort. If you’re looking for something a little different to add to your collection, this is it. It’s a salt-tolerant beauty, perfect for coastal gardens or even as a conversation starter indoors with its succulent, segmented stems. And the best part? Propagating it is incredibly rewarding, and surprisingly, it’s quite forgiving for beginners!
The Best Time to Start
For the absolute best chance of success, I’ve found that spring is your golden ticket. Think of it as giving your cuttings a running start. As the days lengthen and the temperatures start to warm up, the plant is brimming with vigorous energy, ready to put out new growth. Look for actively growing, healthy stems. Avoid taking cuttings during extreme heat or cold snaps.
Supplies You’ll Need
- Sharp pruning shears or a clean knife: You want a clean cut to minimize damage.
- Well-draining potting mix: A blend of succulent mix and coarse sand or perlite works wonders. Standard potting soil can hold too much moisture.
- Small pots or trays: Whatever you have on hand that provides good drainage.
- Optional: Rooting hormone: While Salicornia fruticosa is pretty eager to root, a little hormone can give it an extra boost.
- Optional: Watering can with a fine rose or spray bottle: Gentle watering is key.
Propagation Methods
Let’s dive into how we can get more of this fabulous plant!
1. Stem Cuttings – My Go-To Method
This is honestly the easiest and most popular way to propagate Salicornia fruticosa.
- Take Your Cuttings: In spring, use your clean shears to take cuttings that are about 4-6 inches long. Look for stems that are firm and not too woody, but also not too soft and floppy.
- Prepare the Cuttings: Gently strip off the lower leaves from about an inch or two of the cutting. This exposes the nodes where roots will form. If you’re using rooting hormone, dip the cut end into it now, tapping off any excess.
- Plant Them Up: Fill your small pots with your well-draining mix. Make small holes in the soil with a pencil or your finger. Carefully insert the prepared cuttings into the holes, ensuring the stripped nodes are below the soil surface. You can tuck in a few cuttings per pot, as long as they aren’t touching.
- Water Gently: Water the soil thoroughly but gently. You don’t want to dislodge the cuttings.
2. Water Propagation – A Visual Treat
I love this method because you can literally watch the roots develop!
- Select and Prepare Cuttings: Similar to stem cuttings, take 4-6 inch pieces of healthy, actively growing stems. Remove the lower leaves.
- Place in Water: Fill a clean jar or glass with fresh water. Submerge the stripped ends of the cuttings into the water, making sure no leaves are below the waterline.
- Find a Good Spot: Place the jar in a bright location, but out of direct, scorching sunlight.
- Change the Water: Refresh the water every few days to keep it clean and oxygenated.
The “Secret Sauce” (Pro Tips)
Here are a few little tricks I’ve picked up over the years that really make a difference:
- Avoid Soggy Bottoms: This is the most crucial tip! Salicornia hates sitting in water. If you’re using pots, make sure they have excellent drainage holes. If waterlogging happens, rot is often just around the corner.
- Bottom Heat is Your Friend (Especially for Cuttings): For faster rooting, especially if your house is a bit on the cooler side, consider using a seedling heat mat. This gentle warmth encourages root development from below without drying out the top.
- Don’t Rush the Move: When propagating in water, wait until you see decent root growth – at least an inch or so – before attempting to transplant them into soil. Trying to move them too early can shock the tiny developing roots.
Aftercare & Troubleshooting
Once your cuttings have taken root (this can take anywhere from a few weeks to a couple of months), it’s time to treat them like the precious new plants they are!
- Watering: Once a month-old cutting is established in soil, let the top inch of soil dry out between waterings. They are relatively drought-tolerant once established.
- Light: Continue to provide bright, indirect light. As they grow, you can gradually introduce them to more direct sunlight, but always watch for signs of scorching.
- Troubleshooting: The most common issue you’ll encounter is rot. If your cuttings turn mushy, black, or translucent, it’s a sign of too much moisture. Unfortunately, this is usually fatal, so it’s back to the drawing board. Yellowing leaves on a seemingly healthy cutting can sometimes indicate it’s not getting enough light. Browning and Crispy stems? That might be too much direct sun or lack of water.
A Little Patience Goes a Long Way
Growing plants is a journey, and propagation is a wonderful way to multiply your green joy. Don’t be discouraged if your first attempt isn’t a runaway success. Each try teaches you something new about your plant and your environment. Be patient, observe closely, and celebrate every little sign of new growth. Happy propagating, and enjoy the bounty of your efforts!
Resource:
https://identify.plantnet.org/k-world-flora/species/Salicornia%20fruticosa%20(L.)%20L./data