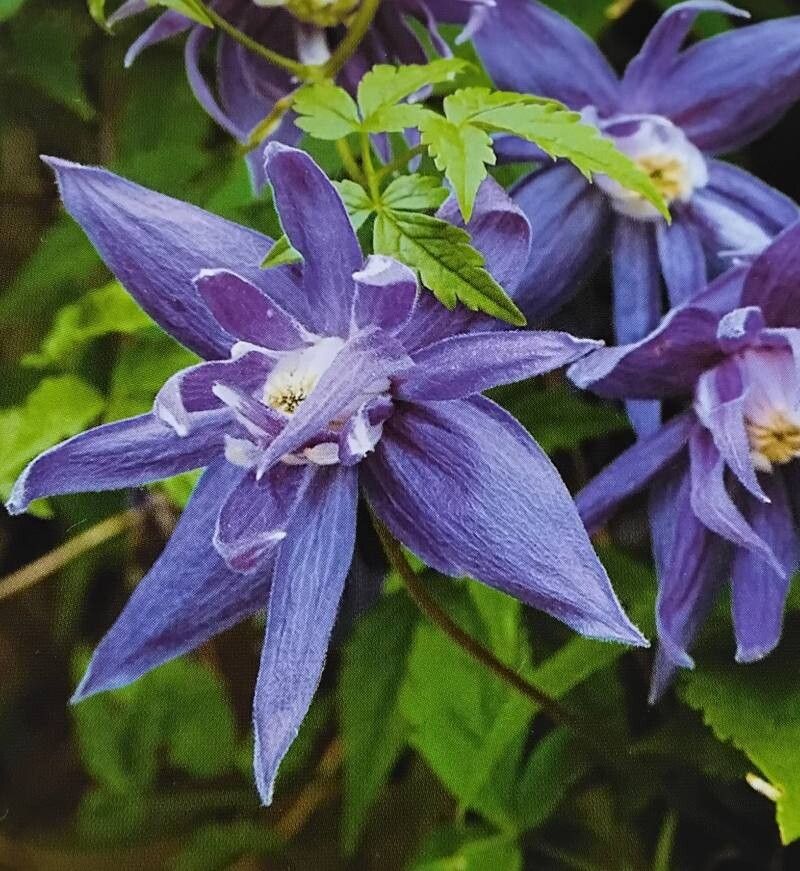
Hello fellow plant lovers! Today, we’re diving into the wonderful world of Clematis lanuginosa. If you’re anything like me, you adore these magnificent vines. Their large, often star-shaped blooms can transform any garden space into a floral masterpiece. The velvety petals, the delicate veins, that intoxicating fragrance – it’s enough to make your heart sing.
And the best part? You can bring that magic into your own garden by propagating them! It’s a truly rewarding experience, watching a tiny cutting unfurl its first leaves and eventually become a robust, blooming plant. Now, I won’t lie, Clematis can be a bit particular. They’re not always the easiest plant to propagate for absolute beginners, but with a little patience and a few of my tricks, you’ll be well on your way to success.
The Best Time to Start
For Clematis lanuginosa, I’ve found the sweet spot is late spring to early summer. This is when the plant is actively growing, and its stems have had a chance to mature a bit. You’re looking for semi-hardwood cuttings. These are stems that are a little less flexible than brand new growth but haven’t fully hardened off yet. Think of it as being somewhere between a floppy new shoot and a stiff, woody branch.
Supplies You’ll Need
Here’s what you’ll want to gather before you get started:
- Sharp pruning shears or secateurs: Cleanliness is key to prevent disease.
- Rooting hormone: A powder or gel works wonders for encouraging root development.
- Well-draining potting mix: A good blend is about 50% perlite or coarse sand and 50% peat moss or coco coir. You can also find specific propagation mixes.
- Small pots or seed trays: Clean ones, of course!
- Plastic bags or a propagator lid: To maintain humidity.
- Labeling stakes and a pen: Don’t forget to label your cuttings!
- Watering can with a fine rose: To water gently.
Propagation Methods: Stem Cuttings
This is hands-down my favorite and most successful method for Clematis lanuginosa.
- Take a Cutting: On a bright, but not scorching, day, select a healthy stem that fits our semi-hardwood criteria. Using your clean shears, take a cutting about 4-6 inches long. Make the cut just below a leaf node (where a leaf attaches to the stem).
- Prepare the Cutting: Gently remove the lower leaves, leaving just the top two or three. If the remaining leaves are very large, I often cut them in half horizontally. This reduces water loss while still allowing for photosynthesis.
- Apply Rooting Hormone: Dip the cut end of the stem into your rooting hormone. Tap off any excess.
- Potting Up: Fill your small pots or trays with your prepared potting mix. Poke a hole with a pencil or stick, then insert the cutting deep enough so that at least one leaf node is buried in the soil. Gently firm the soil around the stem.
- Water and Cover: Water the soil thoroughly but gently. Then, cover the pot with a plastic bag or a propagator lid to create a humid environment. You can use stakes to keep the bag from touching the leaves.
- Placement: Place the pot in a bright spot out of direct sunlight. A north-facing windowsill is often perfect.
The “Secret Sauce” (Pro Tips)
Here are a few things I’ve learned over the years that make a real difference:
- Cleanliness is Godliness (for plants): I cannot stress this enough. Sterilize your tools before every single cut. A quick wipe with rubbing alcohol works wonders. This will save you from a lot of heartache with fungal issues.
- The Art of the Node Water Dip (or Lack Thereof): When you take cuttings that might sit in water for a bit before potting (though I prefer direct sticking), make sure no leaves touch the water. They’ll rot faster than you can say “magnificent blooms.” For stem cuttings, if you can, mist the leaves occasionally rather than directly watering the base.
- Embrace the Heat (Subtly): Clematis, like many plants, love a bit of warmth from below to encourage root growth. If you have a heat mat designed for propagation, placing your pot on it can significantly speed up the rooting process. Just ensure the soil doesn’t dry out excessively.
Aftercare & Troubleshooting
Once your cuttings are potted, the waiting game begins! Keep the soil consistently moist but not waterlogged. You’re looking to maintain that high humidity under the plastic. After about 4-6 weeks, you should start to see signs of new growth – a tiny leaf unfurling at the tip, or a gentle tug on the stem revealing some resistance.
If you notice wilting, yellowing leaves, or mold forming on the soil surface, it’s usually a sign of too much moisture or poor air circulation. Try removing the plastic cover for a few hours a day to let things dry out slightly. If a cutting looks completely dead, sadly, it’s best to discard it and try again. Rot is the biggest enemy, often caused by overwatering or lack of drainage.
A Little Patience Goes a Long Way
Propagating Clematis lanuginosa is a journey, not a race. There will be times when things don’t quite work out, and that’s perfectly okay. Every gardener learns through experience, and each discarded cutting is a lesson learned. Celebrate the small victories, enjoy the process of nurturing new life, and soon you’ll be surrounded by your very own beautiful Clematis blooms. Happy gardening!
Resource:
https://identify.plantnet.org/k-world-flora/species/Clematis%20lanuginosa%20Lindl./data