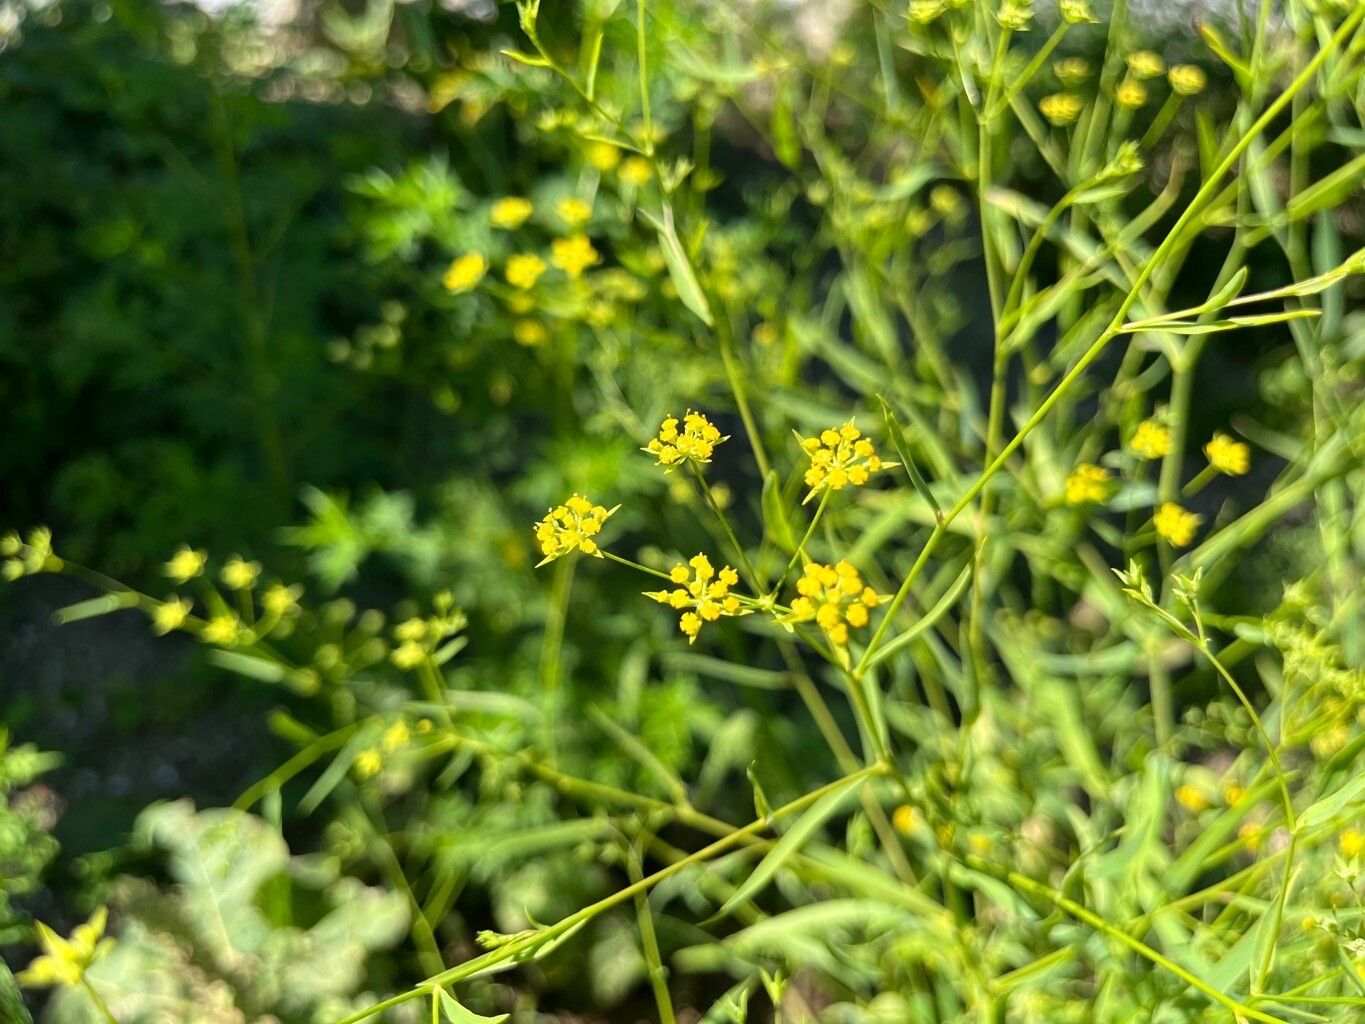
Hello there, fellow garden enthusiasts! Today, I want to chat about a plant that’s been a quiet delight in my garden for years: Bupleurum chinense. You might know it as Thorwhead or Chinese Hare’s Ear. It’s got these lovely, delicate clusters of yellow-green flowers that attract all sorts of beneficial insects. Plus, it’s got a subtle, beautiful form that adds so much texture to borders and bouquets.
Propagating Bupleurum chinense is a wonderfully rewarding endeavor. It’s a chance to multiply the beauty, share with friends, or simply expand your own green space without buying new plants. For beginners, I’d say Bupleurum chinense is moderately easy to propagate, especially with a bit of guidance. It’s not as tricky as some fussier specimens, but it does appreciate a little attention to detail.
The Best Time to Start
Timing is everything in the garden, and for Bupleurum chinense, late spring to early summer is your sweet spot. This is when the plant is actively growing, and your cuttings will have plenty of energy to develop roots. Look for new, flexible growth. Avoid very old, woody stems, as they are much less likely to take.
Supplies You’ll Need
Here’s a quick rundown of what you’ll want to have on hand:
- Sharp pruning shears or a clean, sharp knife: For taking neat cuts.
- Rooting hormone (optional, but recommended): A powder or gel can give your cuttings a helpful boost.
- Well-draining potting mix: A good blend of perlite, peat moss, and compost works wonders. Or, you can use a sterile seed-starting mix.
- Small pots or trays: With drainage holes, of course!
- Plastic bags or a propagation dome: To create a humid environment.
- Watering can or spray bottle: For gentle watering.
Propagation Methods
I find that the stem cutting method is the most reliable way to propagate Bupleurum chinense. It’s straightforward and has a great success rate.
Stem Cuttings:
- Select Your Cuttings: From a healthy, established plant, choose new, non-flowering stems that are about 4-6 inches long. Make your cut just below a leaf node (where a leaf attaches to the stem).
- Prepare the Cuttings: Gently remove the lower leaves, leaving just the top few. This prevents them from rotting in the soil.
- Apply Rooting Hormone (Optional): Dip the cut end of each stem into your rooting hormone, tapping off any excess.
- Plant the Cuttings: Fill your small pots with your well-draining mix. Make a small hole in the center of each pot with your finger or a pencil. Insert the prepared cutting into the hole, ensuring the leaf nodes are buried. Gently firm the soil around the stem.
- Water Gently: Water thoroughly but gently, so you don’t dislodge the cuttings.
- Create Humidity: Cover the pots with a plastic bag or a propagation dome. Make sure the plastic doesn’t touch the leaves too much. You can use stakes to prop it up if needed. Place the pots in a bright location out of direct, harsh sunlight.
The “Secret Sauce” (Pro Tips)
Now, for a couple of things I’ve learned over the years that can really make a difference:
- Avoid “Soft Rot” by Keeping Leaves Dry: This is a biggie. When you water your cuttings, try your best to keep the leaves dry. If they sit in water, especially under the humidity cover, they can quickly turn mushy and rot. A gentle watering at the base or a light misting of the soil is best.
- Bottom Heat is Your Friend: If you can provide a little warmth from below, like using a heat mat designed for seedlings, it can significantly speed up root development. It mimics that gentle warmth you’d find underground in summer.
Aftercare & Troubleshooting
Once your cuttings have developed roots – you’ll know because you’ll feel a gentle resistance when you tug lightly or see new growth emerging – it’s time for some tender loving care.
Start by gradually acclimatizing them to normal room humidity. Poke a few holes in your plastic bag or open the vents on your dome for a few days before removing it entirely. Keep the soil consistently moist but not waterlogged. You can start feeding them with a diluted liquid fertilizer once they’ve been established for a few weeks.
The most common issue you might encounter is rot. If you see stems turning black and mushy, it’s usually a sign of too much moisture and not enough airflow. Unfortunately, rotted cuttings are usually a goner. If you’re seeing multiple cuttings fail like this, re-evaluate your watering schedule and ensure your potting mix is as well-draining as possible.
A Encouraging Closing
Don’t get discouraged if not every single cutting takes. Gardening is a journey, and propagation is a wonderful way to connect with that process. Be patient, observe your little cuttings, and celebrate each tiny root that appears. You’re nurturing new life, and that’s always a beautiful thing. Happy propagating!
Resource:
https://identify.plantnet.org/k-world-flora/species/Bupleurum%20chinense%20DC./data