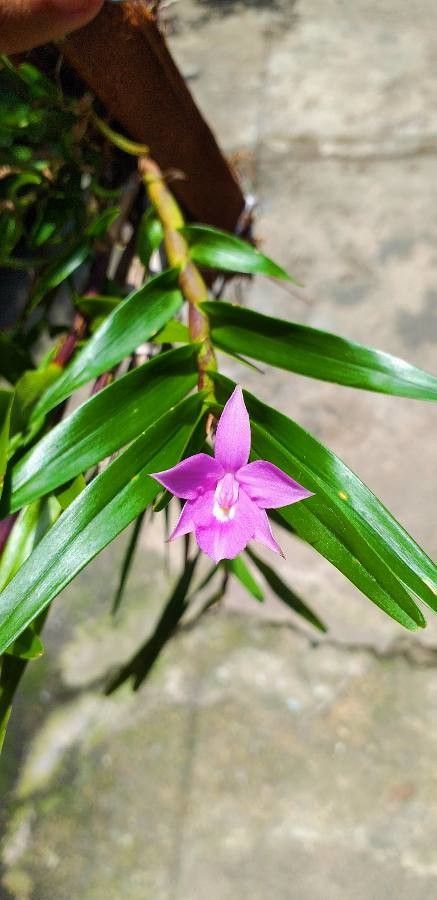
Ah, Dimerandra emarginata! What a delightful orchid. If you’ve ever admired its elegant, cascading blooms and wondered how to bring more of that beauty into your own space, you’re in the right spot. Propagating orchids, especially one as lovely as this, can feel a bit like magic, and I’m thrilled to share how we can make that magic happen. It’s not the simplest orchid to multiply, but with a little patience and the right approach, it’s absolutely achievable.
The Best Time to Start
For Dimerandra emarginata, I find the sweet spot is when the plant is actively growing, usually after it has finished flowering. This means we’re typically looking at late spring or early summer. You’ll see new pseudobulbs forming and perhaps even new leafy shoots emerging. This energy surge is exactly what a new propagation needs to get a good start.
Supplies You’ll Need
Gathering your tools beforehand makes the whole process much smoother. Here’s what I like to have on hand:
- Sharp, sterile pruning shears or a clean knife: For making clean cuts. I always sterilize mine with rubbing alcohol.
- Orchid bark mix: A good quality mix with good drainage is crucial. I often use a blend that includes perlite for extra aeration.
- Sphagnum moss: This is fantastic for retaining just enough moisture without waterlogging.
- Small pots or containers: Look for ones with drainage holes. I often repurpose small plastic pots.
- Rooting hormone (optional but helpful): A powder or gel can give your cuttings a nice boost.
- Clear plastic bags or a propagatior: To create a humid environment.
- Labels: To keep track of what you’ve propagated and when.
Propagation Methods
Dimerandra emarginata is most commonly propagated through division, and sometimes via stem cuttings if you have a particularly large plant. Let’s walk through division first, as it’s generally the most successful route.
Method 1: Division (The Most Reliable)
- Inspect your plant: Gently remove your Dimerandra from its pot. You want to see where the pseudobulbs (those swollen stem segments) are clustered. Look for sections with at least two or three healthy pseudobulbs and some developing roots.
- Gently tease apart the root ball: This can be the trickiest part! I like to use my fingers to carefully loosen the old potting medium. If it’s really stuck, I might use a bamboo skewer or even a blunt tool to gently tease the roots apart. Avoid pulling forcefully, as you don’t want to damage viable roots.
- Make the cut: Once you’ve identified distinct sections, use your sterilized shears to cut through the rhizome (the creeping stem that connects the pseudobulbs). Ensure each division has at least two pseudobulbs and a healthy root system.
- Prepare the new divisions: Trim away any dead or mushy roots. You can dust the cut surfaces with a fungicide or cinnamon powder to help prevent rot.
- Pot them up: Place each division into its own small pot filled with your prepared orchid bark mix. Position the pseudobulbs so they aren’t buried too deeply in the mix. New growth should be facing upwards.
Method 2: Stem Cuttings (For Adventurous Gardeners)
This method is a bit more advanced and has a lower success rate, but it’s worth a try if you have a very large plant you want to divide further.
- Identify a healthy stem: Look for a stem that has at least two or three pseudobulbs and appears robust.
- Make a clean cut: Using your sterilized shears, cut the stem, ensuring you have at least two pseudobulbs on your cutting.
- Prepare the cutting: Remove any lower leaves if they are in the way. You can dip the cut end into rooting hormone.
- Plant the cutting: Gently insert the cut end into a pot filled with damp sphagnum moss or a very fine orchid mix. You want the pseudobulbs to be nestled in the medium.
The “Secret Sauce” (Pro Tips)
I’ve learned a few things over the years that can really make a difference:
- Don’t overwater divisions immediately: After potting up a division, resist the urge to drench it. I usually wait about 48-72 hours before watering lightly. This allows any tiny root wounds to heal and reduces the risk of rot.
- Humidity is king: For both divisions and cuttings, creating a humid microclimate is essential. Place your pots in a clear plastic bag, loosely tied, or use a propagator. This traps moisture and encourages root development. Make sure the leaves aren’t touching the sides of the bag for long periods, as this can lead to fungal issues.
- Bottom heat can be a game-changer: If you have a heat mat designed for seedlings or propagation, placing your potted divisions on it can significantly speed up root formation. It mimics the warmth of tropical environments.
Aftercare & Troubleshooting
Once your divisions are potted, keep them in a spot with bright, indirect light. Water them sparingly but consistently – you want the potting medium to be slightly moist but never soggy. If you’re using the plastic bag method, open it for a few hours each day to allow for air circulation.
Signs of success include new root growth (you might see them peeking out of the drainage holes or turning a healthy green). You’ll also start to see new pseudobulbs or leaf shoots developing from the base.
The main thing to watch out for is rot. If you see pseudobulbs turning black and mushy, or if leaves start to yellow and drop rapidly, it’s usually a sign of overwatering or poor air circulation. If you catch rot early, you might be able to trim away the affected parts with your sterile shears.
A Encouraging Closing
Propagating Dimerandra emarginata is a rewarding journey. It takes a little patience, a bit of observation, and the willingness to learn. Don’t be discouraged if your first attempt isn’t perfect. Every gardener has had their share of setbacks! Just keep at it, enjoy the process of nurturing these new little lives, and before you know it, you’ll have a whole collection of these gorgeous orchids to admire. Happy growing!
Resource:
https://identify.plantnet.org/k-world-flora/species/Dimerandra%20emarginata%20(G.Mey.)%20Hoehne/data