Hey there, fellow garden lovers!
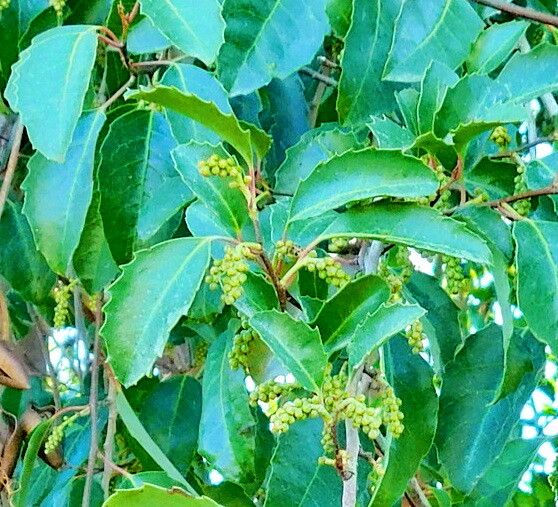
There’s something truly special about Azara petiolaris, isn’t there? Those delicate, often fragrant flowers, the attractive foliage… it just brings a bit of understated elegance to any corner of the garden. And the joy of creating more of these beauties from cuttings or divisions? Well, that’s a feeling that never gets old for me. If you’ve ever admired an Azara and wished you had another one, you’re in the right place. I’ve found that this plant is generally pretty forgiving when it comes to propagation, making it a delightful project even if you’re just starting out.
The Best Time to Start
For Azara petiolaris, I’ve found the sweet spot for propagation is late spring to early summer. This is when the plant is actively growing, and the new shoots have started to mature a bit. You’re looking for stems that are firm but still flexible – not brand new and floppy, but not woody and old either. Think of them as still having plenty of “get up and go” in them.
Supplies You’ll Need
Before we dive in, let’s gather our tools. Having everything ready makes the process so much smoother.
- Sharp Pruning Shears or a Knife: Cleanliness is key to preventing disease.
- Rooting Hormone (Optional but Recommended): This can significantly boost your success rate. Look for one specifically for woody or semi-hardwood cuttings.
- Small Pots or Seed Trays: Make sure they have drainage holes!
- A Quality Potting Mix: I like to use a mix that’s well-draining. A blend of peat moss, perlite, and a bit of compost works wonderfully. You can also find specialized cutting mixes.
- Plastic Bags or a Propagation Dome: This helps maintain humidity around your cuttings.
- Watering Can with a Fine Rose: Gentle watering is important.
- Labels and a Marker: So you don’t forget what you planted where!
Propagation Methods
I’ve had the most success with Azara petiolaris using stem cuttings. It’s a classic for a reason!
- Take Your Cuttings: On a mild day, select healthy stems that fit the description above – firm but flexible. Using your clean shears, take cuttings that are about 4-6 inches long. Try to make your cuts just below a leaf node (where a leaf attaches to the stem). These nodes are where roots are most likely to form.
- Prepare the Cuttings: Gently remove the lower leaves from each cutting, leaving just the top set or two. This prevents them from rotting when buried in the soil. If your cuttings are long, you can sometimes carefully split the remaining leaves lengthwise, which helps reduce water loss.
- Apply Rooting Hormone: Dip the cut end of each prepared cutting into your rooting hormone. Tap off any excess. This may sound like a small step, but I’ve seen it make a big difference!
- Plant Your Cuttings: Fill your pots or trays with your prepared potting mix. Make a small hole in the center of each with your finger or a pencil. Insert the cut end of each cutting into the hole, ensuring the rooting hormone gets into the soil. Gently firm the soil around the base of the cutting.
- Water Gently: Give the soil a good but gentle watering. You want the soil to be moist, not soggy.
The “Secret Sauce” (Pro Tips)
Here are a couple of my go-to tricks that have really paid off over the years:
- Bottom Heat is Your Friend: If you have space, place your pots on a heated propagation mat. This gentle warmth from below really encourages root development. It’s like giving your cuttings a little warm hug to get them growing!
- The Humidity Tent is Crucial: Once planted, cover the pots with a clear plastic bag or a propagation dome. Make sure the plastic doesn’t touch the leaves of your cuttings. You can prop it up with a few stakes if needed. This creates a mini-greenhouse effect, keeping the humidity high, which is vital for cuttings as they can’t absorb water through roots they don’t yet have.
Aftercare & Troubleshooting
Once your cuttings are planted and covered, the waiting game begins! Keep them in a bright spot, but out of direct sunlight. Check the moisture levels regularly and mist them if the soil looks dry.
You’ll know your cuttings have rooted when you see new leaf growth emerging. Gently tug on a cutting; if there’s resistance, it means roots have formed. At this point, you can gradually acclimate them to lower humidity by opening the plastic bag a little more each day over a week. Once they seem happy and are actively growing more leaves, you can remove the cover entirely.
What if things don’t go as planned? The most common issue you’ll see is rot. If a cutting turns black and mushy, it’s usually a sign of too much moisture and not enough air circulation. Discard any rotten cuttings and ensure your remaining ones have good drainage and aren’t sitting in water. If you don’t see any signs of life after several weeks, don’t despair! Some plants take their sweet time. You can try taking more cuttings.
A Little Patience Goes a Long Way
Propagating plants is a journey, and like any good garden project, it requires a bit of patience and observation. Don’t get discouraged if your first attempt isn’t a runaway success. Each time you try, you learn something new. Enjoy the process of nurturing these little bits of life, and soon you’ll have beautiful new Azara plants to enjoy and share! Happy gardening!
Resource:
https://identify.plantnet.org/k-world-flora/species/Azara%20petiolaris%20(D.Don)%20I.M.Johnst./data