Cultivating New Life: Let’s Propagate Austrocactus coxii!
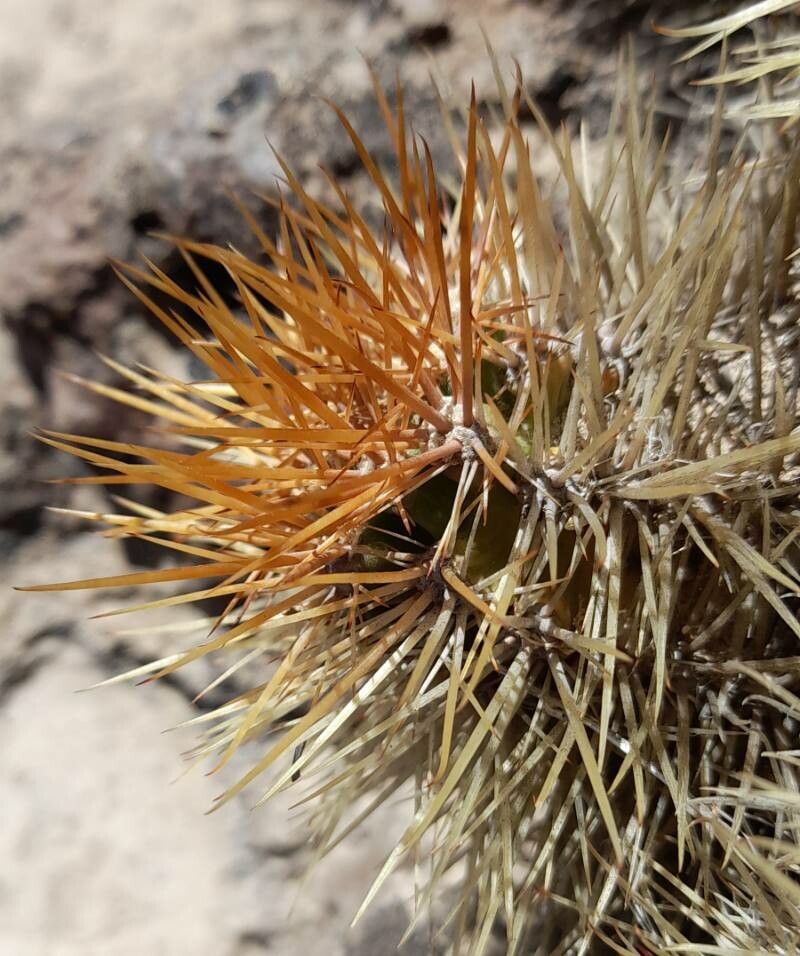
Oh, Austrocactus coxii! If you’ve ever marveled at these charming, often segmented cacti, with their bristly beauty and unique silhouettes, then you know exactly why I’m so excited about sharing this with you. There’s a special kind of joy in watching a little piece of a beloved plant grow into something all its own. Propagating these guys is a deeply satisfying endeavor, a chance to not only expand your collection but also to feel truly connected to your plants. For those just dipping their toes into the world of cactus propagation, Austrocactus coxii is a wonderfully rewarding choice. While they have their own little quirks, they’re surprisingly forgiving with a little know-how.
When Spring Springs Forth: The Best Time to Start
Generally speaking, the late spring and early summer are your golden ticket for propagating Austrocactus coxii. This is when the plant is actively growing and brimming with energy. You’ll notice new shoots or segments are firm and full of life. Trying to propagate when the plant is dormant, say in the dead of winter, will likely lead to disappointment. Think of it like trying to start a fire with damp wood – it just won’t catch as readily.
Your Propagation Toolkit
Gathering the right supplies is half the battle won! Here’s what you’ll want to have on hand:
- Sharp, Sterilized Pruning Shears or a Clean Knife: Essential for making clean cuts.
- Well-Draining Cactus/Succulent Mix: This is non-negotiable for preventing rot. You can buy it or make your own with potting soil, perlite, and coarse sand.
- Rooting Hormone (Optional but Recommended): A little boost can significantly speed up root development.
- Small Pots or Trays: Clean and with drainage holes, of course!
- Gravel or Perlite: For top dressing or mixing into your soil.
- Watering Can with a Fine Rose: For gentle watering.
- Gloves: Some Austrocactus can be quite spiny!
- Newspaper or Cardboard: To handle spiny segments.
Bringing Forth New Sprouts: Propagation Methods
Austrocactus coxii is quite amenable to a few different propagation techniques. I find stem cuttings to be the most straightforward and reliable.
Stem Cuttings – My Go-To Method
- Identify Your Source: Look for healthy, mature stems that have at least two or three segments. Avoid anything that looks weak, diseased, or soft.
- Make the Cut: Using your sterilized shears or knife, make a clean cut just above a joint where two segments connect. If you’re taking a longer cutting, you might want to make several smaller segments from it.
- The Crucial Drying Period: This is so important! After you make your cut, you need to let the cut end callus over. Place the cuttings in a dry, well-ventilated spot out of direct sunlight for anywhere from a few days to a week. You’ll know it’s ready when the cut end has formed a dry, leathery scab. This prevents rot from setting in when you plant them. Don’t rush this step!
- Prepare Your Potting Medium: Fill your clean pots with your well-draining cactus mix. You can add a layer of gravel or perlite to the bottom for extra drainage if you like.
- Apply Rooting Hormone (If Using): Dip the callused end of your cutting into the rooting hormone powder, tapping off any excess.
- Planting Time: Gently insert the callused end of the cutting into the soil, about an inch or so deep. Make sure the stem is stable. You can use a small rock or some gravel to help support taller cuttings.
- Watering Gently: After planting, wait a day or two before watering. When you do, water very sparingly. You want the soil to be just slightly moist, not soggy.
Water Propagation (For the Patient Observer)
I’ve had some success with water propagation for Austrocactus, though it requires a bit more vigilance.
- Follow steps 1-3 for stem cuttings.
- Prepare your container: Use a clean jar or vase.
- Place the cutting: Sit the callused cutting so that only the very bottom tip (where the cut was made) is touching the water. Try to avoid any of the cactus body being submerged. If needed, you can suspend it with toothpicks or rest it on the rim.
- Change the water regularly: Every few days, change out the water completely. This helps prevent bacterial growth.
- Be patient: Roots can take several weeks to appear. Once you have a decent root system (at least an inch long), you can carefully transfer it to gritty soil as described above.
The “Secret Sauce”: My Insider Tips
Years of getting my hands dirty have taught me a few things that make all the difference:
- Give Them a Warm Start: Cacti absolutely love a little warmth. If you’re propagating indoors and your home tends to be cooler, consider using a heat mat under your pots. Not only does it encourage root growth, but it helps the soil dry out a bit quicker between waterings, further reducing rot risk.
- Don’t Be Afraid of Airflow: Good air circulation is key. Make sure your cuttings aren’t crowded together in a humid, stagnant environment. A gentle fan blowing in their direction (not directly on them) can work wonders, helping to keep the soil surface dry and discouraging fungal issues.
- Handle with Respect: Even with gloves, those spines can be persistent! For particularly spiny segments, I’ve found that wrapping the cutting carefully in newspaper or cardboard before handling it makes the process much less prickly. It gives you a better grip without getting impaled.
The Long Game: Aftercare & Troubleshooting
Once you see those glorious roots starting to emerge (patience, my friends, patience!), it’s time for slightly more attentive care. For cuttings in soil, you’ll want to water more regularly, but still allow the soil to dry out between waterings. The frequency will depend on your environment – warmer, brighter spots require more water than cooler, shadier ones.
The biggest enemy of new cactus babies is root rot. You’ll know it’s happening if the stem starts to go soft, mushy, or turns black and slimy at the base. If you see this, act fast! You might be able to salvage the cutting by cutting away the rotted portion, letting it callus again, and replanting in fresh, dry soil. Overwatering is the usual culprit, so err on the side of too dry rather than too wet. If your cutting simply refuses to root and looks dehydrated or shriveled after several weeks, it might just not be viable. Don’t take it personally – it happens!
Keep Growing!
Propagating Austrocactus coxii is a wonderful journey into the heart of plant resilience. It’s a testament to nature’s ability to create life, and you’re the one facilitating it! Be patient with your little propagations, give them the best environment you can, and celebrate every sign of new growth. Soon enough, you’ll have a whole new generation of these spiny beauties to admire. Happy propagating!
Resource:
https://identify.plantnet.org/k-world-flora/species/Austrocactus%20coxii%20(K.Schum.)%20Backeb./data