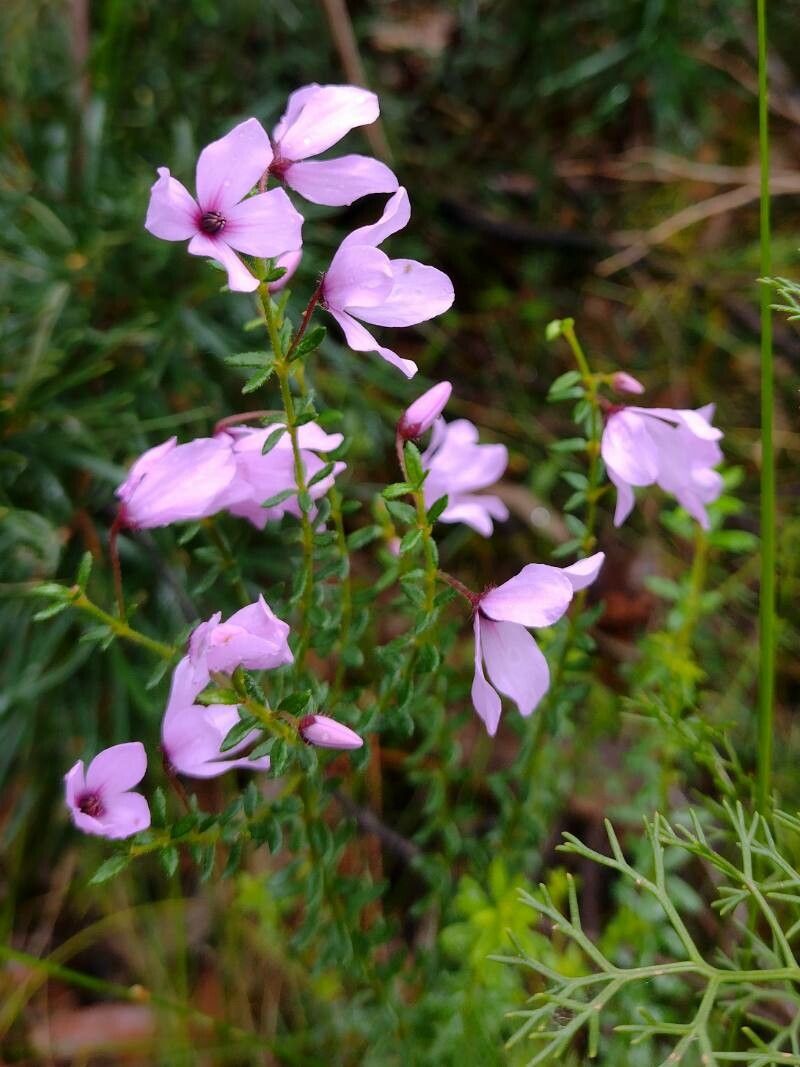
Oh, hello there! Grab a mug of your favorite warm drink, and let’s chat about a truly delightful little plant: Tetratheca thymifolia. You might know it by its common name, Narrow-leaved Black-eyed Susan, or perhaps you’ve simply admired its delicate, star-shaped purple flowers and fine, heath-like foliage. I’ve been growing these beauties for two decades, and there’s something so incredibly satisfying about coaxing new life from an existing one. Think of it as sharing a bit of its joy with more of your garden. Now, I won’t sugarcoat it – while not infuriatingly difficult, this little gem can be a wee bit finicky for absolute beginners. But with a little know-how and a dash of patience, you’ll be well on your way to success.
The Best Time to Start
For Tetratheca thymifolia, the sweet spot for propagation is definitely late spring to early summer. This is when the plant is actively growing, and its stems have had a chance to mature a little but aren’t yet old and woody. Aim to take cuttings after the main flush of spring flowering has passed. You want stems that are firm but still flexible – not wilting, and certainly not brand new, soft growth.
Supplies You’ll Need
Gathering your tools beforehand makes the whole process so much smoother. Here’s what I always have on hand:
- Sharp Pruning Shears or a Clean Knife: For making clean cuts.
- Rooting Hormone Powder or Gel: This is your little helper to encourage those roots to form.
- A Well-Draining Potting Mix: I recommend a mix of equal parts perlite, coarse sand, and good quality potting soil. You want excellent drainage!
- Small Pots or Seedling Trays: Clean ones are key to preventing disease.
- A Spray Bottle: For gentle misting.
- A Clear Plastic Bag or Dome: To create a mini-greenhouse effect.
- Labels: You’ll thank me later for remembering what’s what!
- Optional: Bottom Heat Mat: This can significantly speed up root formation.
Propagation Methods
I find stem cuttings to be the most reliable method for Tetratheca thymifolia. It’s straightforward and gives you a good chance of success.
Step-by-Step: Stem Cuttings
- Select Your Cuttings: Look for healthy, current-season shoots. They should be about 10-15 cm (4-6 inches) long. Gently snap or cut a stem from just below a leaf node (where a leaf joins the stem).
- Prepare the Cuttings: Carefully remove the lower leaves. You want to leave just a few sets of leaves at the top. This reduces water loss and prevents leaves from rotting in the soil. If the leaves are quite large, I sometimes snip them in half horizontally.
- Apply Rooting Hormone: Dip the cut end of the stem into your rooting hormone powder or gel. Tap off any excess. This step is crucial!
- Plant the Cuttings: Make a small hole in your prepared potting mix with a pencil or stick. Gently insert the cutting into the hole, ensuring the cut end and the leaf nodes are in contact with the soil. Firm the soil gently around the base.
- Water and Cover: Water your cuttings gently to settle the soil. Then, cover the pots with a clear plastic bag (held up with stakes or skewers so it doesn’t touch the leaves) or place them under a clear plastic dome. This humidity is vital.
- Placement: Place the pots in a bright spot out of direct sunlight. Morning sun is usually fine, but intense afternoon sun will cook them.
The “Secret Sauce” (Pro Tips)
Here are a few things I’ve learned over the years that really make a difference:
- Bottom Heat is Your Friend: If you have a heat mat, place your pots on it. Many woody cuttings, especially those like Tetratheca, really benefit from that gentle warmth at their base to encourage root initiation. It can halve your waiting time!
- Don’t Drench, Dampen: While humidity is key, soggy soil is the enemy of cuttings. Water thoroughly when you first plant, then only mist the leaves and surface of the soil when it starts to look dry. You want the soil to be consistently moist but never waterlogged.
- Sterilize Everything: I can’t stress this enough. Use clean pots, clean tools, and even clean your hands before you start. Fungus and bacteria can take hold of fresh cuttings in a heartbeat, and a sterile environment gives your little propagations the best possible start.
Aftercare & Troubleshooting
Be patient! It can take anywhere from 4 to 8 weeks for roots to form on Tetratheca thymifolia cuttings, sometimes longer. You’ll know they’re ready when you see new growth appearing or when you very gently tug on a cutting and feel resistance.
Once roots have formed:
- Harden Off: Gradually introduce your new plants to normal conditions. Remove the plastic cover for increasing periods over a week or two.
- Potting Up: Once they are robust enough, you can pot them into slightly larger pots with fresh, well-draining potting mix. Treat them kindly, as they are still young and vulnerable.
Common Signs of Failure:
- Wilting and Browning: This can be too much direct sun, not enough humidity, or the cutting has simply dried out.
- Rotting: This is usually a sign of overwatering and/or poor drainage. The stem will turn black and mushy, especially at the soil line. If you see this, it’s usually best to discard the affected cutting.
A Encouraging Closing
Watching a new plant sprout from a tiny cutting is pure magic, isn’t it? Don’t get discouraged if your first few attempts aren’t perfect. Gardening is a journey, and every “failure” is just a lesson learned. Keep trying, be gentle, and celebrate those tiny roots when they finally appear. Happy propagating!
Resource:
https://identify.plantnet.org/k-world-flora/species/Tetratheca%20thymifolia%20Sm./data