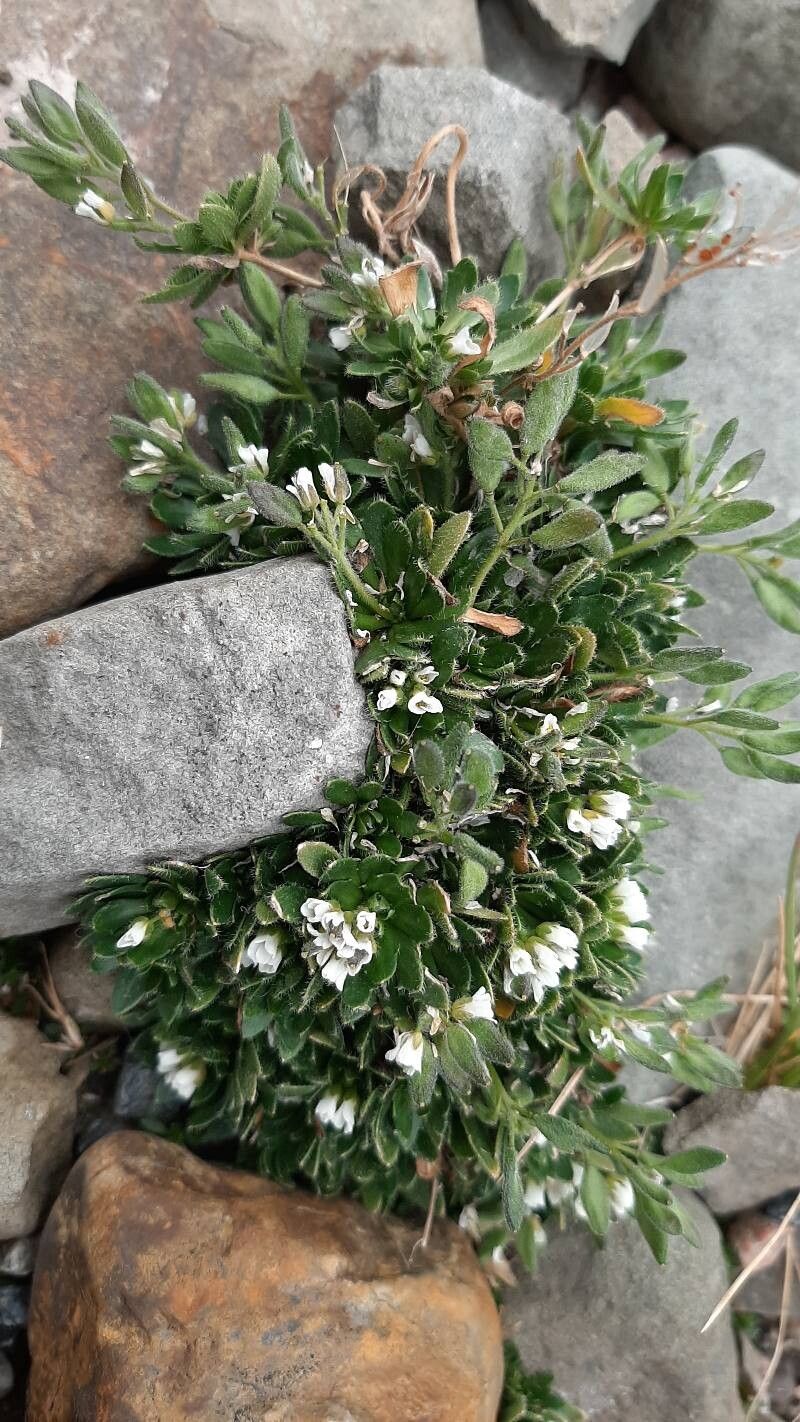
Oh, hello there! So glad you stopped by my little corner of the garden today. We’re going to talk about a real gem: Draba fladnizensis. If you haven’t met it yet, imagine tiny, star-shaped white flowers blanketing a low-growing mat of fuzzy, silver-green leaves. It’s absolutely stunning, especially carpeting a sunny rock garden or spilling over the edge of a pot. And the best part? Growing more of it yourself is a wonderfully rewarding journey. Now, I wouldn’t say Draba fladnizensis is the absolute easiest plant for a complete beginner to propagate, but with a little care and attention, you’ll definitely find success. It’s a project that really makes you feel like you’ve got a green thumb!
The Best Time to Start
When I’m looking to multiply my Draba fladnizensis, I always aim for late spring or early summer. This is when the plant is actively growing and has the most energy to put into developing new roots. Look for healthy, non-flowering stems. You want to catch it before it’s put all its effort into blooms and seed production.
Supplies You’ll Need
Here’s what I always have on hand for a propagation session:
- Sharp, clean pruning shears or a sharp knife: For making clean cuts.
- Small pots or seed trays: Clean ones are key!
- A well-draining potting mix: I usually mix about two parts perlite to one part peat moss or coco coir. A bit of compost can be nice, but drainage is paramount.
- Rooting hormone (optional but recommended): A powder or gel will help speed things along.
- A fine mister or spray bottle: For keeping things humid.
- Plastic bags or a propagation dome: To create a mini-greenhouse.
- Gravel or perlite: For the bottom of pots if you’re worried about waterlogging.
Propagation Methods
For Draba fladnizensis, the method I find most reliable is stem cuttings and division.
Method 1: Stem Cuttings
- Take your cuttings: Choose a healthy, non-flowering stem that’s about 3-4 inches long. Cut just below a leaf node (where a leaf joins the stem). This is where the magic of root development happens.
- Prepare the cuttings: Gently remove the lower leaves from the cutting. You want to expose that leaf node area.
- Apply rooting hormone (optional): Dip the cut end of the stem into your rooting hormone. Tap off any excess.
- Pot them up: Fill your small pots with your well-draining mix. Make a little hole with your finger or a pencil.
- Insert the cuttings: Gently place the base of each cutting into the hole, ensuring the leaf node is buried in the soil. Firm the soil gently around the stem.
- Water lightly: You want the soil to be moist, but not soggy.
- Create humidity: Cover the pot with a plastic bag or place it under a propagation dome. Make sure the leaves don’t touch the plastic, as this can lead to rot.
Method 2: Division
This is best done when the plant is actively growing but before it gets too large and leggy.
- Gently excavate the plant: Carefully dig up the entire clump of Draba fladnizensis.
- Examine the root ball: You’ll see how the plant naturally forms clumps.
- Divide the clump: Using your hands or a clean knife, gently pull or slice the clump into smaller sections. Each section should have a good amount of roots and some leafy growth.
- Pot up divisions: Plant each division into its own pot filled with your well-draining mix, treating them like you would a newly purchased plant. Water them in well.
The “Secret Sauce” (Pro Tips)
Here are a couple of things I’ve learned over the years that really make a difference:
- Bottom heat is your friend: If you’re using stem cuttings, placing your pots on a heat mat specifically designed for seedlings can significantly speed up root formation. It mimics the warmth of spring soil.
- Don’t overwater! This is probably the most common mistake. Draba fladnizensis hates having wet feet. Stick your finger into the soil; if you can feel any moisture about an inch down, wait a bit longer to water. It’s better to err on the side of slightly too dry than too wet when you’re trying to root cuttings.
- Give them a good location: Once potted, find a spot that gets bright, indirect light. Direct, hot sun can scorch those delicate new shoots. A bright windowsill is often perfect.
Aftercare & Troubleshooting
Once you see new growth appearing on your cuttings, that’s a good sign roots are forming! Gradually remove the plastic bag or dome over a few days to help the new plant acclimatize to the drier air. Continue watering when the top inch of soil feels dry.
The main issue you might encounter is rot. If your cuttings turn mushy and dark, or if the soil stays perpetually wet, you’ve likely got rot. Unfortunately, at that point, it’s usually too late. This is why that well-draining mix and careful watering are so crucial. If a division looks a bit sad after repotting, just give it consistent moisture and a bit of time. Most will bounce back.
A Encouraging Closing
So there you have it! Propagating Draba fladnizensis is a beautiful way to fill your garden or pots with more of that delightful charm. Be patient with the process – plants have their own timeline, you know. Enjoy watching those tiny roots form, and don’t be discouraged if one or two don’t make it. Every cutting is a learning opportunity, and the joy of seeing your own little Draba babies thrive is incredibly fulfilling. Happy propagating!
Resource:
https://identify.plantnet.org/k-world-flora/species/Draba%20fladnizensis%20Wulfen/data