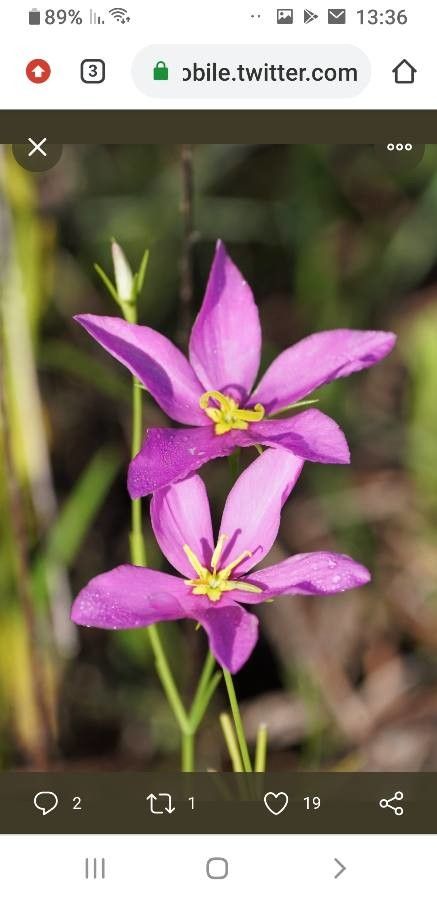
Hello there, fellow plant lovers! I’m so delighted you’re curious about Sabatia campanulata, often called the Marsh Pink or, more poetically, the American Centaury. This native beauty, with its delicate, star-shaped pink flowers, truly brings a touch of wild elegance to any garden, especially those with a bit of moisture or a sunny corner.
There’s something wonderfully fulfilling about coaxing new life from an existing plant. Propagating Sabatia campanulata is a wonderful way to expand your collection or share these treasures with friends. While it might seem a little daunting at first, I promise you, with a little patience and the right approach, you can absolutely succeed. It’s not the easiest plant for a complete novice, but it’s very achievable with this guide!
The Best Time to Start
For Sabatia campanulata, the sweet spot for propagation is late spring to early summer. This is when the plant is actively growing and has plenty of energy to put into rooting. You’ll want to select healthy, non-flowering stems for the best results. Think of it as harvesting new baby shoots just as they’re getting going!
Supplies You’ll Need
Gathering your supplies beforehand makes the whole process much smoother. Here’s what you’ll want to have on hand:
- Sharp, clean pruning shears or a sharp knife: For taking precise cuttings and keeping things hygienic.
- A well-draining potting mix: I like a blend of equal parts peat moss, perlite, and coarse sand. This mimics their natural damp-but-not-soggy habitat.
- Small pots or trays: About 3-4 inches in diameter are perfect. Make sure they have drainage holes!
- Rooting hormone (optional but recommended): A powder or gel can significantly speed up the rooting process.
- A spray bottle: For misting your cuttings.
- Clear plastic bags or a propagator: To create a humid environment.
- Labels and a waterproof marker: So you don’t forget what’s what!
Propagation Methods
Sabatia campanulata is generally propagated from stem cuttings. It’s a tried-and-true method and quite effective for this plant.
- Take Your Cuttings: In late spring or early summer, select healthy, vigorous stems that are at least 4-6 inches long. Using your clean shears, make a clean cut just below a leaf node (where a leaf attaches to the stem). Remove the lower leaves, leaving just a few at the top.
- Prepare the Cuttings: If you’re using rooting hormone, dip the cut end of each stem into the powder or gel. Tap off any excess.
- Plant Your Cuttings: Fill your small pots with your prepared potting mix. Moisten the soil thoroughly but not to the point of saturation. Make a small hole in the center of the soil with your finger or a pencil. Gently insert the cut end of the stem into the hole, ensuring the leaf nodes are buried.
- Firm the Soil: Gently firm the soil around the stem to provide support.
- Create Humidity: Water your potted cuttings lightly and then cover them with a clear plastic bag or place them in a propagator. This creates a greenhouse effect, keeping the cuttings humid, which is crucial for them to develop roots before the stems dry out. You can prop the plastic bag up with a few small stakes to keep it from touching the leaves.
- Provide Light (but not direct sun): Place the pots in a bright location, but out of direct sunlight. A spot on a bright windowsill or under grow lights is ideal.
The “Secret Sauce” (Pro Tips)
Here are a couple of tricks I’ve learned over the years that can really boost your success with Sabatia campanulata:
- Bottom Heat is Your Friend: Sabatia campanulata loves warmth. Placing your pots on a heated propagation mat can significantly speed up root formation. It encourages the plant to send out those initial roots from a cozy base.
- Watch the Water: While humidity is key, ensure the leaves of your cuttings never sit in standing water inside the propagator or bag. This can lead to rot. If you see condensation building up excessively, briefly vent the bag or propagator.
- Be Ruthless with Flowers: If your cuttings happen to produce tiny flower buds, pinch them off immediately. Right now, all the plant’s energy needs to go into root development, not flower production.
Aftercare & Troubleshooting
Once your cuttings have been planted, keep the soil consistently moist (but not waterlogged) and the humidity high. It can take anywhere from four to eight weeks for roots to develop. You’ll know they’re ready when you see new leaf growth or gentle resistance when you tug lightly on the stem.
At this point, you can gradually acclimate them to lower humidity by opening the plastic bag or propagator a little more each day over a week or so. Once they are actively growing and look sturdy, you can transplant them into slightly larger pots.
Now, for troubleshooting. The most common issue you’ll face is rot. This usually happens from overwatering or poor air circulation. If your cuttings turn mushy or black at the base, it’s a sign of rot. Unfortunately, at that point, they’re usually beyond saving. Prevention is key: ensure good drainage, use a well-aerated soil mix, and don’t overwater. If you see leaves wilting, it could be a sign of underwatering or that the stem just didn’t take. Don’t be discouraged; just try again!
A Encouraging Closing
Propagating plants is a journey, and every success, and even every learning experience, is part of the joy. Be patient with your little Sabatia campanulata cuttings. They’re working hard to establish themselves. Celebrate every new leaf and every hint of roots. Happy propagating, and may your gardens be ever blooming!
Resource:
https://identify.plantnet.org/k-world-flora/species/Sabatia%20campanulata%20(L.)%20Torr./data