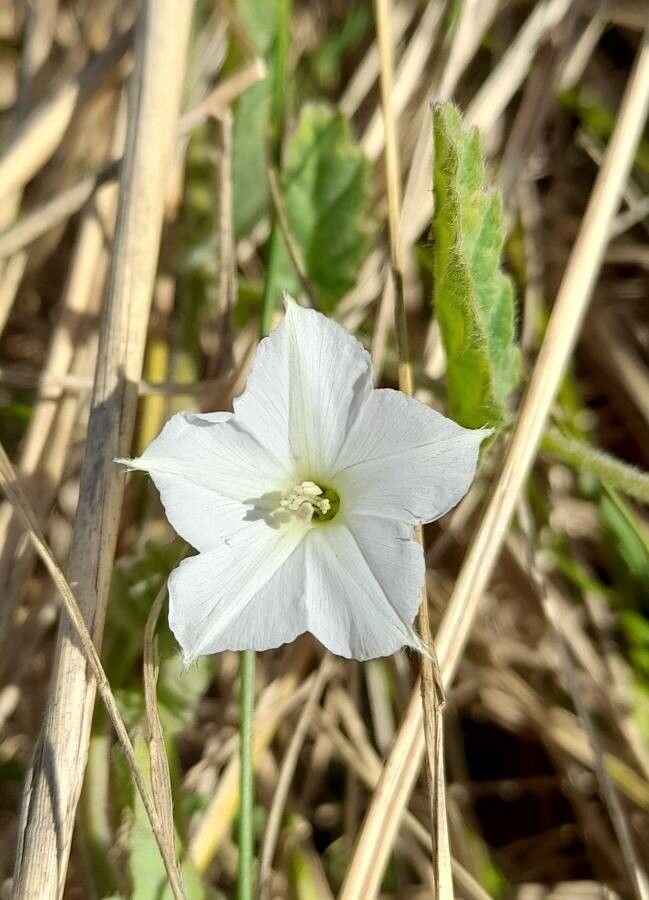
Hey there, fellow plant lovers! If you’ve ever fallen for the delicate, silvery foliage and cheerful, saucer-shaped flowers of Convolvulus hermanniae, you’re in for a treat. This charming Mediterranean native brings such a lovely, airy feel to any garden or container. And guess what? Propagating it yourself is totally doable, and honestly, incredibly rewarding. You get to multiply the joy and share it with friends! For beginners, I’d say it’s moderately easy. It requires a little attention, but the payoff is well worth it.
The Best Time to Start
For the highest success rate with Convolvulus hermanniae, I always recommend starting in late spring or early summer. This is when the plant is actively growing, and you’ll find nice, somewhat hardened new growth that’s perfect for taking cuttings. Avoid trying to propagate from very soft, brand-new shoots, as they tend to be too fragile.
Supplies You’ll Need
Here’s what I’ve got on hand when I’m ready to get propagating:
- Sharp, clean pruning shears or a sharp knife: This is crucial for making clean cuts.
- Small pots or seed trays: About 4-inch pots are usually perfect.
- A well-draining potting mix: I like to use a 50/50 blend of seed starting mix and perlite for excellent aeration. You can also add some coarse sand.
- Rooting hormone (optional but recommended): A powder or gel can give your cuttings a little head start.
- Plastic bags or a propagator lid: To create a humid environment.
- Watering can with a fine rose: For gentle watering.
- Labels and a permanent marker: Don’t forget to label your pots!
Propagation Methods
I find that stem cuttings are the most successful and straightforward method for Convolvulus hermanniae.
- Take Your Cuttings: Gently inspect your Convolvulus hermanniae plant. Look for healthy stems that are flexible but not floppy. Using your clean shears or knife, take cuttings that are about 4-6 inches long. Make the cut just below a leaf node (where a leaf attaches to the stem).
- Prepare the Cuttings: Carefully remove the lower leaves from each cutting. You want to expose at least two or three nodes along the stem that will eventually be buried in the soil. This is where the roots will form.
- Apply Rooting Hormone (Optional): If you’re using rooting hormone, dip the cut end of the stem into the powder or gel, tapping off any excess.
- Plant the Cuttings: Fill your pots with the well-draining potting mix. Make a small hole in the center of each pot with a pencil or your finger. Insert the prepared cuttings into the holes, ensuring that at least one or two leaf nodes are below the soil surface. Gently firm the soil around the cuttings to secure them.
- Create Humidity: Water the soil gently. Then, cover the pots with clear plastic bags, securing them with a rubber band, or place them inside a propagator with a lid. This will trap moisture and create a humid microclimate, which is vital for successful rooting.
- Placement: Place the pots in a bright location, but out of direct, scorching sunlight. A greenhouse or a sunny windowsill is ideal.
The “Secret Sauce” (Pro Tips)
Here are a few little tricks I’ve learned over the years that really make a difference:
- Don’t Drown Them: While humidity is key, make sure you don’t overwater the soil. Waterlogged conditions are a fast track to rot. The soil should feel moist but not soggy. Let the surface dry out slightly between waterings.
- Bottom Heat is Your Friend: If you have access to a heat mat, using bottom heat can significantly speed up the rooting process. It encourages root development from the base of the cutting. Worms the soil temperature to around 70-75°F (21-24°C).
- Patience with the Foliage: Try your best to prevent the leaves from touching the inside surface of the plastic bag or propagator lid. If they’re constantly wet, they’re more prone to fungal issues. A slight tenting of the bag or propping it up can help.
Aftercare & Troubleshooting
Once your cuttings have started to root – usually within 4-6 weeks – you’ll see new growth appearing. This is a great sign! At this point, you can gradually acclimatize them to normal humidity by opening the plastic bag or propagator lid for increasingly longer periods over a few days. Once they seem robust, you can remove the cover entirely.
The most common sign of failure is rot. If your cuttings turn black and mushy, or if the leaves yellow and drop off without any signs of new growth after a reasonable time, it’s usually a sign of too much moisture or poor air circulation. Don’t be discouraged if some don’t make it; it’s all part of the learning process!
A Encouraging Closing
Propagating Convolvulus hermanniae is a wonderful way to expand your collection and experience the magic of plant growth firsthand. Be patient, observe your cuttings closely, and most importantly, enjoy the journey. Happy propagating!
Resource:
https://identify.plantnet.org/k-world-flora/species/Convolvulus%20hermanniae%20L’Hér./data