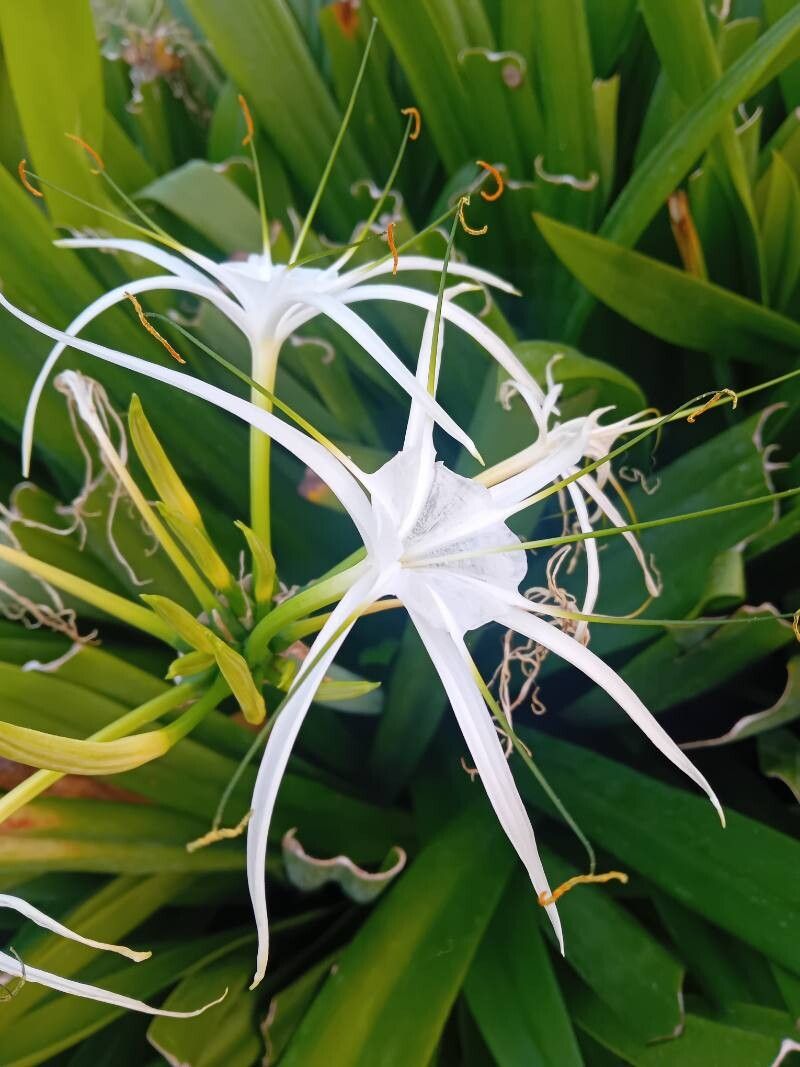
Oh, Hymenocallis fragrans! If you’ve ever been graced by the intoxicating, sweet perfume of this beauty, you know exactly why I’m so excited to chat with you about bringing more of them into your garden. These elegant plants, often called Spider Lilies, are simply stunning with their delicate white blooms and that incredible fragrance. The joy of watching a new little Hymenocallis emerge from a tiny piece of its parent is a special kind of magic that never gets old for me. And the good news? While they might seem a bit fancy, propagating them is actually quite accessible, even for those just dipping their toes into the gardening world.
The Best Time to Start
For the most success with Hymenocallis fragrans, I always aim to propagate them when they’re actively growing. This usually means late spring or early summer, after the main blooming period has passed. You’ll often see new pseudobulbs or offsets forming around this time, which are perfect candidates for propagation. Starting them when they have plenty of energy means they’re ready to establish themselves quickly.
Supplies You’ll Need
Here’s what I like to have on hand before I begin:
- Sharp Pruning Shears or a Knife: Clean cuts are essential!
- Rooting Hormone (Optional but recommended): A little boost can help things along.
- Well-Draining Potting Mix: I prefer a blend of equal parts potting soil, perlite, and a bit of compost. You want it to drain like a sieve!
- Pots or Containers: Small pots or even seed trays work well for starting out. Make sure they have drainage holes.
- Watering Can or Spray Bottle: Gentle watering is key.
- Labels and a Marker: Don’t lose track of what you’ve planted!
Propagation Methods
The most straightforward way to get more Hymenocallis fragrans is by division. These plants form bulbs (technically more like pseudobulbs or rhizomes) that naturally produce offsets, or little baby bulbs, as they mature.
- Gently Excavate: Around late spring or early summer, carefully dig up the parent plant. You can do this with your hands or a trowel, being mindful not to damage the bulbs.
- Clean Off the Soil: Gently brush or rinse away excess soil from the bulbs. You’ll likely see smaller bulbs attached to the main one.
- Separate the Offsets: Look for natural separation points where the offsets are attached. You can often gently twist or use your clean knife/shears to separate them. Ensure each offset has at least one or two healthy bulbs and a few roots, if possible. If an offset seems barely attached, it’s better to leave it connected until it’s stronger.
- Prepare for Planting: If you’re using rooting hormone, dip the cut end of each offset into it.
- Plant Them Up: Fill your small pots with your well-draining potting mix. Plant each offset so that the top of the bulb is just at or slightly below the soil surface. You don’t want to bury them too deeply.
- Water Lightly: Water the newly potted offsets gently. You don’t want to waterlog them.
The “Secret Sauce” (Pro Tips)
Over the years, I’ve picked up a few little tricks that seem to make a difference:
- Don’t Overcrowd the Parent: When dividing, I’m always careful not to take too many offsets from a single plant in one go. Leaving plenty of new growth attached allows the mother plant to recover and continue to thrive. Think about it like giving a haircut – you wouldn’t want to take too much off at once!
- Patience with New Growth: New Hymenocallis can be slow to show signs of life after division. Don’t despair if you don’t see leaves popping up immediately. Keep the soil consistently (but not soggy) moist and provide bright, indirect light. New roots are forming underground, even if you can’t see them yet.
Aftercare & Troubleshooting
Once your new Hymenocallis fragrans are planted, keep them in a bright spot with indirect sunlight. For the first few weeks, mist the soil surface gently or water very sparingly, just enough to keep the potting mix lightly moist. You don’t want them to dry out completely, but waterlogging is their biggest enemy.
The most common issue you might encounter is rot. This usually happens if the soil stays too wet, especially in cooler temperatures. You’ll often see the leaves turn yellow and mushy, or the base of the bulb will become soft and dark. If you suspect rot, gently unearth the bulb and remove any affected parts with a clean knife. Let it air dry for a day or two before repotting in fresh, dry potting mix.
A Encouraging Closing
Growing more of these fragrant beauties from your existing plants is a truly rewarding journey. It takes a little patience and observation, but the payoff of seeing those first tiny leaves unfurl from your own propagated Hymenocallis fragrans is absolutely immense. So, grab your tools, get your hands in the soil, and enjoy the wonderful process of bringing more of this garden treasure into your life!
Resource: