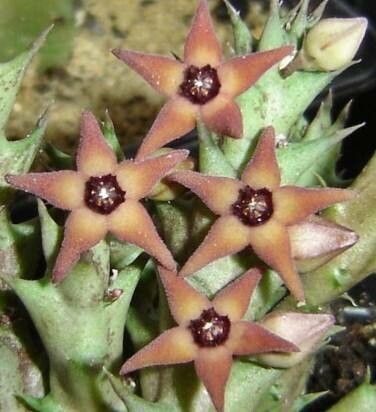
Hey there, fellow plant lovers! I’m so excited to chat with you today about a truly unique succulent: Orbea subterranea. If you haven’t met this one yet, imagine a clump of fascinating, segmented stems that look like they’re creeping right out of the soil – because, well, they are! And the star of the show? Their delightfully fuzzy, star-shaped flowers that often have a surprising scent.
Propagating Orbea subterranea is incredibly rewarding. It’s a fantastic way to multiply your collection or share these botanical oddities with friends. And for you beginners out there, I’d say it falls into the “moderately easy” category. With a little care and attention, you’ll be well on your way to success.
The Best Time to Start
Honestly, the absolute sweet spot for propagating Orbea subterranea is during its active growing season. Think spring and summer. The plant is full of energy then, eager to put out new growth and establish roots. You can often get away with it in early fall, but I find the roots take a bit longer to develop when the days start getting shorter.
Supplies You’ll Need
Gathering your supplies beforehand makes the whole process much smoother. Here’s what I usually have on hand:
- Sharp, clean pruning shears or a sharp knife. Sterilize them with rubbing alcohol between cuts to prevent disease.
- A well-draining potting mix. For succulents and cacti, I usually use a mix of equal parts potting soil and perlite or pumice. You can also buy pre-made cactus and succulent mixes.
- Rooting hormone (optional but helpful). It’s not strictly necessary for Orbea subterranea, but it can give cuttings a little boost.
- Clean pots or containers. Make sure they have drainage holes. Small nursery pots are perfect.
- A watering can or spray bottle.
- A small trowel or dibber (optional). For making holes in the soil.
Propagation Methods
Let’s dive into how you can grow more of these beauties!
Stem Cuttings
This is my go-to method for Orbea subterranea. It’s straightforward and usually gives great results.
- Make the cut. Using your sterilized pruners or knife, select a healthy stem. You want a piece that has at least a couple of segments. Cut it right below a segment node if possible.
- Let it callous. This is crucial! You absolutely must let the cut end dry out and form a callus. Place the cutting on a dry paper towel or in a small, empty pot in a bright spot, away from direct sun, for 2-7 days. You’ll see a dry, hardened layer form over the cut. This prevents rot when you plant it.
- Prepare the pot. Fill your clean pots with your well-draining potting mix. Moisten the soil slightly.
- Plant the cutting. You can dip the calloused end in rooting hormone if you’re using it. Then, make a small hole in the soil with your finger or a dibber, and insert the cutting. Make sure at least one segment is below the soil line.
- Don’t water immediately. I advise waiting a day or two after planting before giving it its first drink. This gives the callus another chance to seal and prevents immediate rot.
- Provide bright light. Place the pots in a bright location, but avoid direct, harsh sunlight initially, as this can stress the new cutting.
Division (Less Common, but possible)
While cuttings are more common, you can sometimes divide established clumps.
- Gently unpot. Carefully slide the plant out of its container.
- Inspect the root ball. Look for natural breaks where sections can be separated. You might be able to see where one stem cluster is not well-connected to another.
- Separate. Gently pull or use your knife to separate clumps. Try to get some roots with each division.
- Let it callous. Just like cuttings, allow any cut or damaged areas to dry and callous for a few days before replanting.
- Pot up. Plant the divisions in their own pots filled with the appropriate soil mix. Water sparingly at first.
The “Secret Sauce” (Pro Tips)
Here are a few things I’ve learned over the years that can really give you an edge:
- Embrace the dry periods. Succulents, including Orbea subterranea, absolutely hate sitting in wet soil. When you’re rooting cuttings, it’s better to err on the side of too dry than too wet. I often wait until I see signs of the soil drying out completely before watering again.
- Think bottom heat. If you’re really keen on speeding things up, especially if your home is a bit cooler, placing your pots on a gentle heat mat designed for seedlings can work wonders. It encourages root development from below, which is where all the action happens!
- Don’t be afraid of airflow. Good air circulation is your best friend when dealing with succulents. It helps the soil dry out and prevents fungal issues. Don’t crowd your cuttings too closely if you have many.
Aftercare & Troubleshooting
Once you start seeing signs of new growth, it’s a good indication that roots have formed! You can gently tug on the cutting to feel for resistance – that’s a sign it’s anchored.
- Watering: Gradually increase watering as the plant establishes, but always allow the soil to dry out between waterings.
- Light: You can slowly acclimate your new plant to brighter light, eventually moving it to a spot where it will receive plenty of sun.
Now, what if things go sideways? The most common culprit is rot. If your cutting turns mushy, black, or smelly, it’s usually a sign of too much moisture. If you catch it early, you might be able to cut off the rotted part, let the healthy bit callous again, and try planting it in fresh, dry soil.
A Encouraging Closing
Propagating plants is a journey, and there will be times when things don’t go as planned. But don’t get discouraged! Each attempt teaches you something new. Be patient with your Orbea subterranea cuttings. Watch them, learn from them, and enjoy the incredibly satisfying feeling of nurturing a new life. Happy growing!
Resource: