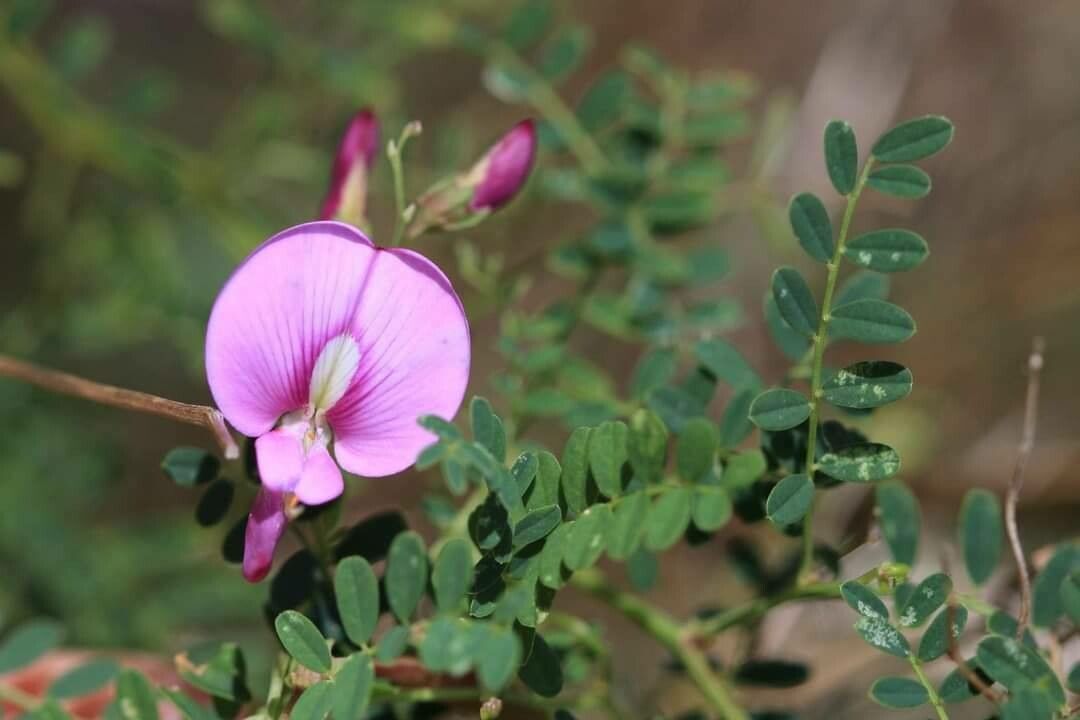
Hello fellow garden enthusiasts! It’s so lovely to sit down with you today. If you’ve ever admired the delicate, pea-like flowers of Swainsona galegifolia, also known as Darling River Pea or Smooth Darling Pea, then you’re in for a treat. This Australian native, with its graceful arching stems and bursts of soft pink, purple, or white blossoms, truly is a gem in any garden. And the best part? It’s surprisingly rewarding to multiply!
Why Propagate Swainsona?
There’s a special kind of joy in growing a new plant from a piece of an existing one. It saves you money, of course, but it’s also about connection – about sharing the life of a plant with another. Swainsona propagation, thankfully, isn’t overly complicated. While it might present a slight learning curve for a complete beginner, with a little care and attention, you’ll be well on your way to success.
The Best Time to Start
For Swainsona galegifolia, spring is your golden ticket. Aim to take cuttings when the plant is actively growing. After the main flowering flush has passed, but before the intense heat of summer sets in, is ideal. This allows the cuttings to establish themselves in a milder environment. You can also try in early autumn, but ensure there’s enough time for roots to develop before the colder weather arrives.
Supplies You’ll Need
Gathering your supplies beforehand makes the whole process so much smoother. Here’s what you’ll want to have on hand:
- Sharp pruning shears or a clean, sharp knife: For taking clean cuts.
- Rooting hormone (powder or gel): While not strictly essential for all plants, it can significantly boost success rates for cuttings.
- A well-draining potting mix: I like a mix of equal parts perlite, coco coir, and a good quality seed-starting mix.
- Small pots or seedling trays: Clean ones are a must to prevent disease.
- A clear plastic bag or humidity dome: To keep your cuttings moist.
- Water: For misting.
- Optional: Bottom heat mat: This can really speed up root development.
Propagation Methods
Swainsona is most commonly and successfully propagated from stem cuttings. It’s my go-to method!
Stem Cuttings:
- Select healthy stems: Look for a healthy, non-flowering stem that’s about 10-15 cm long. Pinch off any developing flower buds.
- Make the cut: Using your clean shears or knife, make a clean cut just below a leaf node (where a leaf joins the stem). This is where new roots are most likely to form.
- Prepare the cutting: Gently remove the lower leaves from the cutting, leaving only two or three sets at the top. This reduces moisture loss.
- Apply rooting hormone: Dip the cut end into rooting hormone, tapping off any excess.
- Pot them up: Fill your small pots or trays with your prepared potting mix. Make a small hole in the center of each pot with your finger or a pencil.
- Insert the cuttings: Gently push the cut end of the stem into the hole, ensuring it’s firm.
- Water gently: Water thoroughly but gently, allowing excess to drain away.
- Create humidity: Place the pots into a clear plastic bag, sealing it loosely, or cover with a humidity dome. This keeps the humidity high around the cuttings.
- Find a warm spot: Place the pots in a bright location, but out of direct harsh sunlight. A little warmth from a bottom heat mat will be a real advantage here, encouraging those roots to form faster.
The “Secret Sauce”
Here are a couple of little tricks I’ve learned over the years that can really make a difference:
- Don’t let leaves touch the water (if water propagating): While I primarily use soil for Swainsona, if you were to try water propagation (which is less common for this species but possible), ensure leaves are well above the water line. Any submerged foliage will rot and can infect the cutting.
- Be patient with bottom heat: If you’re using a heat mat, it’s not about seeing new growth immediately. It’s about providing that consistent, gentle warmth at the base of the cutting, which triggers root initiation. You might not see much happening above soil for a few weeks, but you’ll be developing a strong root system below.
Aftercare & Troubleshooting
Once your cuttings have been in their warm, humid environment for about 3-6 weeks, it’s time to check for roots. Gently tug on a cutting; if you feel resistance, you likely have roots!
- Increase ventilation: Gradually remove the plastic bag or dome over a few days to help the new plants acclimatize to drier air.
- Watering: Water when the top centimeter of soil feels dry. Avoid overwatering, as this is the quickest way to invite rot.
- Light: Continue to provide bright, indirect light.
- Transplanting: Once the new plants are well-rooted and have a few sets of healthy leaves, you can carefully transplant them into slightly larger pots.
Signs of failure typically manifest as wilting that doesn’t recover, yellowing leaves, or a mushy stem at the soil line (rot). If you see rot, unfortunately, that cutting is likely lost, but don’t be discouraged! It’s part of the learning process. Just remove the affected cutting and try again with fresh ones.
Happy Growing!
So there you have it – a straightforward guide to multiplying your beautiful Swainsona galegifolia. Remember to be patient with your little green babies. Gardening is all about observation and learning, and each propagation attempt, whether a roaring success or a gentle learning experience, adds to your wisdom. Enjoy the process, and soon you’ll be sharing the joy of these lovely native blooms with others!
Resource:
https://identify.plantnet.org/k-world-flora/species/Swainsona%20galegifolia%20(Andrews)%20R.Br./data