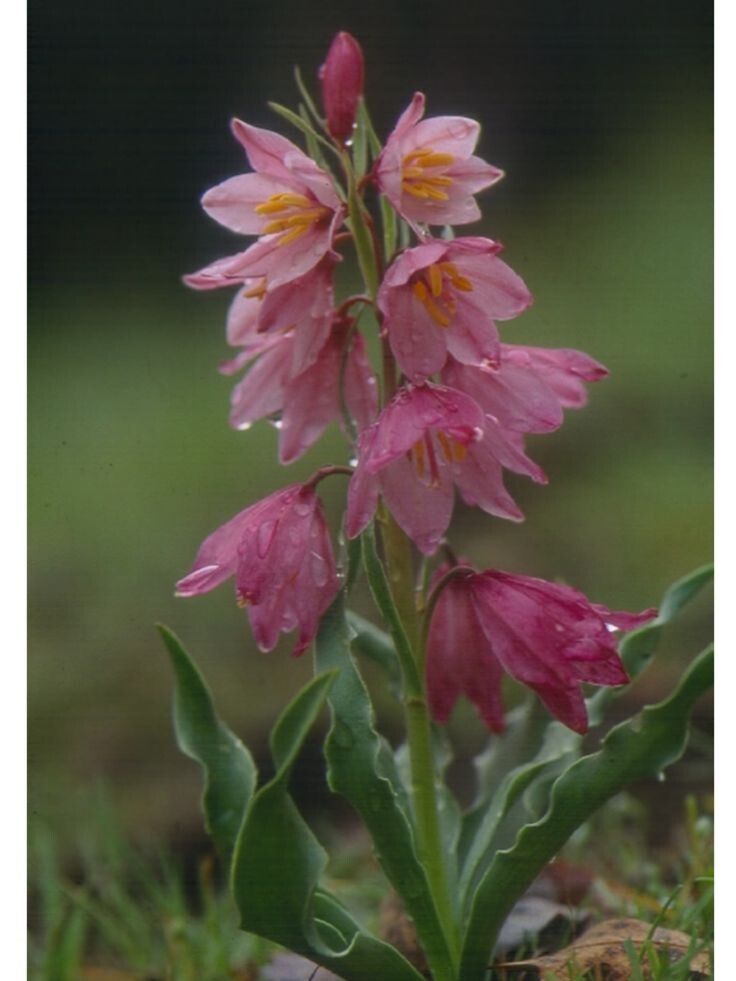
Hello there, fellow garden enthusiasts! Today, we’re going to delve into the charming world of Fritillaria pluriflora, often called the California fritillary. If you’ve ever seen these lovely, nodding bells gracing a woodland garden or a cool, shady nook, you know their understated elegance is truly special. Their delicate patterns and soft colors bring a touch of wild beauty that’s hard to resist. Propagating them is a wonderfully rewarding way to share that magic with your own garden or with friends. Now, they aren’t the absolute easiest plant for a complete beginner to start with, but with a little patience and the right approach, you’ll be well on your way to success.
The Best Time to Start
For Fritillaria pluriflora, the ideal time to propagate is typically in late summer or early fall, after the plant has gone dormant and its foliage has completely died back. This is when the bulbs are at their prime, storing energy for the next growing season. Working with dormant bulbs is much less stressful for the plant and usually yields the best results. Waiting until they’ve had their full growing and resting cycle is key.
Supplies You’ll Need
Here’s a little kit to get you going:
- Gardening gloves: To keep your hands clean and protect them.
- Sharp, clean trowel or bulb digger: For gently excavating the bulbs.
- Small, sharp knife or pruning shears: For dividing bulbs and cleaning off any old roots.
- Well-draining potting mix: A good blend for bulbs, or a mix of compost, perlite, and sand works wonders.
- Shallow trays or pots: For replanting the divisions.
- Watering can with a fine rose: For gentle watering.
- Optional: Rooting hormone powder: While not strictly necessary for Fritillaria division, some gardeners like to use it.
Propagation Methods: Bulb Division
Fritillaria pluriflora is most commonly propagated by bulb division. This involves carefully separating the offsets or bulbils that form around the main bulb.
- Gently excavate: In your chosen propagation window (late summer/early fall), carefully dig around the dormant Fritillaria plant. You want to lift the entire bulb cluster without damaging the bulbs themselves. A trowel or a soil knife works well for this.
- Clean the bulbs: Once you’ve lifted the bulbs, gently brush away as much soil as you can. You’ll likely see smaller bulbs attached to the main one.
- Make the divisions: Using your clean, sharp knife, carefully separate the offsets from the main bulb. Try to keep at least one good basal plate (where the roots emerge) on each division. If an offset is tiny and doesn’t have a clear basal plate, it might be better to leave it attached for now.
- Trim old roots (optional): You can trim off any long, old roots to encourage new root growth, but this isn’t always essential. Just make sure you’re not cutting into the bulb itself.
- Replant immediately: Pot your divisions in your well-draining mix. Plant them at about the same depth they were growing previously – usually about 2-3 inches deep. Give them a little space; they don’t need to be crammed in.
The “Secret Sauce” (Pro Tips)
Here are a few little tricks I’ve learned over the years that can make a difference:
- Don’t rush the dormancy: This is probably the most crucial tip. Fritillarias absolutely need their rest period. Trying to divide them while they’re actively growing will exhaust them and dramatically reduce your success rate. Patience here is rewarded!
- Good drainage is non-negotiable: Fritillaria bulbs are notoriously susceptible to rot, especially in wet conditions. Think of their native habitat – they often grow in well-drained slopes. Ensuring your potting mix is light and airy, and that your pots have drainage holes, is paramount.
- A little shade goes a long way: Once replanted, these divisions don’t need baking in full sun. A spot that gets morning sun and afternoon shade is ideal, mimicking their natural growing conditions.
Aftercare & Troubleshooting
Once your divisions are planted, give them a gentle watering. Don’t drench them, just moisten the soil. Keep the pots in a cool, protected spot. You shouldn’t expect much visible growth until the following spring.
The most common problem you’ll encounter is rot. If you see a bulb turning mushy, brown, or developing a foul smell, it’s likely rot. This is almost always due to overwatering or poor drainage. Unfortunately, once rot sets in, it’s very difficult to save the bulb. Be vigilant about checking your soil moisture and ensuring good air circulation. If you see tiny white fungal threads, that’s often a sign of too much moisture and potential problems ahead.
A Encouraging Closing
Propagating Fritillaria pluriflora is a journey that teaches us about patience and the cycles of nature. It might take a season or two to see your new bulbs really take off, but the anticipation is part of the fun! Trust the process, observe your plants, and don’t be discouraged if you have a setback or two. Every gardener has them! Enjoy watching your Fritillary collection expand, and savor the beauty they bring to your garden. Happy growing!
Resource: