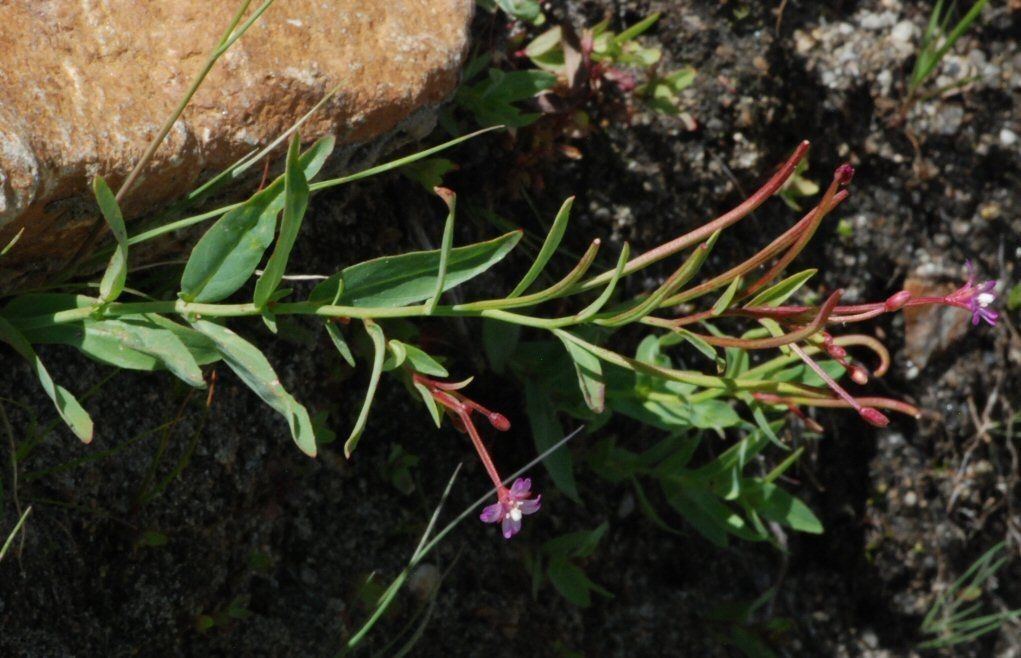
Hello fellow garden enthusiasts! Today, I want to chat about a truly special plant: Epilobium glaberrimum, often known as the California fuchsia. If you’ve ever seen its vibrant, trumpet-shaped flowers gracing a sunny slope, you know exactly why it captures our hearts. The hummingbirds can’t get enough of them! Propagating this beauty is incredibly rewarding. You get to fill your garden, share with friends, and just deepen that amazing connection we have with our plants.
Now, about getting started. Is Epilobium glaberrimum a beginner-friendly plant to propagate? I’d say it’s moderately easy, especially once you know a few tricks. It’s not as forgiving as a succulent, but it’s certainly not a temperamental orchid either. A little care goes a long way.
The Best Time to Start
For the highest success rate with Epilobium glaberrimum, I always aim for late spring to early summer. This is when the plant is actively growing and has plenty of fresh, healthy material to work with. You want to catch it before it gets too woody or starts putting all its energy into flowering. Look for stems that are flexible but not super soft and floppy.
Supplies You’ll Need
Here’s what I keep on hand for my propagation projects:
- Sharp pruning shears or a clean knife: For making clean cuts.
- Rooting hormone powder or gel: This isn’t strictly essential for Epilobium glaberrimum, but it can speed up root development and improve success rates, especially if you’re a bit nervous.
- A well-draining potting mix: I usually use a sterilized seed-starting mix blended with perlite or coarse sand (about a 50/50 ratio). This is crucial to prevent rot.
- Small pots or seed trays: Clean ones, of course! Little 4-inch pots work wonderfully.
- Plastic bags or a clear propagation dome: To maintain humidity, which is vital for cuttings.
- Watering can with a fine rose spray: For gentle watering.
Propagation Methods
Let’s get our hands dirty! The most reliable method for Epilobium glaberrimum is by stem cuttings.
Stem Cuttings:
- Take your cuttings: In late spring or early summer, select healthy, non-flowering stems. Using your sharp shears or knife, take cuttings that are about 4-6 inches long. Make the cut just below a leaf node (where a leaf attaches to the stem). This is where the plant’s hormones are most concentrated.
- Prepare the cuttings: Gently remove the lower leaves, leaving just two or three sets at the top. This prevents them from rotting in the soil. If your cuttings feel a bit flimsy, you can pinch off a few more leaves.
- Apply rooting hormone (optional but recommended): Dip the cut end of each stem into your rooting hormone powder or gel, tapping off any excess.
- Plant your cuttings: Fill your small pots with your prepared well-draining mix. Make a small hole with a pencil or your finger, and carefully insert the cuttings. Gently firm the soil around them to ensure good contact with the hormone and soil.
- Water gently: Water thoroughly but gently, until you see water draining from the bottom of the pot.
- Create humidity: This is key! You can cover the pots with a clear plastic bag (propping it up with stakes so it doesn’t touch the leaves) or place them under a propagation dome.
- Place in bright, indirect light: Find a warm spot, but avoid direct sunlight, which can scorch delicate cuttings.
The “Secret Sauce” (Pro Tips)
Over the years, I’ve learned a few things that really make a difference:
- The “Bottom Heat” Trick: If you really want to give your cuttings a boost, place the pots on a gentle heating mat. This provides consistent, warm temperatures to the soil, encouraging root formation much faster. It’s like a cozy spa day for your new plants!
- Don’t Over-Water! This is perhaps the biggest mistake beginners make. While cuttings need moisture, soggy soil is a death sentence. It leads to rot. Check your soil moisture by feeling it with your finger. Only water when the top inch feels dry.
- Fresh Cuts are Best: Try to plant your cuttings as soon as possible after making them. The longer they sit out, the more they can dehydrate, making it harder for them to root. If you must wait a short while, keep them in a slightly damp paper towel in a cool, dark place.
Aftercare & Troubleshooting
Once your cuttings have been in their cozy, humid environment for a few weeks, you might start to see signs of life. The best sign is new leaf growth at the top of the stem. You can also give a very gentle tug on a cutting – if there’s resistance, you know roots have formed.
Once roots have developed, gradually acclimate your new plants to normal humidity by slowly opening the plastic bag or ventilation on your dome. Continue to keep them in bright, indirect light and water when the soil feels dry. You can pot them up into slightly larger containers once they’ve developed a good root system.
What if things go wrong? The most common culprit is rot. If your cuttings turn mushy, black, or simply disappear, it’s usually a sign of too much moisture and not enough air circulation. This is where that well-draining soil and the plastic bag trick (not sealed too tightly) come in handy. If you see rot, it’s usually best to discard the affected cuttings and start again, paying extra attention to watering.
A Encouraging Closing
Propagating Epilobium glaberrimum is a journey, and like any good garden journey, it requires a little patience. Don’t be discouraged if not every cutting takes. Observe, learn, and enjoy the process! It’s amazing to watch these little bits of plant life transform into robust new specimens. Happy propagating!
Resource:
https://identify.plantnet.org/k-world-flora/species/Epilobium%20glaberrimum%20Barbey/data