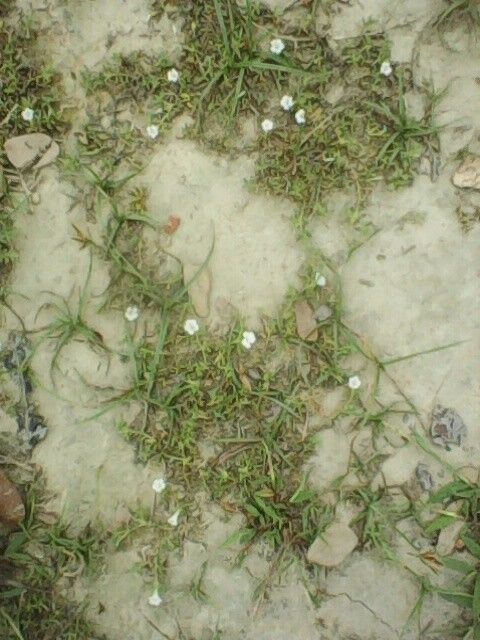
Hello fellow garden enthusiasts! Today, I want to talk about a little gem that’s been stealing my heart for years: Dentella repens. If you’re looking for a charming groundcover that spills and cascades with delicate white flowers, this is it. It brings such a lovely, understated beauty to hanging baskets, fairy gardens, or even as a living mulch in pots. And the best part? Propagating it is incredibly rewarding, and I’m happy to say, quite easy to get started with! Even if you’re new to the plant propagation game, you’ll find success here.
The Best Time to Start
For the highest success rate with Dentella repens, I always lean towards the warmer months. Late spring through to early autumn is your sweet spot. This is when the plant is actively growing and has plenty of energy to dedicate to putting out roots. You want to work with healthy, vigorous material, so avoid anything that looks stressed or is just waking up from dormancy.
Supplies You’ll Need
Gathering your materials before you begin makes the whole process much smoother. Here’s what I usually have on hand:
- Clean, sharp pruning shears or scissors: For making clean cuts.
- Small pots or nursery trays: Make sure they have drainage holes!
- Well-draining potting mix: A seed-starting mix or a blend of peat moss, perlite, and a little compost works wonderfully.
- Rooting hormone (optional but helpful): A powder or gel can give your cuttings a little boost.
- Clear plastic bags or a propagator lid: To create a humid environment.
- Spray bottle: For misting.
- Labels and a pen: To keep track of your projects!
Propagation Methods
Dentella repens is a real trooper, and thankfully, it’s quite forgiving when it comes to propagation. Here are a couple of my go-to methods:
Stem Cuttings
This is my absolute favorite way to multiply Dentella repens. It’s straightforward and usually yields excellent results.
- Select your cuttings: Look for healthy, non-flowering stems that are about 3-4 inches long. Give them a gently tug – if they snap easily, they’re probably a good thickness.
- Make the cut: Using your clean pruners, make a clean cut just below a leaf node (where a leaf attaches to the stem). This is where roots are most likely to form.
- Prepare the cutting: Gently remove the lower leaves from the bottom inch or so of the stem. You can leave the top few leaves; they’ll help the cutting photosynthesize.
- Apply rooting hormone (optional): If you’re using hormone, dip the cut end into the powder or gel. Tap off any excess.
- Plant your cuttings: Stick the prepared cuttings into your prepared pots filled with the moist potting mix. Make sure the leaf nodes you removed are buried in the soil. Space them a couple of inches apart.
- Create humidity: Water gently to settle the soil. Then, cover the pots with a clear plastic bag or a propagator lid. This traps moisture and mimics the humid environment cuttings crave.
Water Propagation
This method is so satisfying to watch!
- Take your cuttings: Follow steps 1-3 from the stem cuttings method.
- Place in water: Fill a small jar or glass with clean water. Place your cuttings in the water, ensuring that the leaf nodes are submerged, but importantly, don’t let the leaves touch the water. Remove any leaves that would be below the waterline.
- Find a bright spot: Place the container in a bright location, but out of direct, harsh sunlight.
- Change the water regularly: Refresh the water every few days to keep it clean and oxygenated. You’ll be amazed to see little white roots begin to sprout in a week or two!
- Pot them up: Once the roots are about an inch long, you can carefully pot them into your well-draining soil mix.
The “Secret Sauce” (Pro Tips)
Here are a couple of tricks I’ve learned over the years that really make a difference:
- Bottom Heat is Your Friend: If you’re struggling with rooting, especially in cooler conditions, a heat mat placed under your pots can dramatically speed things up. It gives those root-forming cells a gentle nudge to get going. You don’t need it blazing hot, just a warm touch.
- Don’t Be Afraid to Prune: Sometimes, a cutting might try to put out a flower bud before it’s rooted. If you see this happening, pinch off the flower bud. The plant’s energy is better spent on growing roots, not flowers, at this stage.
Aftercare & Troubleshooting
Once your little cuttings have developed a good root system (you can gently tug on them to feel resistance, or even see them poking out the drainage holes), it’s time for them to graduate!
- Gradual Acclimation: If you’ve been using a propagator lid or plastic bag, start by removing it for a few hours each day, gradually increasing the time until the cuttings are hardened off. This helps them adjust to normal humidity levels.
- Regular Watering: Continue to water them consistently, keeping the soil moist but not waterlogged.
- Watch for Rot: The most common issue you’ll encounter is rot, which usually happens if the cuttings are kept too wet or have poor air circulation. If a cutting turns mushy or black, unfortunately, it’s likely lost. Discard it to prevent any spread.
- Slow Growth is Okay: Don’t be discouraged if growth is slow initially. Dentella repens can take its time establishing itself.
A Encouraging Closing
Propagating Dentella repens is a wonderfully low-stakes way to expand your collection or share these charming plants with friends. Be patient, observe your little ones closely, and trust the process. Before you know it, you’ll have cascading beauty to enjoy all season long. Happy gardening!
Resource: