Hello, fellow garden lovers!
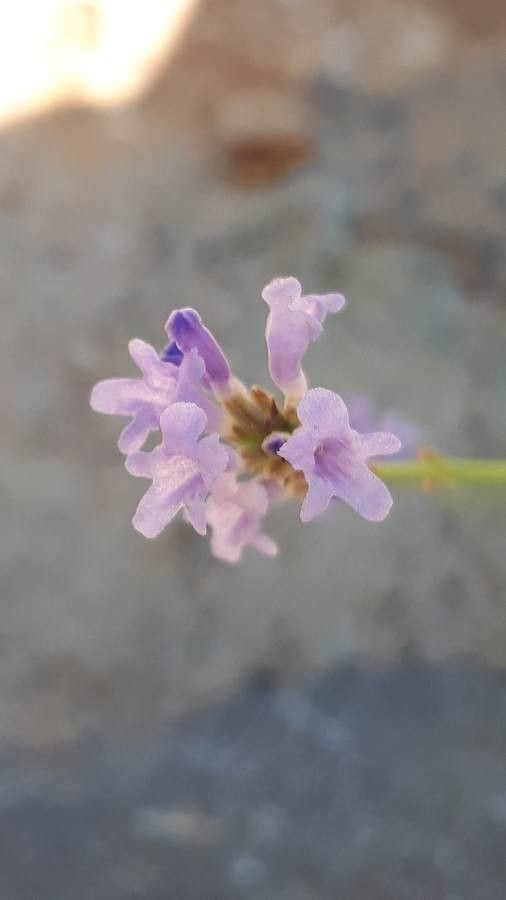
There’s something truly special about lavender, isn’t there? And Lavandula subnuda, or the Native Lavender as it’s sometimes called, is no exception. Its delicate, often subtly colored blooms and wonderfully fragrant foliage bring a touch of wild elegance to any garden. For me, the most rewarding part of gardening is creating more of what I love. Propagating a plant like Lavandula subnuda is a fantastic way to do just that, building up your collection or sharing these beauties with friends.
Now, I know some of you might be wondering if this is a tricky plant to propagate. Honestly, I’d say it’s moderately easy. It’s not as hands-off as some succulents, but with a little care and attention, you’ll find success with it.
The Best Time to Start
For Lavandula subnuda, the absolute sweet spot for propagation is late spring to early summer, just as the plant is actively growing. You’re looking for new, but not too soft, growth. Think of it as “semi-hardwood” cuttings. This is when the stems have begun to firm up but still have plenty of life in them. Waiting until the plant has finished its main flush of flowering is also a good bet.
Supplies You’ll Need
To get started on your propagation adventure, gather these essentials:
- Sharp pruning shears or a clean craft knife: For making clean cuts.
- Rooting hormone (optional but recommended): A powder or gel can give your cuttings a helpful boost.
- Small pots or seed trays: With good drainage holes, of course.
- Propagating mix: I like a 50/50 blend of perlite and seed starting mix or coarse sand and peat moss. This ensures excellent drainage.
- Watering can with a fine rose attachment: Or a mister, for gentle watering.
- Plastic bags or a propagator lid: To create a humid environment.
- A pen or plant labels: To keep track of your projects!
Propagation Methods: Stem Cuttings
This is my go-to method for Lavandula subnuda. It’s reliable and yields good results.
- Select your cuttings: Look for stems that are about 4-6 inches long. They should be healthy, free of flowers or flower buds, and have started to harden off. Snip them from the parent plant using your clean shears.
- Prepare the cuttings: Gently remove the lower leaves from the bottom two-thirds of the stem. This prevents them from rotting in the soil. If your cuttings are a bit floppy, you can cut the stem in half horizontally to make them easier to handle.
- Apply rooting hormone (if using): Dip the cut end of the stem into your rooting hormone, tapping off any excess.
- Plant the cuttings: Make a small hole in your prepared propagating mix using a pencil or your finger. Insert the cut end of the stem into the hole, about an inch deep, and gently firm the soil around it.
- Water gently: Give the pots a good but gentle watering. You want the soil to be moist but not waterlogged.
- Create humidity: Cover each pot with a plastic bag, creating a mini-greenhouse effect. You can also use a propagator lid. Place them in a bright spot, but out of direct, hot sunlight.
The “Secret Sauce” (Pro Tips)
Here are a couple of things I’ve learned over the years that make a big difference:
- Bottom Heat is Your Friend: For lavender, a little warmth from below can significantly speed up root development. A simple seedling heat mat, set to a low temperature, can work wonders. It mimics the warmth of spring soil.
- Don’t Rush the Roots: Patience is key! It can take anywhere from 4 to 8 weeks for lavender cuttings to root. Resist the urge to constantly tug at them to check. You’ll know they’re rooting when you see new growth emerging.
- Air Out Regularly: If you’re using plastic bags, open them up for an hour or so each day to allow for air circulation. This is crucial for preventing fungal issues.
Aftercare & Troubleshooting
Once you start seeing signs of root development – new shoots or leaves appearing – it’s time to transition your cuttings.
- Acclimatize them: Gradually remove the plastic bag or propagator lid over a week, allowing the plants to get used to the regular air.
- Potting up: When the cuttings have a good root system (you can gently feel a bit of resistance when you tug lightly, or you might see roots peeking out of the drainage holes), it’s time to move them to their own pots with a good quality, well-draining potting mix.
- Watering: Continue to water them keeping the soil consistently moist but not soggy. As they establish, you can gradually reduce watering frequency.
- Common Issues: The biggest culprit for failure is usually rot. If your cuttings turn mushy and black, it’s likely due to overwatering or poor drainage. Ensure your soil mix is excellent and that you’re not letting them sit in water. Wilting can also occur, often from lack of establishment or underwatering.
A Little Patience Goes a Long Way
Propagating plants is a journey of learning and discovery. Don’t be disheartened if every single cutting doesn’t make it – that’s perfectly normal! Celebrate every success, and learn from any setbacks. Enjoy the process, and soon you’ll have a wonderful collection of Lavandula subnuda to fill your garden with fragrance and beauty. Happy gardening!
Resource:
https://identify.plantnet.org/k-world-flora/species/Lavandula%20subnuda%20Benth./data