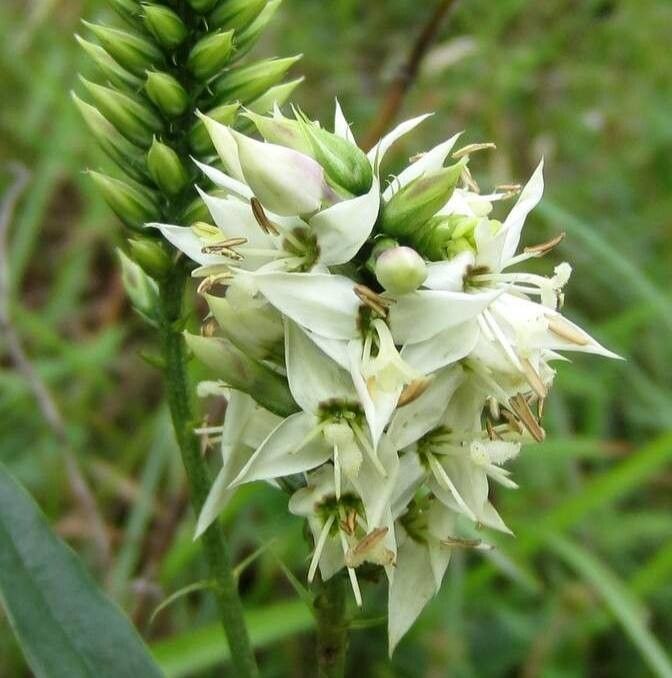
Oh, how I love talking about plants! And today, we’re diving into one of my favorites: Coutoubea spicata. If you’ve ever admired its vibrant blooms and lush foliage, you’re not alone. This beauty brings such a cheerful splash of color to any garden or windowsill. The best part? It’s surprisingly rewarding to multiply them! For those just dipping their toes into the world of propagation, I’d say Coutoubea spicata is moderately easy. It’s not quite “set it and forget it,” but with a little attention, you’ll be amazed at how many new plants you can coax into existence.
The Best Time to Start
When it comes to getting new Coutoubea spicata plants going, think spring and early summer. This is when the plant is really in its stride, actively growing and full of vigor. Taking cuttings during this active growth period means they have the best chance to develop strong roots quickly. If you miss the window, don’t fret too much – late summer can also work, but you might find they take a little longer to establish before cooler weather arrives.
Supplies You’ll Need
Gathering your tools beforehand makes the whole process much smoother. Here’s what I always have on hand:
- Sharp Pruning Shears or a Craft Knife: Clean cuts are crucial for preventing disease.
- Potting Mix: A well-draining mix is a must. I usually opt for a blend of perlite and peat moss, or a good quality seedling starter mix. Adding a little perlite to regular potting soil works wonders too.
- Small Pots or Propagation Trays: Whatever you have that’s clean and has drainage holes.
- Rooting Hormone (Optional but Recommended): This can give your cuttings a helpful boost. Look for a powdered or gel form.
- Watering Can or Spray Bottle: For gentle moisture.
- Labels and a Marker: Trust me, you’ll thank yourself later!
Propagation Methods
For Coutoubea spicata, I’ve found two methods to be exceptionally successful.
Stem Cuttings: My Go-To
This is my favorite way to make new plants. It’s efficient and yields great results.
- Take Your Cuttings: In spring or early summer, select a healthy, non-flowering stem. Using your sharp shears, make a clean cut just below a leaf node (where a leaf attaches to the stem). Aim for cuttings that are about 4-6 inches long. Remove the lower leaves, leaving just the top 2-3.
- Apply Rooting Hormone (If Using): Dip the cut end of the stem into rooting hormone, tapping off any excess.
- Plant the Cuttings: Gently push the cut end into your prepared potting mix. Make sure the leaf nodes that were below the soil are submerged; this is where roots will form.
- Water Gently and Cover: Water lightly until the soil is evenly moist. To create a humid environment, I like to cover the pot with a clear plastic bag or dome. Make sure the plastic isn’t touching the leaves!
Division: For Established Plants
If you have a larger, mature Coutoubea spicata that’s looking a bit crowded, dividing it can be a great way to get more plants.
- Gently Remove from Pot: Carefully take your established plant out of its container.
- Loosen the Root Ball: Gently tease apart the soil from the roots. You’re looking for natural divisions within the clump.
- Separate Sections: With your hands or a clean trowel, carefully pull or cut apart sections, ensuring each new piece has a good portion of roots and some healthy foliage.
- Repot: Plant each division into its own pot with fresh, well-draining potting mix. Water thoroughly.
The “Secret Sauce” (Pro Tips)
Beyond the basics, here are a couple of things I’ve learned that often make all the difference:
- Humidity is Key: Especially for cuttings, don’t let them dry out entirely. A light misting from a spray bottle a couple of times a day, or using that plastic cover, will keep them happy. If you’re using a propagator with a lid, lifting the lid for a few minutes daily allows for air circulation and prevents fungal issues.
- Bottom Heat for Speed: If you’re really eager to see results, placing your pots or trays on a gentle heating mat can significantly speed up root development. It mimics the warmth of spring soil, encouraging those roots to emerge faster. Just make sure it’s not too hot – lukewarm is perfect.
Aftercare & Troubleshooting
Once you see new growth or gently tug on a cutting and feel resistance (a sign of roots!), it’s time to transition. Gradually remove the plastic cover over a few days to acclimate your new plants to the ambient humidity. Continue to keep the soil consistently moist but not waterlogged.
The most common culprit for failure is rot. If your cuttings turn mushy, black, or fall over, it’s usually a sign of too much moisture and not enough air circulation. It’s a good reminder to ensure your potting mix is airy and your pots have good drainage. Don’t be discouraged if a few don’t make it – it happens to the best of us!
A Little Patience Goes a Long Way
Propagating plants is such a joyful endeavor. It’s a chance to connect with nature, a little bit of magic really, and to share the beauty of Coutoubea spicata with friends and family. Be patient with your new little ones, give them good light and consistent moisture, and you’ll be rewarded with an abundance of these lovely blooms. Happy gardening!
Resource:
https://identify.plantnet.org/k-world-flora/species/Coutoubea%20spicata%20Aubl./data