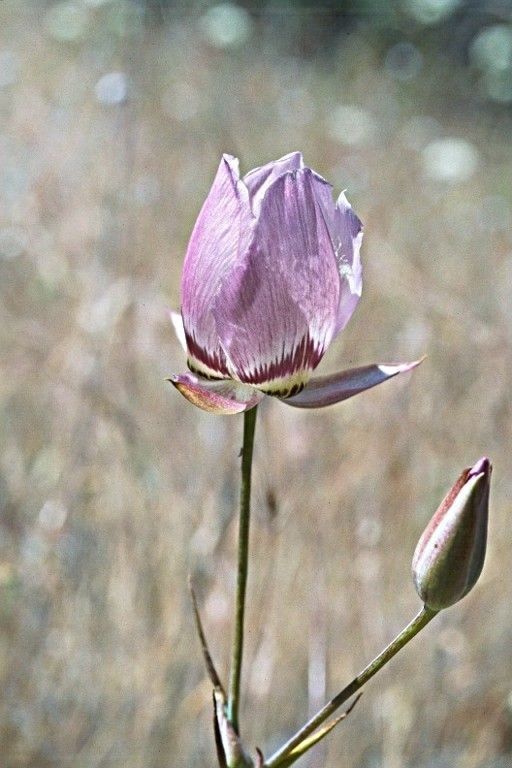
Hello fellow garden enthusiasts! If you’ve ever admired the delicate beauty of Calochortus greenei, also known as Greene’s Mariposa Lily, you know why it’s such a special bloom. Their intricate petals, often painted in shades of lilac, rose, and cream, are a real showstopper in any garden. Propagating these beauties can feel a bit daunting, and I’d say for newcomers, Calochortus greenei might lean towards the moderately challenging side. But don’t let that deter you! The reward of nurturing a new life from a piece of an existing plant is truly unmatched.
The Best Time to Start Your Propagation Journey
For Calochortus greenei, the sweet spot is in late spring to early summer, just as the plant is winding down its flowering. This is when the bulbs have stored up enough energy, and the plant is transitioning into its dormant phase. Starting around this time gives your new propagules the best chance to establish themselves before the cooler months arrive.
Supplies You’ll Need
To give your little Calochortus greenei sprouts the best start, gather these essentials:
- Well-draining potting mix: A blend of coarse sand, perlite, and a bit of compost works wonders. Think sharp drainage, not soggy feet!
- Small pots or propagation trays: Clean, with good drainage holes.
- Sharp, sterile pruning shears or a clean knife: For making clean cuts.
- Rooting hormone powder (optional but recommended): Especially helpful for cuttings.
- Watering can with a fine rose: To gently water your new arrivals.
- Labels: To keep track of what you’ve planted and when.
- A shaded location: To protect delicate seedlings from harsh sun.
Propagation Methods: Bringing Greenes’ Mariposa Lilies to Life
Calochortus greenei can be propagated from bulb offsets and, with a bit more patience, from seed. While stem cuttings aren’t typically successful for this type of geophyte, let’s focus on the most reliable methods.
From Bulb Offsets: A Sure Bet
Mariposa lilies often produce small offsets, or “baby bulbs,” around the base of the parent bulb.
- Wait for Dormancy: The absolute best time to do this is when the plant is fully dormant. This means the foliage has completely died back. You’ll see dry, papery leaves.
- Gently Excavate: Carefully dig around the parent bulb with your hands or a trowel. You want to expose the offsets without damaging them or the main bulb.
- Detach the Offsets: Gently twist or use your sterile knife to separate healthy offsets from the parent bulb. They should come off relatively easily if they are ready. Look for offsets that are at least pea-sized.
- Dry Them Out (Optional but helpful): Let the offsets air dry for a day or two in a cool, dry, and well-ventilated spot. This helps prevent rot.
- Pot Them Up: Plant each offset about 1-2 inches deep in your well-draining potting mix. Give them a little space if you’re planting multiple in a tray.
- Water Lightly: Give them a gentle watering after planting.
From Seed: A Long Game for the Patient Gardener
Growing Calochortus greenei from seed is a journey, and it requires understanding their specific germination needs.
- Collect Seeds: If you’re lucky enough to have them set seed, collect the seed pods once they start to dry and turn brown, but before they split open. Store them in a cool, dry place.
- Stratification is Key: These seeds need a period of cold, moist stratification to break dormancy. Mix your seeds with a bit of damp (not wet) peat moss or vermiculite in a plastic bag.
- Refrigerate: Place the bag in your refrigerator for 8-12 weeks. Check occasionally, and if the mix seems dry, lightly mist it.
- Sow the Seeds: After stratification, sow the seeds on the surface of your well-draining potting mix in a shallow tray or pot. You can lightly cover them with a thin layer of fine grit.
- Provide Moisture: Keep the soil consistently moist but not waterlogged. A spray bottle is perfect for this.
- Patience is a Virtue: Germination can be erratic and may take anywhere from several weeks to many months. Some may germinate in the first year, others in the second. Grow them in a shaded, protected area.
The “Secret Sauce” (Pro Tips for Success)
Here are a couple of things I’ve learned over the years that make a real difference:
- Never let your offsets or seedlings sit in water. Calochortus bulbs are prone to rot in soggy conditions. Err on the side of slightly dry rather than too wet.
- When planting offsets, I often find it helpful to allow the cut surface (where it detached from the parent) to callus over for a day or two before planting. This is especially true if you had to use a knife for detachment.
Aftercare & Troubleshooting: Nurturing Your New Sprouts
Once your offsets are planted or your seeds have germinated, it’s time for nurturing.
- Initial Watering: Water the newly potted offsets gently. Make sure the soil drains well.
- Light: Provide bright, indirect light. Direct sun can be too much for tender new growth.
- Watering Gradually: As new growth appears (this might take a few weeks for offsets, or longer for seeds), you can gradually increase watering, always ensuring excellent drainage. When the foliage starts to die back, reduce watering significantly.
- Signs of Trouble: The most common enemy is rot. If you see mushy, discolored stems or bulbs, it’s likely rot. The best remedy is to act quickly: gently dig up the affected plant, remove any rotted parts with a sterile knife, and repot in fresh, dry, well-draining soil. Sometimes, it’s a loss, but you can often save others by adjusting your watering.
Happy Propagating!
Growing Calochortus greenei from offsets or seed is a deeply satisfying experience. It might test your patience, especially with seeds, but seeing those tiny bulbs or seedlings develop into beautiful blooms is a joy. So, grab your pots, your potting mix, and your sense of adventure. Be gentle, be observant, and enjoy the magic of bringing new life into your garden. Happy growing!
Resource:
https://identify.plantnet.org/k-world-flora/species/Calochortus%20greenei%20S.Watson/data