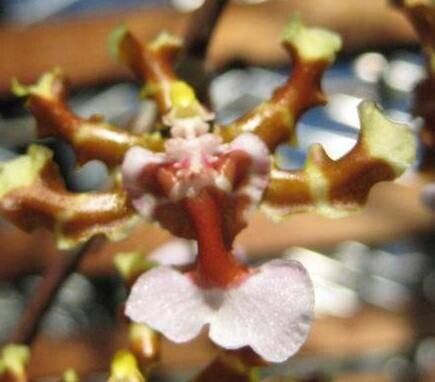
Hey there, fellow plant enthusiasts! I’m so excited to chat with you today about a truly special orchid: Oncidium fuscatum. If you’ve ever swooned over its dramatic, often dark-spotted flowers and rich, velvety petals, you know just what I mean. There’s something so deeply satisfying about coaxing a new life from an established specimen, and with Oncidium fuscatum, that reward is all the sweeter. Now, I won’t lie, this one can be a touch more particular than some of the easier orchids out there, but don’t let that deter you! With a little patience and understanding, propagating this beauty is absolutely achievable.
The Best Time to Start
For Oncidium fuscatum, timing is everything. I find that the absolute best window to begin propagation is just after the plant has finished flowering. This is when the pseudobulbs are nice and plump, holding plenty of energy for new growth. Aim for spring or early summer – when the days are getting longer and the temperatures are starting to warm up. This gives your new plant a good, long growing season to establish itself before cooler weather arrives.
Supplies You’ll Need
To set yourself up for success, gather these handy items:
- Sharp, sterilized pruning shears or a clean knife: A clean cut is crucial to prevent disease.
- Cinnamon powder or a rooting hormone powder: Cinnamon is a great natural antifungal, or you can opt for a commercial rooting hormone for an extra boost.
- Fresh orchid potting mix: A bark-based mix is usually best for orchids, allowing good drainage. Avoid anything that retains too much moisture.
- Small pots or propagation trays: Something that allows for good airflow. Terra cotta pots are wonderful as they breathe.
- A spray bottle: For gentle misting.
- Optional but helpful: A heating mat: Orchids love a bit of warmth to encourage root growth.
Propagation Methods: Division is Key!
Oncidium fuscatum is most successfully propagated through division. This means carefully separating sections of the plant that have their own roots and pseudobulbs.
Here’s how I do it:
- Gently remove the orchid from its pot. If it’s been in the same pot for a while, you might need to run a knife around the edge to loosen it.
- Carefully shake or brush away as much of the old potting mix as you can to get a good look at the root system.
- Identify natural divisions. Look for sections of the plant that have at least two to three healthy pseudobulbs and a decent root system attached. Often, you’ll see where the plant naturally wants to split.
- Use your sterilized shears or knife to make a clean cut between these divisions. If roots are tangled, don’t be afraid to gently tease them apart. Patience here prevents damage.
- Inspect the cut surfaces. If you see any signs of rot (dark, mushy tissue), trim away the affected areas until you find healthy, firm tissue.
- Dust the cut surfaces with cinnamon powder or rooting hormone. This helps to dry the wound and prevent infection.
- Pot up your divisions. Place each division into its own small pot with fresh orchid mix. Bury the roots and the base of the pseudobulbs, but leave the very top of the pseudobulb exposed to the air.
- Don’t water immediately. Let the newly potted divisions sit for a day or two. This allows any small nicks in the roots to heal over.
The “Secret Sauce” (Pro Tips)
Over the years, I’ve learned a few tricks:
- Never use soil! Seriously, if you’re potting orchids, stick to bark-based mixes or specialized orchid potting media. Regular potting soil suffocates their roots and leads to rot faster than you can say “orchid rescue.”
- Think “air circulation is king.” Orchids, especially when dividing, need to breathe. Don’t pack them too tightly into pots, and ensure your potting mix is open and airy. Even a fan on low in the room can make a difference.
- Bottom heat is a game-changer. If you have a heating mat, place your pots on it. Orchids are tropical plants, and consistent warmth from below really encourages those roots to get moving.
Aftercare & Troubleshooting
Once your divisions are potted, treat them gently. Mist them lightly every few days, especially if you’re using a heating mat, as warmth can dry things out. Avoid letting water sit around the base of the pseudobulbs. You want the roots to experience periods of slight dryness between waterings.
Keep an eye out for signs of a happy transplant: new root growth, and eventually, a new shoot emerging from the base of a pseudobulb.
The most common issue you’ll face is rot. If you see pseudobulbs turning black and mushy, or if your delicate new roots shrivel and die, it’s usually a sign of too much moisture or poor air circulation. If rot sets in, you might need to unpot, trim away diseased parts with sterilized tools, and repot into very dry, airy medium, and then hold back on watering even more.
A Little Encouragement
Propagating Oncidium fuscatum is a journey, and like all good journeys, it requires patience. Don’t get discouraged if your first attempt isn’t an instant success. Observe your plants, learn from them, and enjoy the process of nurturing new life. Happy growing!
Resource:
https://identify.plantnet.org/k-world-flora/species/Oncidium%20fuscatum%20Rchb.f./data