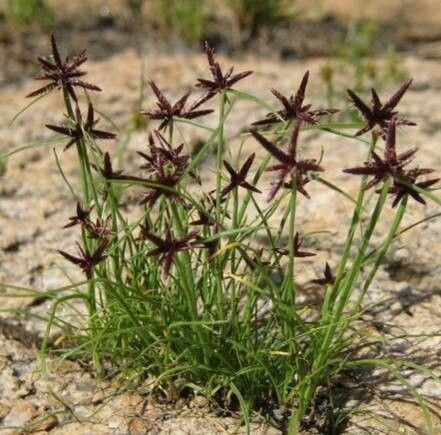
Oh, hello there, fellow plant lover! I’m so glad you’ve stopped by. Today, we’re diving into the wonderful world of Cyperus amauropus, a plant that truly brings a touch of wild elegance to any space. Its grassy, architectural form is simply captivating, and the satisfaction of multiplying these beauties yourself? Well, that’s just the icing on the cake! This isn’t a fussy plant by any means, so if you’re looking to dip your toes into propagation, you’ve picked a fantastic place to start. It’s wonderfully rewarding!
The Best Time to Start
Whenever you feel inspired is pretty much the best time to get going with Cyperus amauropus. However, for the absolute quickest and most vigorous results, I find starting in late spring or early summer is ideal. This is when the plant is in its prime growing season, full of energy and ready to put out new roots and shoots. You can definitely propagate them at other times, but this period gives them a real head start.
Supplies You’ll Need
Gathering your tools is half the fun, don’t you think? Here’s what you’ll want to have on hand:
- Sharp pruning shears or a clean, sharp knife: For making precise cuts.
- Potting mix: A well-draining mix is key. I often use a blend of seedling mix and perlite (about 2:1 ratio).
- Small pots or containers: Clean ones, of course! Terracotta pots are great for drainage.
- A spray bottle: For keeping things consistently moist.
- Rooting hormone (optional but helpful): Especially for division, it can give new roots a boost.
- A tray or saucer: To catch excess water.
Propagation Methods
Cyperus amauropus is a gem because it’s quite amenable to a couple of straightforward propagation methods.
Division: The Root of the Matter
This is, in my opinion, the easiest and most fail-safe way to propagate Cyperus amauropus. You’re essentially just separating a mature plant into smaller, individual ones.
- Gently remove the plant from its pot. If it’s stuck, give the pot a few taps and gently coax it out.
- Inspect the root ball. You’ll often see natural divisions already formed.
- Using your hands or a clean knife, carefully pull or cut the root ball apart. Aim for sections that have a good amount of roots and at least a few leafy shoots. Don’t be afraid to be a little firm.
- Pot up each division into its own container filled with your well-draining potting mix.
- Water thoroughly to settle the soil around the roots.
Stem Cuttings (or Leafy Shoots)
This method can be a fun experiment, and it works surprisingly well for these plants!
- Select a healthy, mature stem. Look for one with firm, green shoots and well-established roots at its base.
- Carefully cut the stem near its base. You want a good piece of the stem, including the leafy crown.
- Optional: You can gently remove any lower leaves that might rot if submerged in water.
- Place the cutting in a jar or glass of fresh water. Make sure the cut end is submerged, but try to keep the leaves out of the water.
- Place the jar in bright, indirect light. Avoid direct sun, which can scorch the delicate cutting.
- Change the water every few days to keep it fresh and prevent stagnation. You should start to see tiny white roots appearing within a few weeks.
- Once the roots are about an inch long, it’s time to plant them in a pot with well-draining soil.
The “Secret Sauce”
Now, for a couple of little tricks that have served me well over the years:
- Don’t let the leaves touch the water! This is crucial for stem cuttings. If leaves are submerged, they tend to rot, which can take down your entire cutting. It sounds simple, but it makes a big difference.
- Bottom heat is your friend for divisions. While they’ll root fine without it, placing your newly potted divisions on a gentle heat mat can really speed up root development. It mimics that lovely warm soil of spring. Just a low setting is all you need!
Aftercare & Troubleshooting
Once your divisions are potted or your water cuttings have sprouted roots and are in soil, treat them like a mature plant, but with a little extra tenderness. Keep the soil consistently moist but not soggy. They love a good drink, but hate sitting in waterlogged pots.
The most common sign of trouble you’ll encounter is rot, usually due to overwatering or poor drainage. If you see wilting that doesn’t improve with water, or if the base of the stem starts looking mushy and dark, that’s a red flag. Unfortunately, rot can be hard to come back from, so it’s all about prevention. Make sure your soil drains well and adjust your watering frequency as needed.
A Little Patience Goes a Long Way
Propagating plants is such a rewarding journey. It’s a chance to connect with nature on a deeper level and to see your gardening efforts multiply. Don’t get discouraged if a cutting or two doesn’t make it; it happens to all of us! Celebrate the successes, learn from any little mishaps, and most importantly, enjoy the process of nurturing new life. Happy propagating!
Resource:
https://identify.plantnet.org/k-world-flora/species/Cyperus%20amauropus%20Steud./data