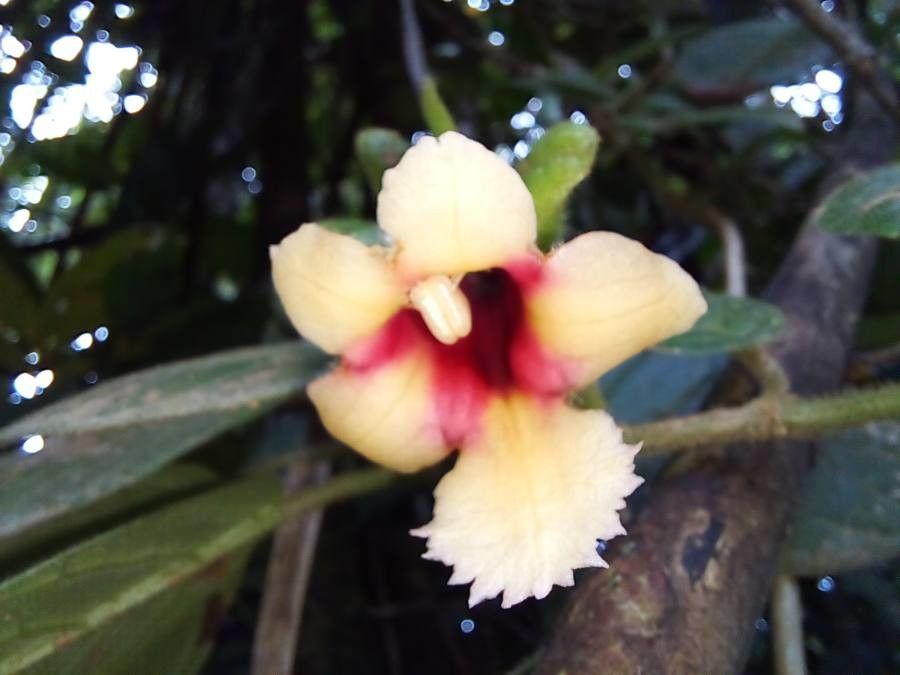
Oh, Drymonia alloplectoides! If you’ve ever admired its lush, trailing foliage and those delightful, bell-shaped flowers, you’re not alone. I’ve been captivated by this beauty for years. And the best part? It’s surprisingly rewarding to bring more of it into your life through propagation. While it might seem a little intimidating at first, I promise, with a few pointers, you’ll be well on your way to success. It’s not the absolute easiest plant for a complete beginner, but it’s definitely achievable with a little patient practice.
The Best Time to Start
Honestly, spring and early summer are your golden windows of opportunity. This is when your Drymonia is actively growing, full of vigor, and ready to send out those new shoots that root so beautifully. You can actually take cuttings almost any time the plant is actively growing, but you’ll find the most success and the fastest results when the days are longer and warmer.
Supplies You’ll Need
Gathering your tools beforehand makes the whole process so much smoother. Here’s what you should have on hand:
- Sharp Pruning Shears or a Clean Knife: For making clean cuts.
- Well-Draining Potting Mix: I like a mix of equal parts peat moss (or coco coir), perlite, and a bit of compost.
- Small Pots or Seedling Trays: About 4-inch pots work wonderfully.
- Rooting Hormone (Optional but Recommended): A powder or gel helps speed things up.
- Plastic Bag or Clear Dome: To create a mini-greenhouse.
- Spray Bottle with Water: For keeping things humid.
- Labels and a Marker: To remember what you’ve propagated and when!
Propagation Methods
For Drymonia alloplectoides, stem cuttings are my go-to method. They’re reliable and give you the best chance of success.
Stem Cuttings:
- Select Your Mother Plant: Start with a healthy, non-flowering stem from your Drymonia. Look for a stem that’s been growing for a bit – not a brand-new, flimsy one.
- Take Your Cuttings: Using your sharp shears or knife, cut a stem that’s about 4-6 inches long. Make the cut just below a leaf node (where a leaf attaches to the stem). You want at least two or three leaf nodes on your cutting.
- Prepare the Cuttings: Gently remove the lower leaves from the bottom half of the cutting. This prevents them from rotting once planted.
- Apply Rooting Hormone (Optional): Dip the cut end of the stem into your rooting hormone. Tap off any excess. This step really does give new roots a helpful boost.
- Plant the Cuttings: Fill your small pots with your prepared potting mix. Make a hole in the center with your finger or a pencil. Insert the cut end of the Drymonia stem into the hole, pushing it down so that at least one leaf node is buried. Gently firm the soil around the stem.
- Create a Humid Environment: Water the soil lightly until it’s moist but not soggy. Then, cover the pot with a clear plastic bag or place it under a clear dome. Poke a few holes in the bag for ventilation, or lift the dome daily for a few minutes. This humidity is crucial for preventing the cuttings from drying out before they root.
- Placement is Key: Place the pots in a bright spot with indirect light. Avoid direct sun, as it can scorch the delicate cuttings. A windowsill that gets morning sun but is shaded in the afternoon is perfect.
The “Secret Sauce” (Pro Tips)
Here are a few little tricks I’ve learned over the years that can really make a difference:
- Don’t let those lower leaves touch the soil or water! If you’re experimenting with water propagation (though I find cuttings in soil more reliable for Drymonia), make absolutely sure the leaves stay above the water line. Any submerged foliage will just rot and can take your whole cutting down with it.
- A little warmth goes a long way. If your home tends to be on the cooler side, or if you’re propagating in early spring, consider using a seedling heat mat placed underneath your pots. This gentle bottom heat encourages root development and can speed up the process significantly. Your little cuttings will thank you!
- Be patient with the watering. It’s tempting to overwater when you’re excited for roots, but Drymonia cuttings hate sitting in soggy soil. Let the top inch of soil dry out slightly between waterings. It’s better to be a little dry than too wet at this stage.
Aftercare & Troubleshooting
Once you start to see new leaf growth or feel a bit of resistance when you gently tug on the cutting, you know you have roots! This usually takes anywhere from 4 to 8 weeks, sometimes longer. At this point, you can gradually acclimate your new plant to normal household humidity by removing the plastic bag or dome for longer periods each day. Continue to keep it in bright, indirect light and water as needed.
The most common problem you’ll encounter is rot. If your cutting turns mushy and black, it’s usually due to too much moisture and poor air circulation. Don’t be discouraged if a few don’t make it; it’s part of the learning process. Yellowing leaves on an otherwise healthy stem cutting can sometimes indicate it hasn’t rooted yet and is struggling to photosynthesize fully, or that it’s getting too much light. Keep an eye on them and adjust your care as needed.
A Encouraging Closing
Propagating plants is such a wonderful way to connect with nature and expand your indoor jungle. It teaches us patience and observation. So, grab your shears, find a healthy stem, and give it a try! Enjoy the journey of watching new life emerge. Happy propagating, green thumbs!
Resource:
https://identify.plantnet.org/k-world-flora/species/Drymonia%20alloplectoides%20Hanst./data