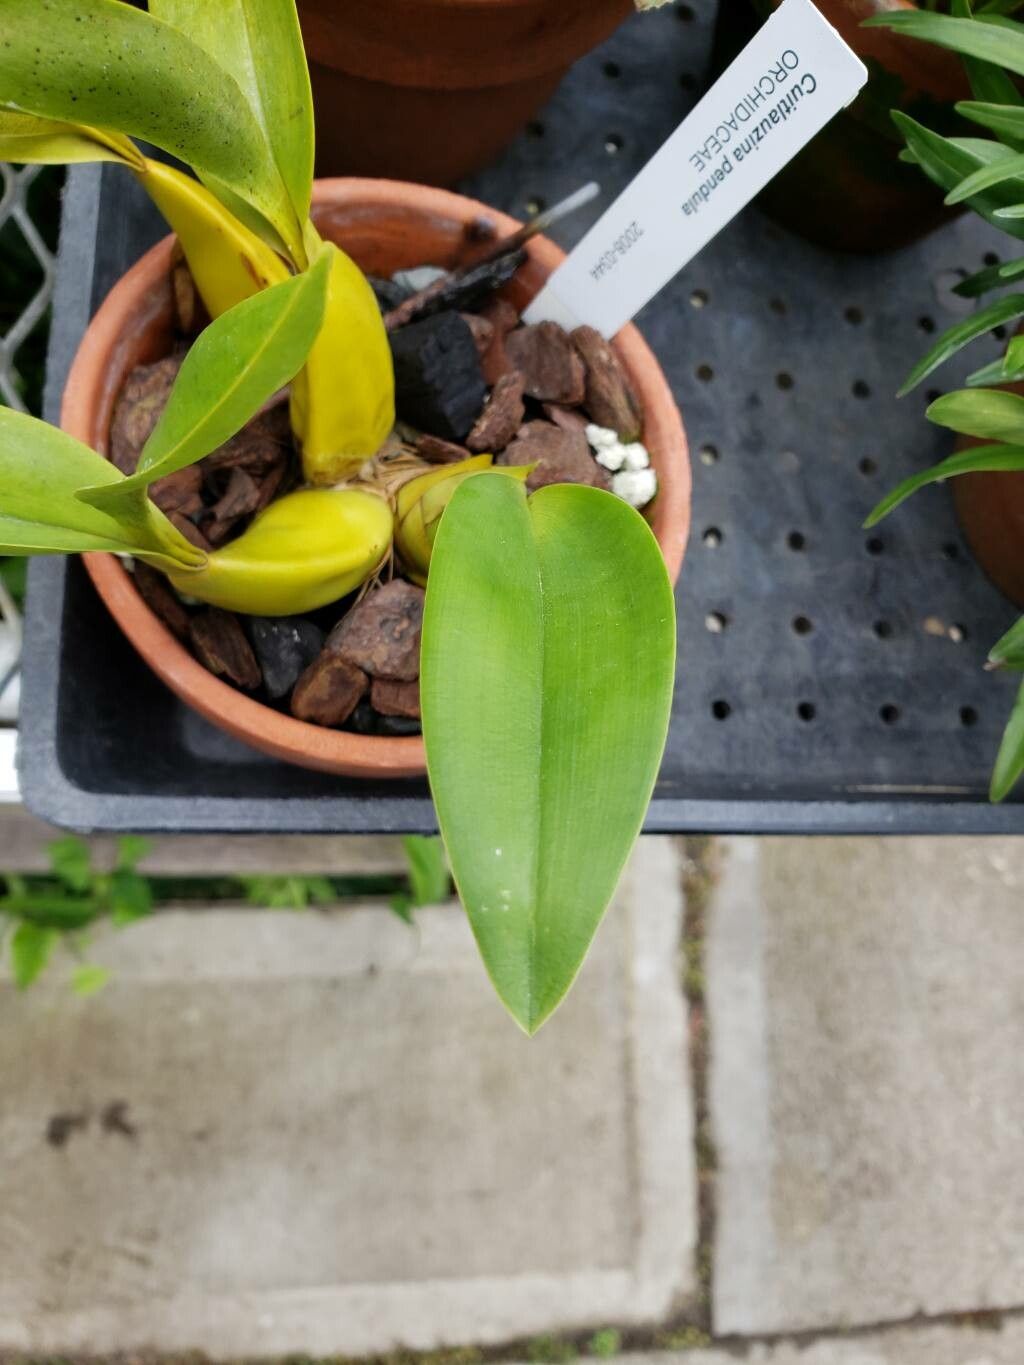
Hello, fellow plant lovers! Today, we’re diving into the delightful world of Cuitlauzina pendula. If you’ve ever swooned over its delicate, pendulous blooms and enchanting fragrance, you’ll be thrilled to know you can bring that magic into your own home – and share it! Propagating this beauty is a wonderfully rewarding experience, offering a chance to witness new life unfold and expand your orchid collection. While orchids can sometimes feel a little intimidating, Cuitlauzina pendula is surprisingly accessible, even if you’re just starting your orchid journey.
The Best Time to Start
Spring is your best friend when it comes to coaxing new life from your Cuitlauzina pendula. Aim to propagate after it has finished flowering. This is typically when the plant is transitioning into its active growth phase. You’ll be looking for developing new shoots or pseudobulbs that are looking plump and healthy. Starting during this vigorous growth period gives your new cuttings the best chance to establish themselves quickly.
Supplies You’ll Need
Before we get our hands dirty, let’s gather our tools:
- Small, sharp pruning shears or a sterile knife: We need a clean cut for a healthy start.
- Orchid bark mix: A well-draining mix is crucial for orchids. Look for one with good aeration, often containing medium-grade bark, perlite, and charcoal.
- Sphagnum moss: Great for retaining a bit of moisture while still allowing airflow.
- Small pots or seedling trays: Choose containers that are appropriately sized for the cuttings.
- Rooting hormone (optional but helpful): A dab can really encourage root development.
- Watering can or spray bottle: For gentle hydration.
- Clean water: Rainwater or distilled water is ideal.
- Gloves (if you prefer): To keep your hands clean.
Propagation Methods
Cuitlauzina pendula is most commonly propagated through division. This is a fantastic method because you’re essentially taking a healthy piece of a mature plant and giving it a fresh start.
Division:
- Gently remove the orchid from its pot. If it’s been in the same pot for a while, you might need to loosen the edges carefully with a knife or trowel.
- Inspect the root system. You’re looking for natural divisions where new growths (pseudobulbs) are emerging from the main plant. You want to divide where there are at least two or three healthy pseudobulbs attached to a good portion of roots.
- Carefully separate the divisions. Using your sterile pruning shears or knife, make a clean cut through the rhizome (the creeping stem that connects the pseudobulbs) to separate the divisions. Try to minimize damage to the roots.
- Trim any dead or damaged roots. Remove any dark, mushy, or papery roots.
- Pot up your divisions. Place each division into its own small pot filled with your orchid bark mix. Ensure the pseudobulbs are sitting just at the surface of the mix, not buried too deeply.
- Water lightly. After potting, give them a gentle watering to settle the mix around the roots.
The “Secret Sauce” (Pro Tips)
Here are a couple of tricks I’ve learned over the years that make a big difference:
- Don’t over-pot! It’s tempting to give a new division a big pot, but smaller pots are better for newly divided orchids. They help prevent the potting mix from staying too wet, which is a recipe for root rot. A tight fit actually encourages the plant to focus its energy on growing roots.
- A little bit of humidity goes a long way. While you don’t want soggy conditions, new divisions appreciate a slightly more humid environment as they establish. You can achieve this by placing the pots on a pebble tray filled with water, or by grouping them together. Just make sure there’s still good air circulation to prevent fungal issues.
Aftercare & Troubleshooting
Once your new divisions are potted, keep them in a bright, indirect light location, away from harsh sunbeams. Water them only when the potting mix is nearly dry to the touch. Don’t be discouraged if they don’t show immediate signs of growth – new root and leaf development takes time.
The most common issue you might encounter is rot. This usually happens from overwatering or poor drainage. If you see mushy, dark roots or a wilting pseudobulb that feels soft and waterlogged, it’s a sign of trouble. Unfortunately, severe rot is often difficult to recover from. The best defense is maintaining that excellent drainage and allowing the potting mix to dry out slightly between waterings.
A Encouraging Closing
Propagating Cuitlauzina pendula is a journey of patience and observation. Don’t be afraid to learn from any setbacks; they’re part of the gardening process! With a little care and attention, you’ll soon be rewarded with new plants that will bring the same exquisite beauty and fragrance into your life. Happy growing!
Resource:
https://identify.plantnet.org/k-world-flora/species/Cuitlauzina%20pendula%20Lex./data