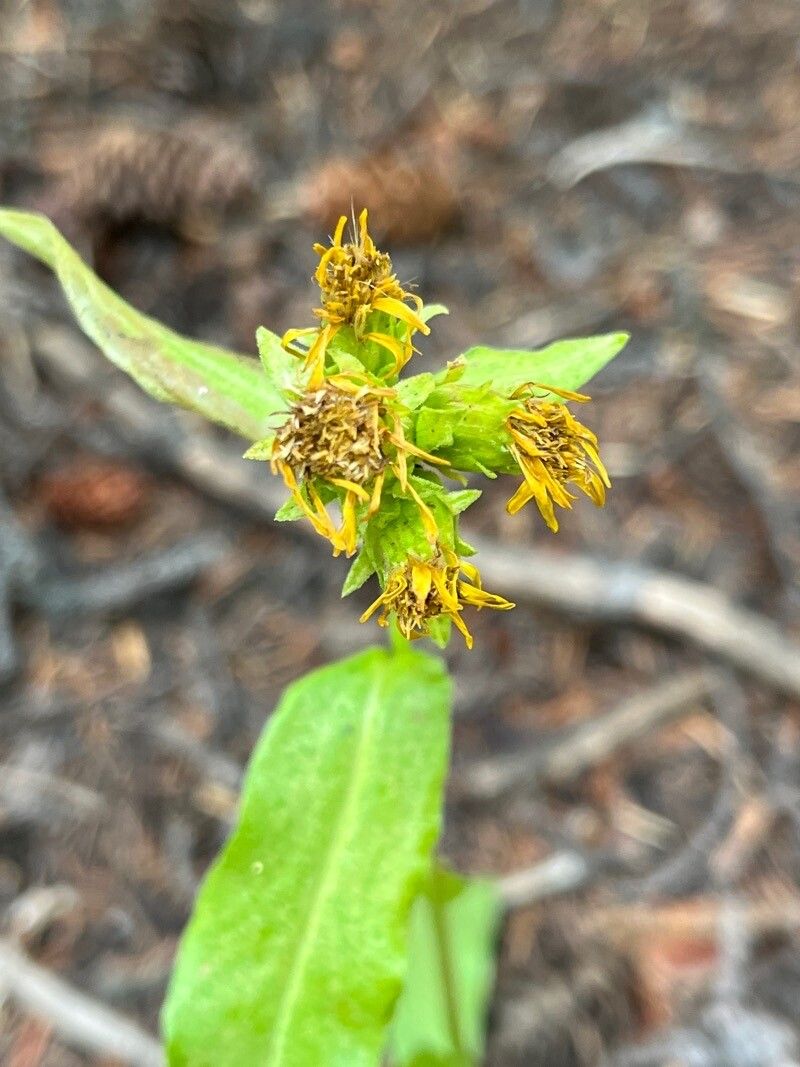
Oh, hello there! Pull up a chair and let’s chat about a truly wonderful plant: Oreochrysum parryi. If you’ve ever seen those cheerful, daisy-like flowers, often a brilliant yellow, nodding in the breeze, you know exactly what I’m talking about. They bring such a burst of sunshine to the garden. And you know what’s even better? Bringing more of that sunshine into your life by propagating them yourself!
Why Propagate Oreochrysum Parryi?
As a seasoned gardener, I’ve found that growing plants from scratch is one of the most rewarding aspects of this hobby. It’s like magic, really, watching a tiny cutting or seed transform into a thriving plant. Oreochrysum parryi is a fantastic candidate for propagation. It allows you to create new plants for different parts of your garden, share with friends (because who doesn’t love a plant gift?), or simply expand your collection without the expense of buying new ones. For beginners, I’d say Oreochrysum parryi is moderately easy to propagate. It’s not as foolproof as, say, a spider plant, but with a little attention, you’ll likely have success.
The Best Time to Start
Timing is everything in the garden, isn’t it? For Oreochrysum parryi, the absolute sweet spot for propagation is late spring to early summer. This is when the plant is actively growing, and the stems are still somewhat soft and pliable, making them ideal for taking cuttings. You’re looking for new, non-flowering growth. If you wait too long into the season, the stems will become woody, and they’ll be much more challenging to root.
Supplies You’ll Need
Gathering your tools beforehand makes the whole process much smoother. Here’s what I always have on hand:
- Sharp Pruning Shears or a Craft Knife: Cleanliness is key to preventing disease.
- Rooting Hormone: While not strictly essential for every plant, it gives your cuttings a significant boost. Look for a powdered or gel form.
- Potting Mix: A good mix is crucial. I often use a blend of peat moss, perlite, and a little coarse sand. This provides excellent drainage and aeration. You can also buy commercially made seed-starting or propagation mixes.
- Small Pots or Trays: Clean pots are a must. Small ones are perfect for starting cuttings.
- Plastic Bags or a Clear Dome: This helps maintain humidity, which is vital for cuttings.
- Watering Can or Spray Bottle: For gentle watering.
- Labels and a Permanent Marker: Trust me, you’ll forget what you planted and when!
Propagation Methods: Let’s Get Our Hands Dirty!
There are a couple of ways to go about this, and both can be quite successful.
Method 1: Stem Cuttings (My Favorite!)
This is my go-to method for Oreochrysum parryi. It’s reliable and gives you a good number of new plants from a single parent.
- Select Your Cuttings: Find healthy, non-flowering stems on your mature Oreochrysum parryi. You want stems that are about 4-6 inches long.
- Make the Cut: Using your clean, sharp shears, make a clean cut just below a leaf node. A leaf node is where a leaf attaches to the stem. This is where the magic happens, where roots are most likely to form. Remove the bottom leaves from the cutting, leaving just a few at the top.
- Dip in Rooting Hormone: If you’re using rooting hormone, lightly moisten the cut end of the stem and then dip it into the powder or gel. Tap off any excess.
- Plant Your Cuttings: Fill your small pots with your prepared potting mix. Make a small hole in the center with your finger or a pencil. Gently insert the cut end of the stem into the hole, making sure the node where you removed the leaves is buried. Firm the soil gently around the stem.
- Water Gently: Water the soil lightly. You want it moist, not soggy.
- Create the Humid Environment: Place the potted cuttings into a plastic bag, loosely closed, or cover them with a clear plastic dome. This traps the moisture and keeps the humidity high.
- Find a Bright Spot: Place the pots in a location that receives bright, indirect light. Avoid direct sun, which can scorch the delicate cuttings.
- Be Patient: Check the soil moisture regularly. If it feels dry, gently water again. You should start to see roots forming in about 4-6 weeks. You can gently tug on a cutting; if there’s resistance, it has rooted!
Method 2: Division (For Spreading Plants)
If your Oreochrysum parryi has been in the ground for a few years and has started to form clumps, division is a wonderful way to rejuvenate the parent plant and get new ones.
- Dig Carefully: In early spring, before new growth really takes off, carefully dig around the clump of your Oreochrysum parryi with a spade. Gently lift the entire root ball from the ground.
- Divide the Clump: You can do this by hand or with the help of two spades or forks. Gently pull or pry the root ball apart into smaller sections. Each section should have healthy roots and some leafy growth.
- Replant Immediately: Dig new holes for your divisions in their desired locations. Plant each division at the same depth it was previously growing. Water them in well.
- Mulch and Water: Apply a layer of mulch around the newly planted divisions to help retain moisture and suppress weeds. Water them regularly, especially during their first growing season.
The “Secret Sauce” (Pro Tips)
Now, let me share a few little tricks I’ve picked up over the years that can make a big difference:
- Don’t Let the Leaves Touch the Water (During Water Propagation): While stem cuttings are my preferred method, some folks try water propagation. If you do, make sure only the stem is submerged. Leaves sitting in water will rot and can introduce disease to the cutting, dooming it before it even has a chance to root.
- Bottom Heat is Your Friend: If you have a small propagator with a heating mat, using it can significantly speed up the rooting process. The gentle warmth encourages root development. Just place your pots on the mat, covered with that plastic bag or dome.
- Cleanliness is King (and Queen!): I cannot stress this enough. Always use clean tools and clean pots. A simple wash with soap and water is usually fine, but for extra precaution, you can rinse with a dilute bleach solution. This prevents fungal diseases and bacteria from taking hold of your vulnerable cuttings.
Aftercare & Troubleshooting
Once you see those tiny roots appearing, it’s time for a slightly different kind of care.
New Plant Care:
- Gradually Introduce to Sunlight: Once your cuttings have a good root system (you can gently tease it out to check, or wait until they’re a few inches tall), begin to gradually increase their exposure to direct sunlight. Start with a few hours a day and slowly build up.
- Continue Regular Watering: Keep the soil consistently moist but not waterlogged. As the plant grows, you can start watering it more like your mature plants.
- Transplant: When your new plant has a robust root system and is growing well, it’s ready to be transplanted into a slightly larger pot or its final garden location.
Troubleshooting:
- Wilting or Yellowing Leaves: This can be a sign of overwatering, underwatering, or not enough light. Check your moisture levels and adjust the light.
- Rotting Stems: This is a common issue and usually points to too much moisture and poor drainage, or a bacterial infection. If a cutting rots, remove it immediately to prevent it from spreading. Ensure your potting mix is well-draining and you aren’t overwatering.
- No Rooting: Sometimes, cuttings just don’t take. Don’t get discouraged! Try again. Sometimes it’s the time of year, the health of the parent plant, or just a bit of beginner’s luck needed.
A Gentle Remind
Propagating plants is a journey, not a race. There will be hiccups along the way, but each one is a learning opportunity. Enjoy the process, celebrate every little root that forms, and soon you’ll have a garden overflowing with your own beautiful Oreochrysum parryi. Happy planting!
Resource:
https://identify.plantnet.org/k-world-flora/species/Oreochrysum%20parryi%20Rydb./data