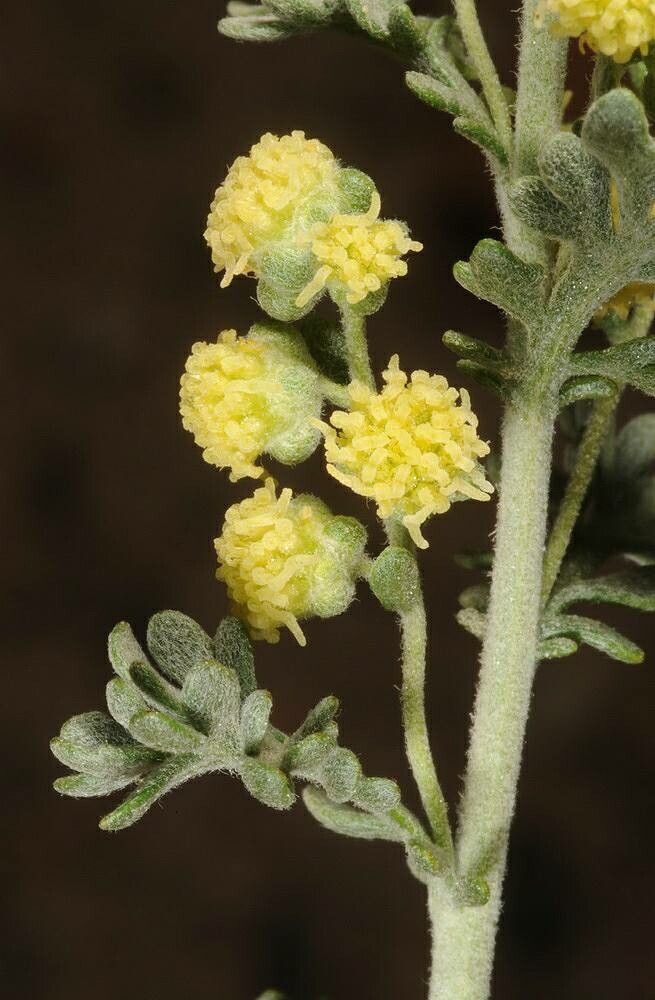
Hey there, fellow plant enthusiasts! I’m so excited to chat with you today about a plant that holds a special place in my heart – Artemisia judaica. You know, those lovely silver plumes that smell divine and add such a beautiful texture to the garden? It’s a real showstopper. And the best part? You can easily grow more of this beauty yourself. Propagating Artemisia judaica is a truly rewarding experience, one that I think most of you, even if you’re just starting out, will find quite manageable.
The Best Time to Start
For the highest chance of success with Artemisia judaica, I like to get my cuttings started in late spring or early summer. This is when the plant is actively growing, and the stems usually have a good balance of soft new growth and slightly more mature, woody pieces. It’s like the plant is just bursting with energy, making it eager to root.
Supplies You’ll Need
Gathering your supplies beforehand makes the whole process so much smoother. Here’s what you’ll want to have on hand:
- Sharp Pruning Shears or Scissors: Clean cuts are essential for healthy rooting.
- Rooting Hormone (Powder or Gel): This is a great booster for cuttings.
- Well-Draining Potting Mix: A mix of perlite, peat moss, and coarse sand works wonders. You can also buy a commercial succulent or cactus mix.
- Small Pots or Trays: With drainage holes, of course!
- Plastic Bag or Propagator Lid: To create a humid environment.
- Watering Can or Spray Bottle: For gentle watering.
- Labels: So you don’t forget what you planted!
Propagation Methods
There are a couple of ways to go about increasing your Artemisia judaica collection, but my favorite and the one I find most reliable is stem cuttings.
Stem Cuttings:
- Take Your Cuttings: Select healthy, non-flowering stems from your mature plant. Using your clean pruning shears, cut stems about 4-6 inches long. Make a cut just below a leaf node (where a leaf meets the stem).
- Prepare the Cuttings: Gently remove the lower leaves from the cutting, leaving just a few at the top. This prevents them from rotting once they’re in the soil.
- Apply Rooting Hormone: Dip the cut end of each stem into your rooting hormone, tapping off any excess.
- Plant the Cuttings: Make small holes in your well-draining potting mix with a pencil or your finger. Insert the bottom of each cutting into the hole, ensuring the leaf nodes are buried. Gently firm the soil around the stem.
- Create Humidity: Water the soil gently. Then, cover the pot with a plastic bag or place a propagator lid over it. This traps moisture, which is crucial for rooting. Place the pot in a bright spot, but out of direct sunlight.
Division (for more mature plants):
If you have a really established clump of Artemisia judaica, you can also try division in early spring.
- Dig Up the Plant: Carefully dig up the entire plant, trying to disturb the roots as little as possible.
- Separate the Roots: Gently pull or use a clean spade to divide the root ball into sections. Each section should have a good amount of roots and some leafy growth.
- Replant: Replant the divisions back into their desired locations or into pots of well-draining soil. Water them in well.
The “Secret Sauce” (Pro Tips)
Over the years, I’ve picked up a few tricks that really seem to help cuttings thrive.
- First off, don’t be shy with the rooting hormone. It’s not a magic bullet, but it definitely gives those struggling cuttings a much-needed nudge towards root development. Just a quick dip is all they need.
- Also, I swear by bottom heat for cuttings, especially when I’m propagating in cooler months or if my indoor space isn’t particularly warm. A seedling heat mat placed under the pots can really speed up the rooting process. It mimics the warm soil the plant loves.
- And this is a big one: air circulation is key. While a humid environment is necessary, you don’t want stagnant air around your cuttings. I’ll often lift the plastic bag for a few minutes each day to let fresh air circulate. This helps prevent fungal diseases, which are the enemy of happy cuttings.
Aftercare & Troubleshooting
Once you see new growth emerging from your cuttings, that’s a great sign! It usually means roots are forming.
- Gradually Acclimate: Once roots have formed (you can test this by gently tugging on a stem – if there’s resistance, they’ve rooted), gradually remove the humidity cover over a few days. This helps the new plants adjust to drier indoor air.
- Watering: Continue to water them when the top inch of soil feels dry. They’re still delicate and don’t like to be waterlogged.
- Signs of Trouble: The biggest issue you’ll likely encounter is rot. If your cuttings look wilted and mushy, or if you see dark spots developing, it’s often a sign of too much moisture and not enough drainage. Unfortunately, rotted cuttings can’t usually be saved, but don’t get discouraged! It just means you learn for next time. Ensure good drainage and avoid overwatering.
Propagating plants is such a beautiful journey. It’s a chance to connect with nature, to learn, and to fill your home and garden with even more of the plants you love. Have patience with your little cuttings, observe them closely, and most importantly, enjoy the process! Happy gardening!
Resource:
https://identify.plantnet.org/k-world-flora/species/Artemisia%20judaica%20L./data